路由简单分三步吧
第一定义路由: 包括访问地址,对应组件
第二使用:在index.html中使用它
下面是代码示例:
components/Person.vue
<template>
	<router-link to="/test/hello">跳转</router-link><!-- 跳转子路由 -->
	<router-view/>
	<div class="ttt">
<!-- 		<button @click="consoleName">测试一下</button>-->
		<h2>{{age}}</h2>
		<button @click="addAge">年龄+1</button>
		<h2>{{age2}}</h2>
<!-- 		<li v-for="data in reactive2" :key="data.name">{{data.name}}</li>
		<h2>{{reactive3.name}}</h2>
		<h2>{{reactive4.a.b.c.d}}</h2> -->
		<button @click="updateReactive2">更新数据</button>
<!-- 		<h2>{{objectRef.two}}</h2> -->
<!-- 		<h2>{{score}}</h2>
		<h2>{{name}}</h2>
		<h2>{{refObj}}</h2>
		<h2>toRefid:{{toRefId}}</h2> -->
		<h2>{{fullName}}</h2>
		<h2>{{name3}}</h2>
		<h2>refObj:{{refObj}}</h2>
		<h2>reactive3:{{reactive3}}</h2>
		<button @click="test">测试一下</button>
		<h2>{{reactive5}}</h2>
		<h2>汽车:{{ person.car.c1 }}、{{ person.car.c2 }}</h2>
		<button @click="changeCar">修改整个车</button>
	</div>
</template>

<script setup lang="ts" name="testName">
	import {ref} from 'vue'
	import {reactive} from 'vue'
	import {toRefs} from 'vue'
	import {toRef} from 'vue'
	import {computed} from 'vue'
	import {watch} from 'vue'

	let age2 = 1

	const obj = {
		one:Number,
		two:Number
	}

	let objectRef = ref<obj>({
		one:1,
		two:2
	})

	let reactive4 = reactive({a:{b:{c:{d:233}}}})

	let reactive3 = reactive({id:1,name:'13123132测试数据'})

	let reactive2 = reactive([
	{
		name:'测试1'
	},
	{
		name:'测试2'
	},
	])

	let student = reactive({id:1,score:25,name:'数学'})

	let {score,name} = toRefs(student);
	let toRefId = toRef(student,'id');

	let refObj = ref([
		{id:1,name:'ref对象'},
		{id:2,name:'测试咯'}
	])

	function updateReactive2(){
		reactive2[0].name = "更新数据"
		reactive4.a.b.c.d = 6666
		objectRef.value.two = 6
		score.value = 99
		// refObj.value[1].name = '更新的数据'
		refObj.value = {id:3,name:'测试一下'}
		reactive3.name= "reactive3更新数据"
		toRefId.value = 2 +1
		fullName.value = "啦啦啦啦啦"
	}


	  // 数据
	  let person = reactive({
	    name:'张三',
	    age:18,
	    car:{
	      c1:'奔驰',
	      c2:'宝马'
	    }
	  })

	  function changeCar(){
	    person.car = {c1:'雅迪',c2:'爱玛'}
	  }

	  // 监视,情况五:监视上述的多个数据
	  watch([()=>person.name,()=>person.car],(newValue,oldValue)=>{
		  debugger
	    console.log('person.car变化了',newValue,oldValue)
	  },{deep:true})


	let reactive5 = reactive({
		id:1,
		name:{
			xing:'wang',
			ming:'sansan'
		}
	})

	function test(){
		reactive5.name = {xing:'2',ming:'测试'}
	}

	const reactiveWatch = watch(reactive3,(newValue,oldValue)=>{
		console.log("reactive对象值变化",newValue,oldValue)
	})

	watch([()=>reactive5.id,reactive5.name],(newValue,oldValue)=>{
		console.log("reactive5对象多属性变化",newValue,oldValue)
	},{deep:true})

	watch(refObj,(newValue,oldValue)=>{
		console.log("ref对象变化",newValue,oldValue)
	},{deep:true})

	watch(reactive3,(newValue,oldValue)=>{
		console.log("reactive对象变化",newValue,oldValue)
	})

	let age = ref(1)
	function addAge(){
		age.value = age.value + 1
		age2 += 1
		refObj.value.name= 6666
	}

	const swatch = watch(age,(newValue,oldValue)=>{
		console.log("ref变量值变化"+newValue+oldValue)
		if(newValue>5){
			swatch()
		}
	})


	let name3 = ref('李莉莉')
	let fullName = computed({
		get(){
			return name3
		},
		set(value){
			console.log("赋值方法")
			name3.value = value
		}
	})

</script>

<style>
	.ttt{
		color:red
	}
</style>
router/index.js:定义路由地址和映射组件
import testName from '../components/Person.vue'
import HelloWorld from '../components/HelloWorld.vue'

import {createRouter,createWebHistory} from 'vue-router'

const router = createRouter({
	history:createWebHistory(),
	routes:[
		{
			path:'/test',
			component:testName//在这个路由界面上补上router-link,以及routerView就可以跳转子路由
			children:[
				{
					path:'/test/hello',//子路由:路径要完整
					component:HelloWorld
				}
			]
		}
	]
})

export default router
main.ts:把组件绑定到标签id上
// 映入createApp用于创建应用
import { createApp } from "vue"


// 引入App根组件
import App from './App.vue'
// 引入路由器
import router from './router'


// 创建根组件应用
const app = createApp(App);
// 使用路由器
app.use(router)
// 将整个应用挂在到id为app的容器上
app.mount('#app')
App.vue:使用路由要注意,routerlink和router-view是必须有的,后者是组件显示位置
<script setup>
// This starter template is using Vue 3 <script setup> SFCs
// Check out https://v3.vuejs.org/api/sfc-script-setup.html#sfc-script-setup
// import VueTwo from './components/vue2.vue'
import Person from './components/Person.vue'
import HelloWorld from './components/HelloWorld.vue'

</script>

<template>
<!-- 	<VueTwo/> -->
<!-- 	<Person/>-->
<!--  <img alt="Vue logo" src="./assets/logo.png" /> -->
<!-- <HelloWorld msg="Hello Vue 3 + Vite" /> -->
<router-link to="/test">测试</router-link>
<router-view/>
</template>

<style>
#app {
  font-family: Avenir, Helvetica, Arial, sans-serif;
  -webkit-font-smoothing: antialiased;
  -moz-osx-font-smoothing: grayscale;
  text-align: center;
  color: #2c3e50;
  margin-top: 60px;
}
</style>
index.html
<!DOCTYPE html>
<html lang="en">
  <head>
    <meta charset="UTF-8" />
    <link rel="icon" href="/favicon.ico" />
    <meta name="viewport" content="width=device-width, initial-scale=1.0" />
    <title>Vite App</title>
  </head>
  <body>
    <div id="app"></div>
    <script type="module" src="/src/main.ts"></script>
  </body>
</html>
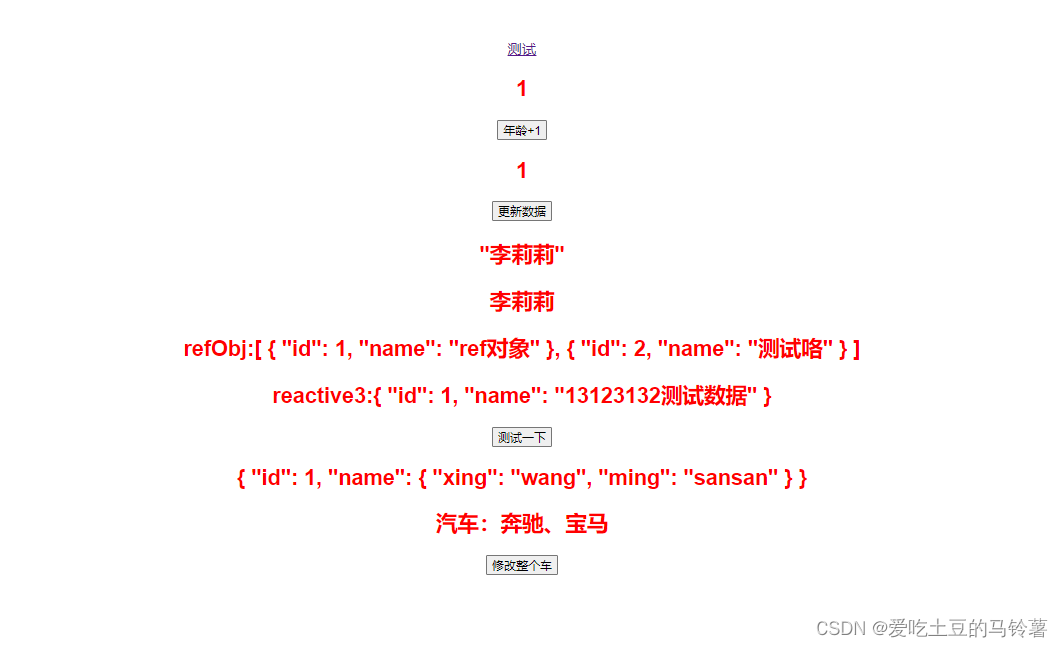
页面效果图: