1、安装jenkins(建议别用docker安装,坑太多)
docker run -d -p 8089:8080 -p 10241:50000 -v /var/jenkins_workspace:/var/jenkins_home -v /etc/localtime:/etc/localtime --name my_jenkins --user=root jenkins/jenkins:2.449
坑1 打开xxx:8080 页面 一直在等待刷新
更换 /var/jenkins_home/hudson.model.UpdateCenter.xml 中的url为https://mirrors.tuna.tsinghua.edu.cn/jenkins/updates/update-center.json
坑2 安装插件很慢 失败了一大堆
cd /var/jenkins_home/updates
sed -i 's/https:\/\/updates.jenkins.io\/download/https:\/\/mirrors.tuna.tsinghua.edu.cn\/jenkins/g' default.json && sed -i 's/https:\/\/www.google.com/https:\/\/www.baidu.com/g' default.json
查看登录密码
docker exec -i my_jenkins cat /var/jenkins_home/secrets/initialAdminPassword
浏览器打开URL
http:///your-ip-addr:8089
2、安装Nexus制品库
docker run -d --name nexus_repo -p 8081:8081 sonatype/nexus3
查看登录密码
docker exec -i nexus_repo cat /nexus-data/admin.password
浏览器登录
http:///your-ip-addr:8081
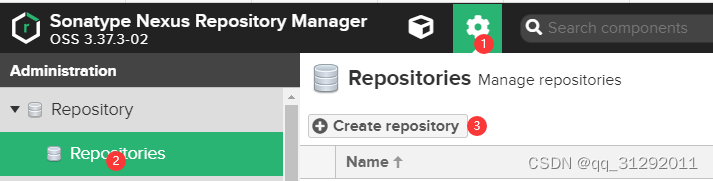
在Nexus中创建存储库
在这一步中,您将在Nexus中创建一个Maven托管存储库,您的Jenkins将在其中上载“构建”工件。
步骤1:按照以下步骤创建托管存储库,并将其命名 maven-nexus-repo,将在本指南中使用。
从列表中选择 maven2,如下所示:

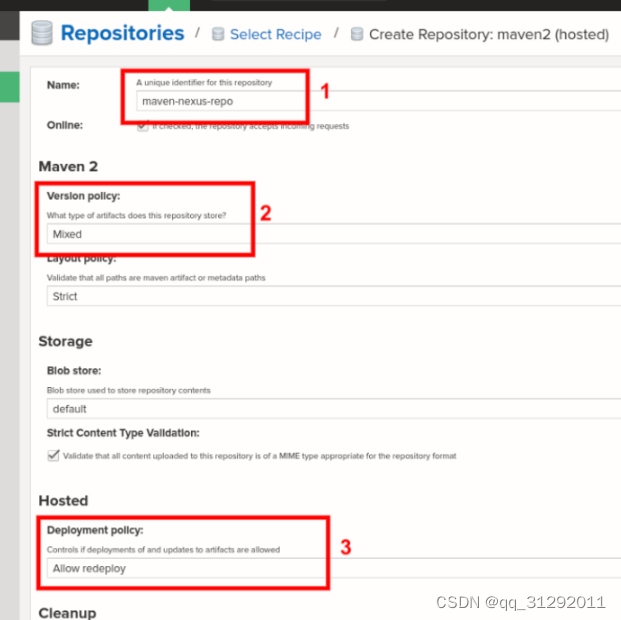
步骤2:在“ 创建存储库”页面上
-
输入名称为 maven-nexus-repo
-
在版本策略中,选择工件的类型。
-
在“ 托管” 部分 下的“ 部署策略”中,选择“ 允许重新部署”。它将允许您多次部署应用程序。
步骤3:要创建新用户,请转到 信息中心>服务器管理员和配置>用户>创建用户。选择 恰好是默认领域的本地用户类型:

在“ 创建用户”页面中
-
ID:输入所需的ID;在我们的案例中,它是Jenkins用户。
-
名字:输入所需的名字;就我们而言,就是Jenkins。
-
姓:输入所需的名字;在我们的例子中是用户。
-
电子邮件:输入您的电子邮件地址。
-
状态:从下拉菜单中选择 有效。
-
角色:确保将nx-admin 角色授予 用户。
至此,我们完成了Nexus Repository Manager的设置部分。让我们转到Jenkins在此处设置Nexus。
在Jenkins中安装和配置Nexus插件
在这里,您将为Jenkins中的Nexus安装并配置一些插件。为此,请转到Jenkins,然后转到 信息中心>管理Jenkins>管理插件>可用, 然后搜索并安装 Nexus Artifact Uploader 、pipeline-utility-steps这2个插件

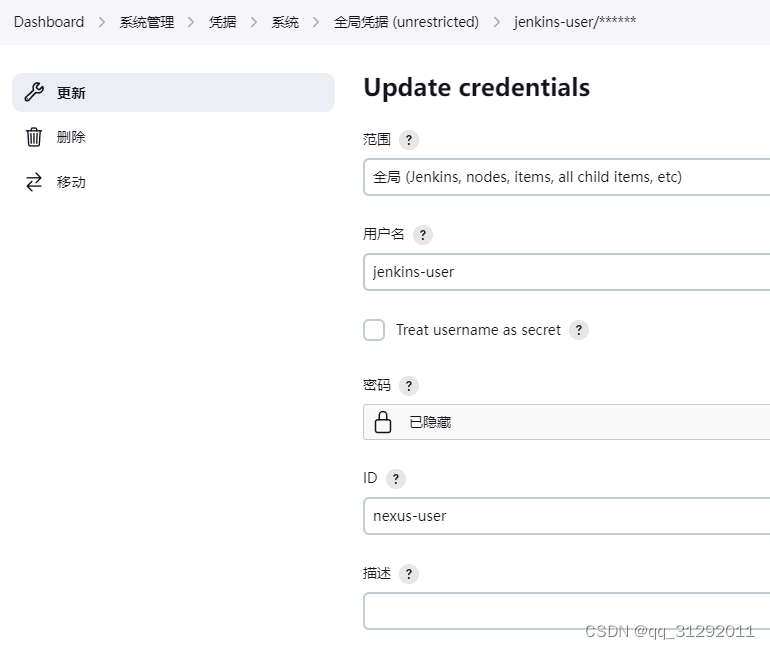
在Jenkins中添加Nexus Repository Manager的用户凭据。转到 仪表板>凭证>系统>全局凭证(不受限制),如下所示:
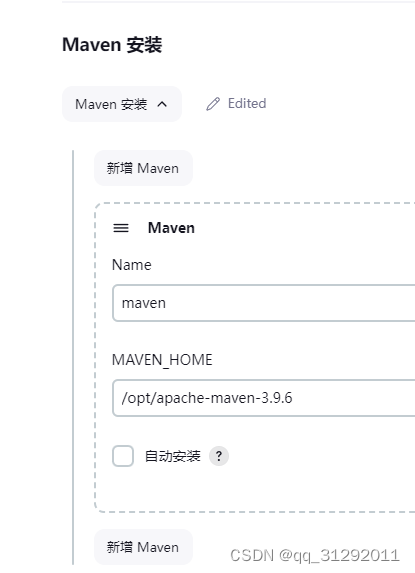
接下来,将Maven安装,手动安装maven
1、进入docker容器,下载安装包
因容器使用的Debian系统,因此更换国内源
# 华为云 Huawei Cloud
sed -i 's@deb.debian.org@repo.huaweicloud.com@g' /etc/apt/sources.list.d/debian.sources
更新工具包
apt-get update
apt-get upgrade
Maven – Download Apache Maven
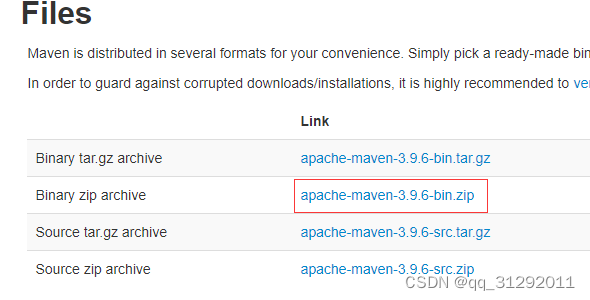
2、解压并设置变量
unzip apache-maven-3.9.6-bin.zip
#maven
export MAVEN_HOME=/opt/apache-maven-3.9.6
export PATH=$MAVEN_HOME/bin:$PATH

3、配置maven的setting.xml
<?xml version="1.0" encoding="UTF-8"?>
<settings xmlns="http://maven.apache.org/SETTINGS/1.2.0"
xmlns:xsi="http://www.w3.org/2001/XMLSchema-instance"
xsi:schemaLocation="http://maven.apache.org/SETTINGS/1.2.0 https://maven.apache.org/xsd/settings-1.2.0.xsd">
<!-- 依赖存储地址-->
<localRepository>/opt/repo</localRepository>
<!-- 阿里云镜像地址-->
<mirrors>
<mirror>
<id>aliyunmaven</id>
<mirrorOf>*</mirrorOf>
<name>阿里云公共仓库</name>
<url>https://maven.aliyun.com/repository/public</url>
</mirror>
</mirrors>
<!-- 编译环境-->
<profiles>
<profile>
<id>jdk1.8</id>
<activation>
<activeByDefault>true</activeByDefault>
<jdk>1.8</jdk>
</activation>
<properties>
<maven.compiler.source>1.8</maven.compiler.source>
<maven.compiler.target>1.8</maven.compiler.target>
<maven.compiler.compilerVersion>1.8</maven.compiler.compilerVersion>
<encoding>UTF-8</encoding>
</properties>
</profile>
</profiles>
</settings>
5、仪表板>管理Jenkins>全局工具配置, 然后找到 Maven

创建一条Jenkins流水线
pipeline {
agent any
tools {
maven "maven"
}
environment {
NEXUS_VERSION = "nexus3"
NEXUS_PROTOCOL = "http"
NEXUS_URL = "192.168.50.14:8082"
NEXUS_REPOSITORY = "maven-nexus-repo"
NEXUS_CREDENTIAL_ID = "nexus-user"
}
stages {
stage("Clone code from VCS") {
steps {
script {
git 'https://gitee.com/aminglinux/java-maven-demo.git';
}
}
}
stage("Maven Build") {
steps {
script {
sh "mvn package -DskipTests=true"
}
}
}
stage("Publish to Nexus Repository Manager") {
steps {
script {
pom = readMavenPom file: "pom.xml";
filesByGlob = findFiles(glob: "target/*.${pom.packaging}");
echo "${filesByGlob[0].name} ${filesByGlob[0].path} ${filesByGlob[0].directory} ${filesByGlob[0].length} ${filesByGlob[0].lastModified}"
artifactPath = filesByGlob[0].path;
artifactExists = fileExists artifactPath;
if(artifactExists) {
echo "*** File: ${artifactPath}, group: ${pom.groupId}, packaging: ${pom.packaging}, version ${pom.version}";
nexusArtifactUploader(
nexusVersion: NEXUS_VERSION,
protocol: NEXUS_PROTOCOL,
nexusUrl: NEXUS_URL,
groupId: pom.groupId,
version: pom.version,
repository: NEXUS_REPOSITORY,
credentialsId: NEXUS_CREDENTIAL_ID,
artifacts: [
[artifactId: pom.artifactId,
classifier: '',
file: artifactPath,
type: pom.packaging],
[artifactId: pom.artifactId,
classifier: '',
file: "pom.xml",
type: "pom"]
]
);
} else {
error "*** File: ${artifactPath}, could not be found";
}
}
}
}
}
}
让我们逐一分解上述参数:
-
NEXUS_VERSION:在这里,我们必须提及Nexus的确切版本,可以是
nexus2或nexus3。在我们的情况下,它是的最新版本nexus3。 -
NEXUS_PROTOCOL:对于本指南,我们使用了HTTP协议,但是,在正式生产的情况下,您将必须使用HTTPS。
-
NEXUS_URL:添加您的IP地址和端口号,以运行Nexus。确保您添加的Nexus实例详细信息没有提及协议,例如
https或http。 -
NEXUS_CREDENTIAL_ID:输入您先前在Jenkins中创建的用户ID,在本例中为
nexus-user-credentials。 -
Git项目:在阶段阶段,我们使用了aminglinux/java-maven-demo
在完成管道设置的过程中,是时候开始Build我们的项目了。转到JenkinsNexus项目作业页面,然后单击立即构建。由于这是您的第一个构建,因此将需要一些时间。
一旦构建成功,在Jenkins控制台输出中,您将看到类似以下内容:
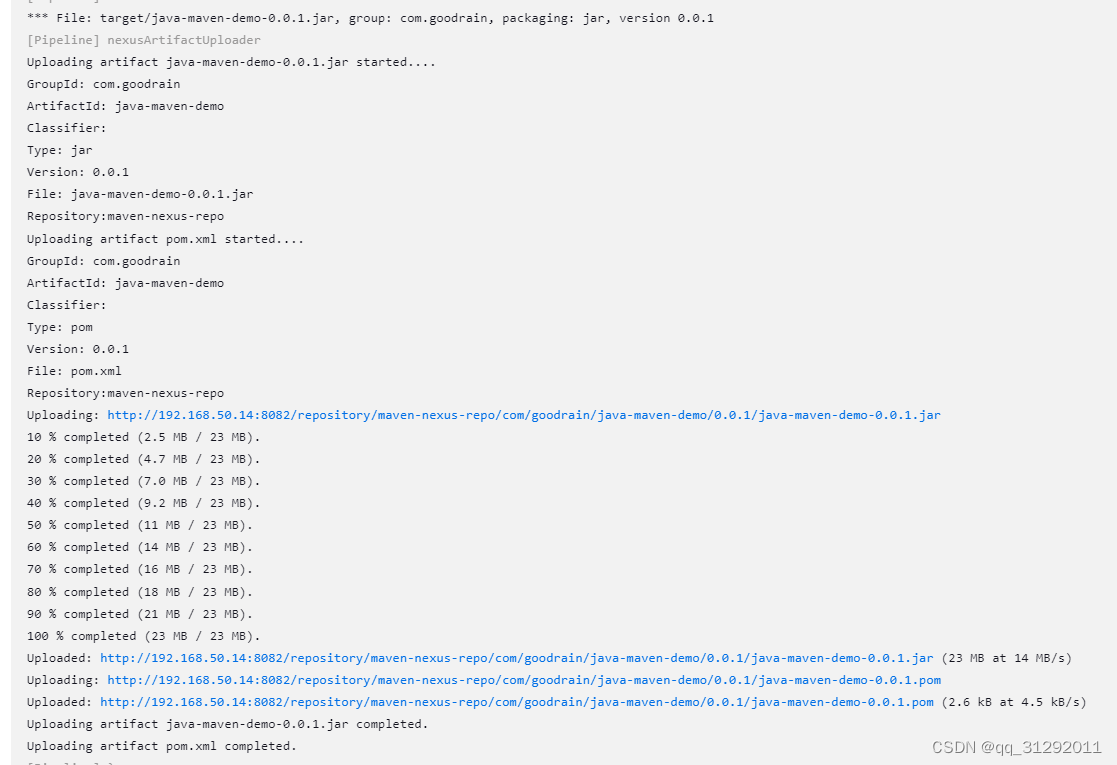
而在Nexus Repository Manager中,您会看到类似以下内容:


