在之前的WPF示例中,都会用到一个MVVM框,也是一个比较常的MVVM框架,就是MVVM工具包【CommunityToolkit.Mvvm】,今天专门以一个简单的小例子,简述一下MVVM工具包的常见用法,仅供学习分享使用,如有不足之处,还请指正。

什么是MVVM工具包?
CommunityToolkit.Mvvm 包(又名 MVVM 工具包)是一个现代、快速和模块化的 MVVM 库。 MVVM工具包是 .NET 社区工具包的一部分,围绕以下原则生成:
- 独立于平台和运行时 - .NET Standard 2.0、.NET Standard 2.1 和 .NET 6🚀(与 UI 框架无关)
- 易于选取和使用 - 对应用程序结构或编码范例(“MVVM”之外)没有严格的要求,也就是可以灵活使用。
- 按需取用 - 自由选择要使用的组件。
- 引用实现 - 精简且高效,为基类库中包含的接口提供实现,但缺少直接使用它们所需的具体类型。
MVVM 工具包由 Microsoft 维护和发布,是 .NET Foundation 的一部分。
安装MVVM工具包
在Visual Studio 开发工具中,可以通过NuGet包管理器进行安装。点击项目右键,选择“管理NuGet程序包”,打开NuGet管理窗口,然后搜索“CommunityToolkit.Mvvm”,进行安装即可,目前最新版本为8.2.2 。如下所示:

可观测对象ObservableObject
可观测对象ObservableObject,实现了 INotifyPropertyChanged 和 INotifyPropertyChanging 接口,是MVVM工具包实现的可观测对象的基类。如果某些类中的属性需要具备变更通知功能,则可能继承此类,如ViewModel或者Model等。主要分两个步骤:
1. 模型类继承ObservableObject,即拥有了基类具有的方法和属性。
2. 将传统属性的set方法中字段=value,修改为SetProperty(ref 字段名,value)。
以Student为例,如下所示:
using CommunityToolkit.Mvvm.ComponentModel; | |
using System; | |
using System.Collections.Generic; | |
using System.Linq; | |
using System.Text; | |
using System.Threading.Tasks; | |
namespace DemoMVVM.Models | |
{ | |
public class Student:ObservableObject | |
{ | |
private int id; | |
public int Id | |
{ | |
get { return id; } | |
set {SetProperty(ref id , value); } | |
} | |
private string name; | |
public string Name | |
{ | |
get { return name; } | |
set { SetProperty(ref name , value); } | |
} | |
} | |
} |
命令RelayCommand
RelayCommand是ICommand的实现,可以向ViewModel中的方法公开委托,从而可以包装标准的方法或者Lamada表达式。如下所示:
using CommunityToolkit.Mvvm.ComponentModel; | |
using CommunityToolkit.Mvvm.Input; | |
using DemoMVVM.Models; | |
using System; | |
using System.Collections.Generic; | |
using System.Linq; | |
using System.Text; | |
using System.Threading.Tasks; | |
using System.Windows; | |
using System.Windows.Input; | |
namespace DemoMVVM.ViewModels | |
{ | |
public class MainWindowViewModel:ObservableObject | |
{ | |
private Student student; | |
public Student Student | |
{ | |
get { return student; } | |
set { student = value; } | |
} | |
public MainWindowViewModel() | |
{ | |
student = new Student(); | |
} | |
private ICommand saveCommand; | |
public ICommand SaveCommand=>saveCommand??=new RelayCommand(Save); | |
private void Save() | |
{ | |
MessageBox.Show($"需要保存的信息为Id={Student.Id},Name={Student.Name}!"); | |
} | |
} | |
} |
控制反转Ioc
使用MVVM模式进行开发,最重要的目的是为了解耦,其中常见的方式就是通过依赖注入的方式实现控制反转,进而实现解耦。目前来说,MVVM工具包并未实现此功能,因为已经有专门的API来实现,如:Microsoft.Extensions.DependencyInjection。
首先安装依赖注入的库【Microsoft.Extensions.DependencyInjection】,当前最新,通过NuGet包管理器进行安装,如下所示:
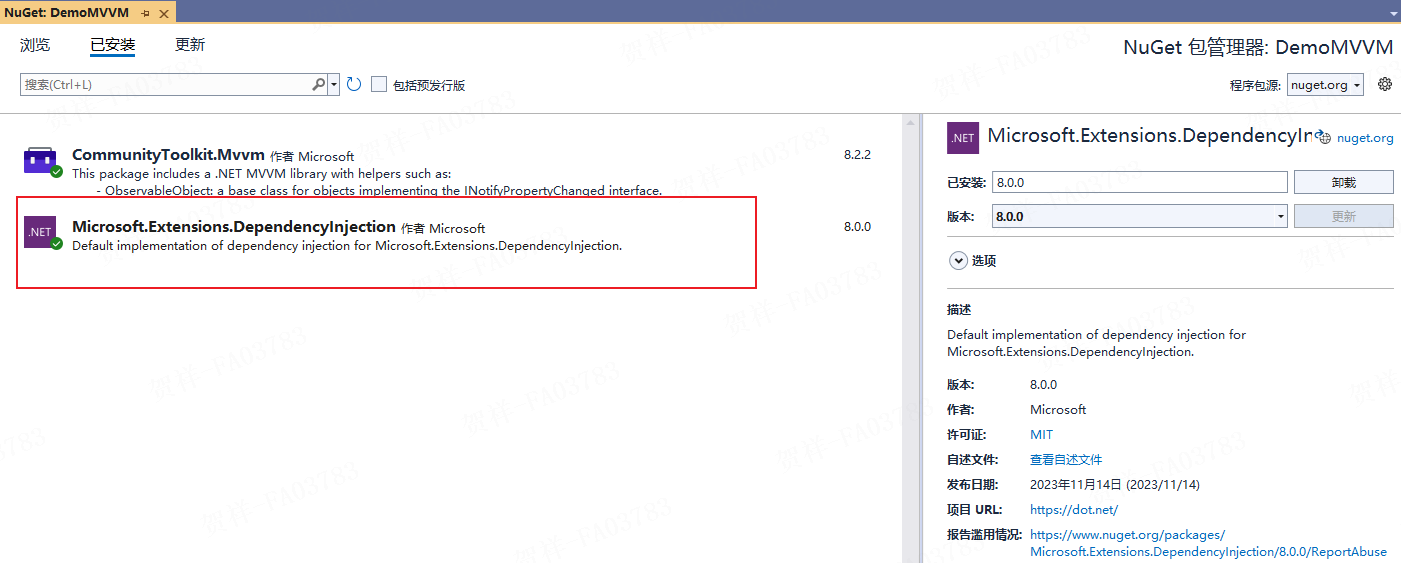
在App启动程序中,创建IServiceProvider对像,并初始化注入ViewModel,如下所示:
using DemoMVVM.ViewModels; | |
using Microsoft.Extensions.DependencyInjection; | |
using System; | |
using System.Collections.Generic; | |
using System.Configuration; | |
using System.Data; | |
using System.Linq; | |
using System.Threading.Tasks; | |
using System.Windows; | |
namespace DemoMVVM | |
{ | |
/// <summary> | |
/// Interaction logic for App.xaml | |
/// </summary> | |
public partial class App : Application | |
{ | |
public IServiceProvider ServiceProvider { get; private set; } | |
public new static App Current => (App)Application.Current; | |
public App() | |
{ | |
ServiceProvider=ConfigurationServices(); | |
} | |
private static IServiceProvider ConfigurationServices() | |
{ | |
var services = new ServiceCollection(); | |
services.AddTransient<MainWindowViewModel>(); | |
return services.BuildServiceProvider(); | |
} | |
} | |
} |
在视图类中,进行获取对应的服务即可,如下所示:
using DemoMVVM.ViewModels; | |
using System; | |
using System.Collections.Generic; | |
using System.Linq; | |
using System.Text; | |
using System.Threading.Tasks; | |
using System.Windows; | |
using System.Windows.Controls; | |
using System.Windows.Data; | |
using System.Windows.Documents; | |
using System.Windows.Input; | |
using System.Windows.Media; | |
using System.Windows.Media.Imaging; | |
using System.Windows.Navigation; | |
using System.Windows.Shapes; | |
namespace DemoMVVM | |
{ | |
/// <summary> | |
/// Interaction logic for MainWindow.xaml | |
/// </summary> | |
public partial class MainWindow : Window | |
{ | |
public MainWindow() | |
{ | |
InitializeComponent(); | |
this.DataContext = App.Current.ServiceProvider.GetService(typeof(MainWindowViewModel)); | |
} | |
} | |
} |
以上就实现了控制反转,将对象的创建与释放,交到容器去处理,而不是由视图去做。
视图数据绑定
因为视图的DataContext和ViewModel对象是同一个,所以在UI视图中,只需要对控件进行数据绑定即可,如下所示:
<Window x:Class="DemoMVVM.MainWindow" | |
xmlns="http://schemas.microsoft.com/winfx/2006/xaml/presentation" | |
xmlns:x="http://schemas.microsoft.com/winfx/2006/xaml" | |
xmlns:d="http://schemas.microsoft.com/expression/blend/2008" | |
xmlns:mc="http://schemas.openxmlformats.org/markup-compatibility/2006" | |
xmlns:local="clr-namespace:DemoMVVM" | |
mc:Ignorable="d" | |
Title="MainWindow" Height="300" Width="400"> | |
<Grid> | |
<Grid.ColumnDefinitions> | |
<ColumnDefinition Width="0.6*"></ColumnDefinition> | |
<ColumnDefinition></ColumnDefinition> | |
</Grid.ColumnDefinitions> | |
<Grid.RowDefinitions> | |
<RowDefinition></RowDefinition> | |
<RowDefinition></RowDefinition> | |
<RowDefinition></RowDefinition> | |
</Grid.RowDefinitions> | |
<TextBlock Text="编号" Grid.Column="0" VerticalAlignment="Center" HorizontalAlignment="Right" Margin="10"></TextBlock> | |
<TextBox Text="{Binding Student.Id}" Grid.Column="1" HorizontalAlignment="Left" VerticalAlignment="Center" Width="130" Height="35" Margin="10" VerticalContentAlignment="Center"></TextBox> | |
<TextBlock Text="姓名" Grid.Column="0" Grid.Row="1" VerticalAlignment="Center" HorizontalAlignment="Right" Margin="10"></TextBlock> | |
<TextBox Text="{Binding Student.Name}" Grid.Column="1" Grid.Row="1" HorizontalAlignment="Left" VerticalAlignment="Center" Width="130" Height="35" Margin="10" VerticalContentAlignment="Center"></TextBox> | |
<Button Content="保存" Command="{Binding SaveCommand}" Grid.Row="2" Grid.ColumnSpan="2" HorizontalAlignment="Center" Height="30" Width="120"></Button> | |
</Grid> | |
</Window> |
示例演示
经过上述步骤,就实现了MVVM模式的数据绑定和命令调用,如下所示

参考文档
在本实例中,只是简单介绍了MVVM工具包的使用,如若想具体了解更详细内容,可参考官方文档,
1. MVVM工具包:https://learn.microsoft.com/zh-cn/dotnet/communitytoolkit/mvvm/
2. 依赖注入:https://learn.microsoft.com/zh-cn/dotnet/core/extensions/dependency-injection
以上就是【浅谈WPF之MVVM工具包】的全部内容,旨在抛砖引玉,一起学习,共同进步。


