写在前面的话
这是一篇旧文档,代码仓库见 https://gitee.com/tanyunxiu/AR-pipe
本文档是基于超图移动端SDK的AR模块开发的示例,仅供参考,SDK在持续迭代中,相关描述可能有变化。
示例介绍
这是一个使用AR查看墙内管线的基础示例程序。
涉及的关键词:SuperMap iMobile for Android、深度遮挡、ARCore、AREngine
数据准备
数据格式
本示例所使用到的管线模型格式为:gltf2.0 、gltf2.0介绍
示例数据
示例数据位于ar_occlusion\sampledata\PipeData.zip中
数据制作
- 使用blender制作模型(或在blender中导入模型)
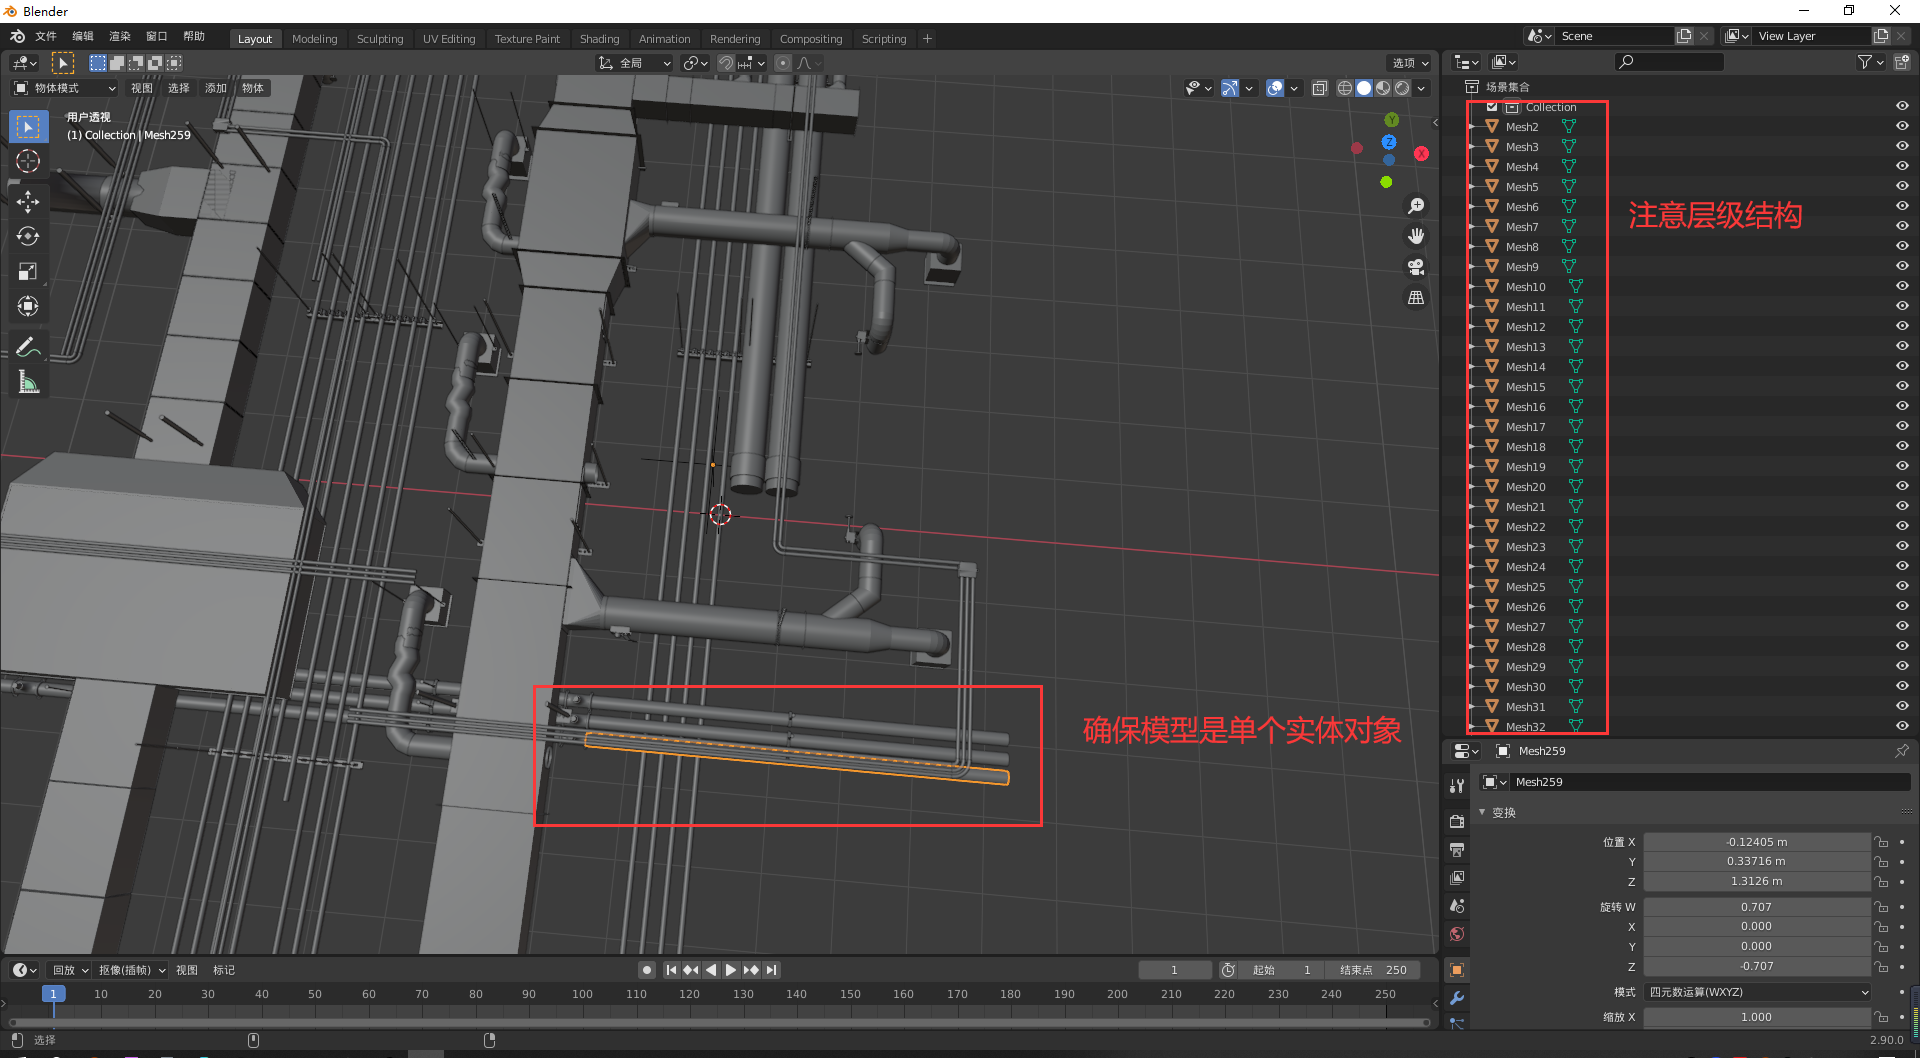
为了防止在模型批量导出的过程中出现错误,请参考下图的场景集合的层级结构。
由于示例程序中采用OBB有向包围盒( 它是包含该对象且相对于坐标轴方向任意的最小的长方体 )的方式用于射线检测。为了在示例程序中能够准确点击模型,请通过将模型拆分成单个实体对象的方式,确保模型的冗余空间尽可能地小。
- 批量导出模型
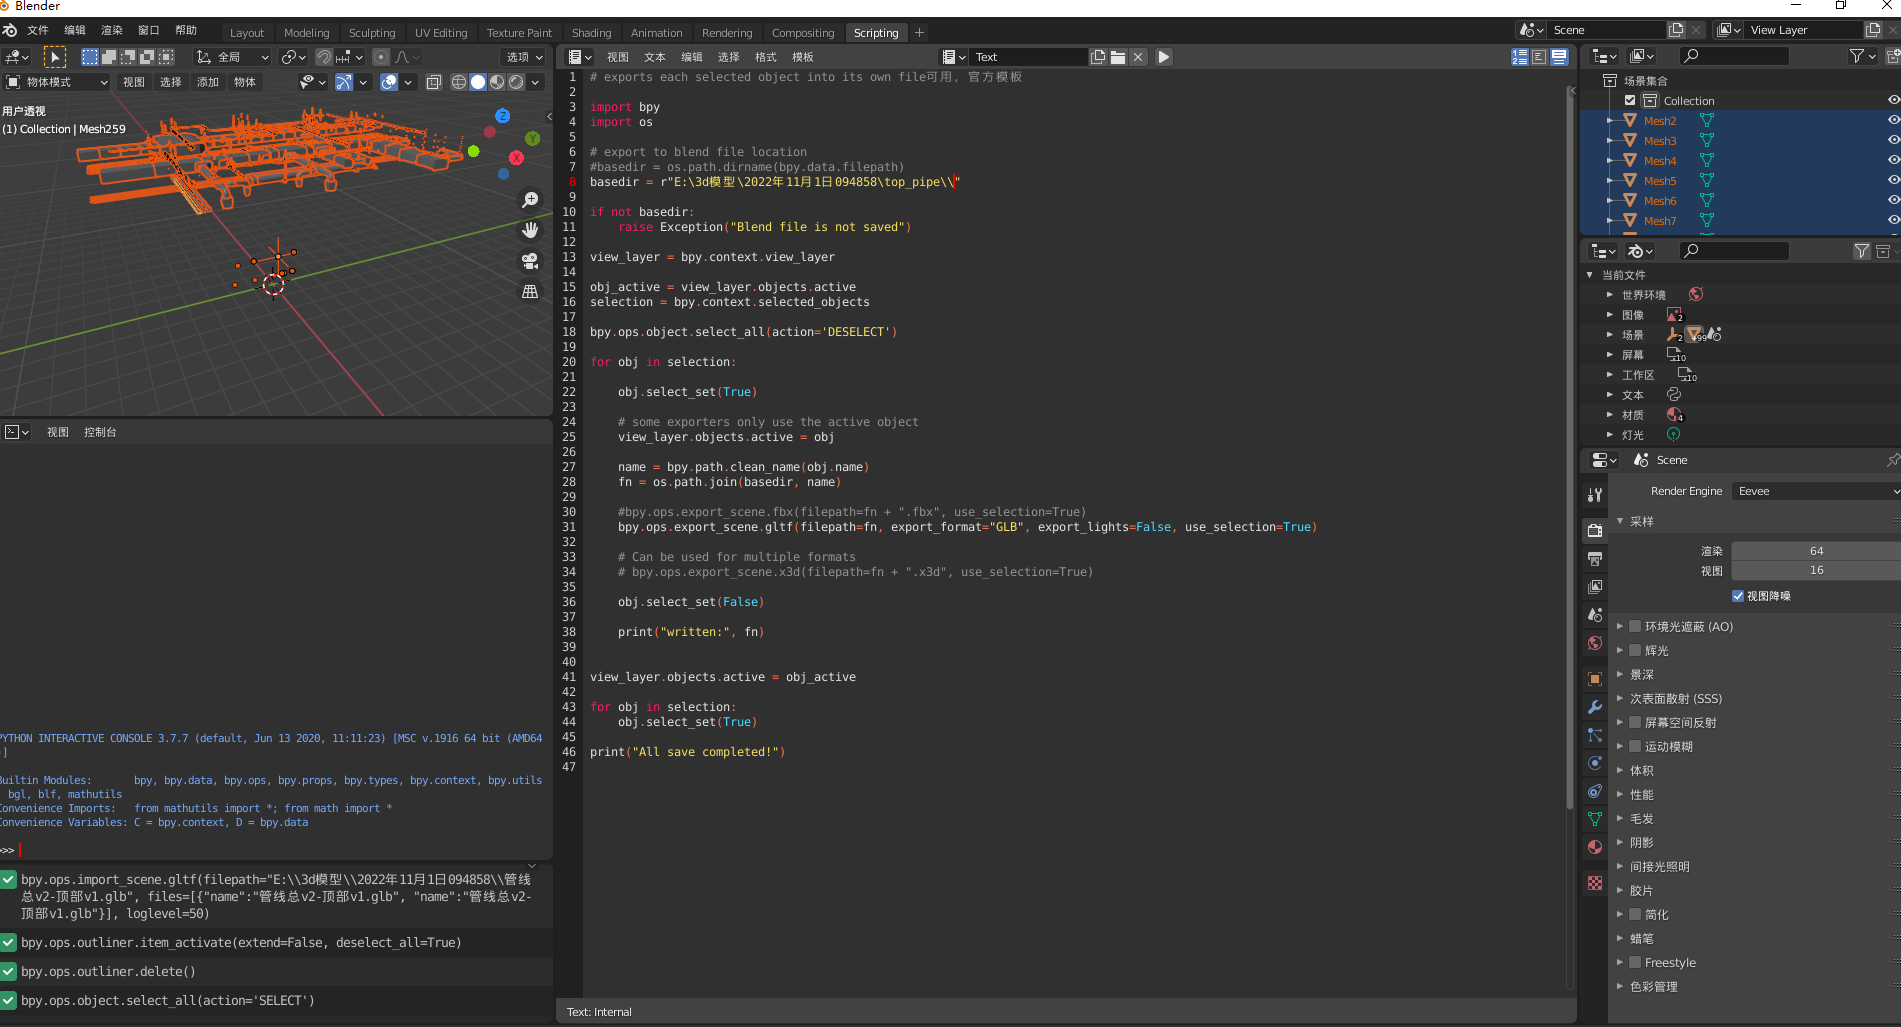
在菜单栏->"Scripting"中新建脚本,内容如下:
# exports each selected object into its own file
import bpy
import os

# export to blend file location
basedir = r"E:\3d\top_pipe\\"

if not basedir:
    raise Exception("Blend file is not saved")

view_layer = bpy.context.view_layer

obj_active = view_layer.objects.active
selection = bpy.context.selected_objects

bpy.ops.object.select_all(action='DESELECT')

for obj in selection:

    obj.select_set(True)

    # some exporters only use the active object
    view_layer.objects.active = obj

    name = bpy.path.clean_name(obj.name)
    fn = os.path.join(basedir, name)

    #bpy.ops.export_scene.fbx(filepath=fn + ".fbx", use_selection=True)
    bpy.ops.export_scene.gltf(filepath=fn, export_format="GLB", export_lights=False, use_selection=True)

    obj.select_set(False)

    print("written:", fn)

view_layer.objects.active = obj_active

for obj in selection:
    obj.select_set(True)

print("All save completed!")
- 选中场景集合中所有模型,执行脚本,导出模型。
- 查看模型文件夹。

- 至此,数据准备阶段已完成。
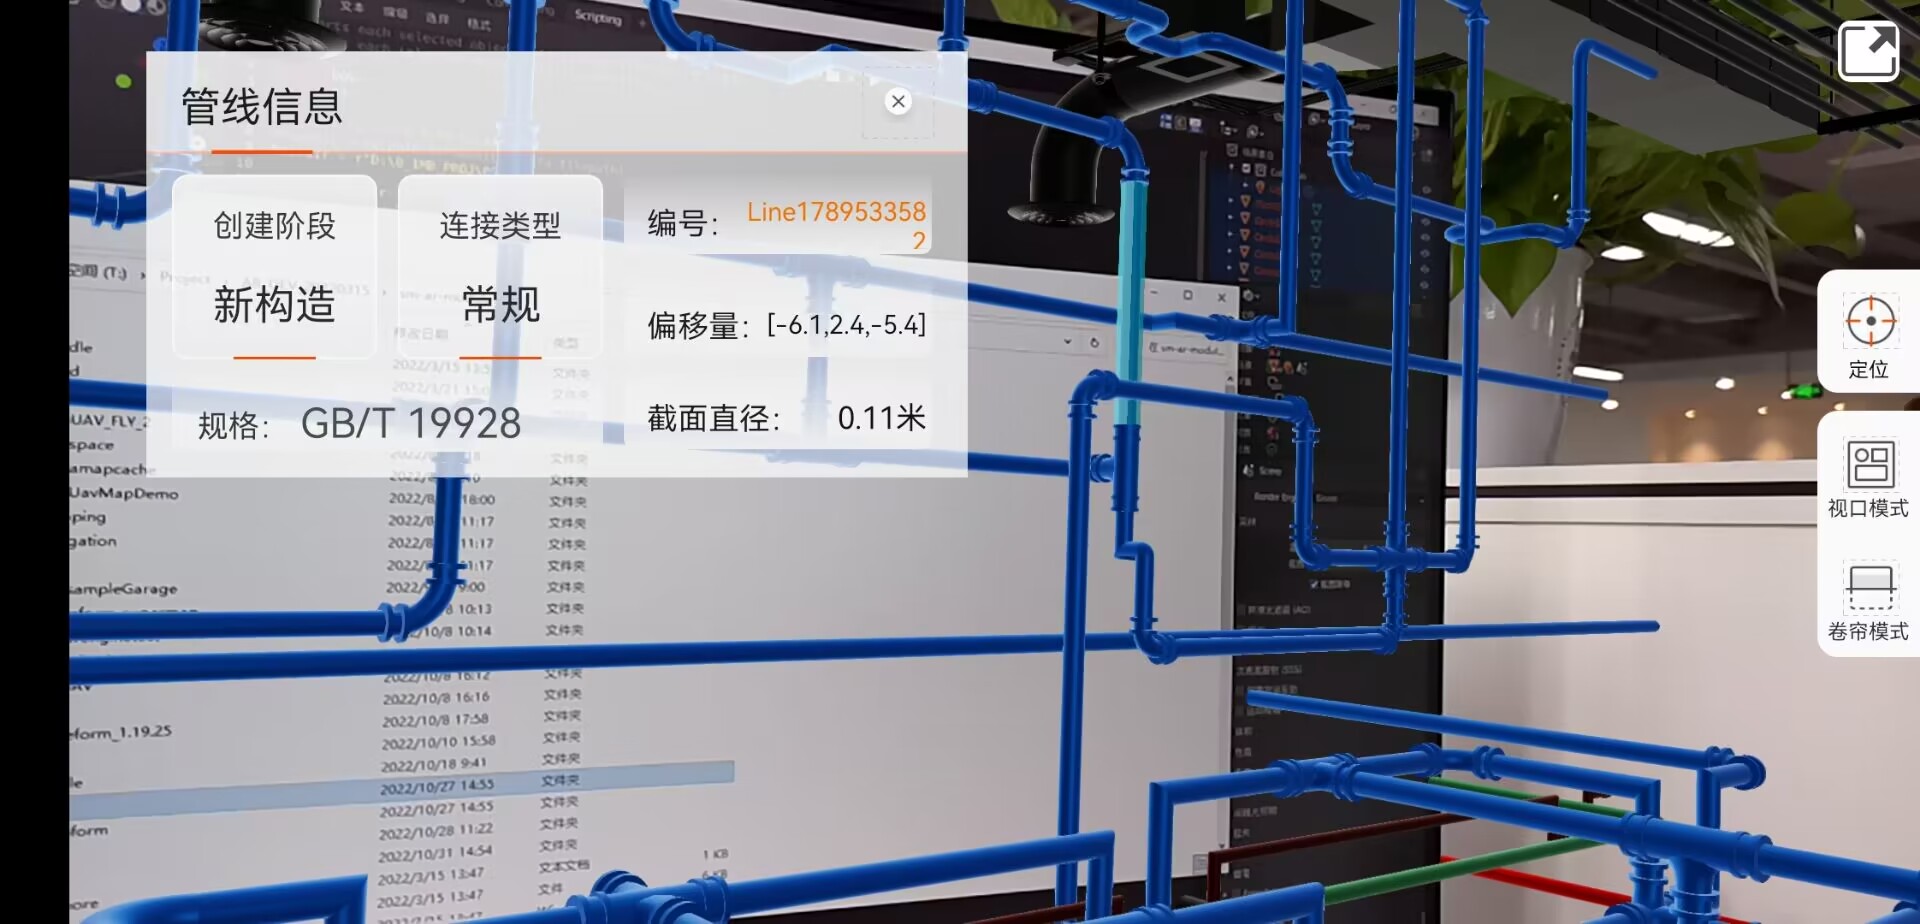
在后续构建的AR场景中,通过点击交互就可以查询出模型的名称。(Mesh2、Mesh3、Line…)。
若是需要通过点击交互,查询模型的其他属性信息(诸如规格、连接类型这些信息)。可通过创建一张属性表,建立模型名称与属性字段的一一对应的关系。通过查询模型名称,进而去查询对应的属性值。
运行流程
开发环境
- IDE:Android Studio 2021
- Android Gradle Plugin Version:4.1.2
- Gradle Version:6.5
注意事项:
Gradle 7.0版本后,请参考Android官方对于Gradle版本与Gradle插件的配套关系,把Gradle插件版本也升级到7.0及以上。
iMobile SDK
使用SuperMap移动GIS的iMobile for Android 的SDK 下载链接
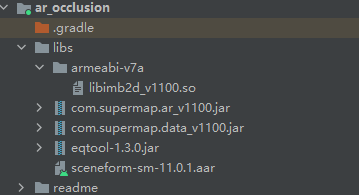
示例程序涉及SDK中的以下so 和 jar
- libimb2d_1100.so
- com.supermap.data_v1100.jar
- com.supermap.ar_v1100.jar
- scenefrom-sm-11.0.1.aar
在工程中导入iMboile的AR模块
模块的build.gradle配置如下
plugins {
    id 'com.android.application'
}

android {
    compileSdk 28

    defaultConfig {
        applicationId "com.supermap.samplecode.occlusiondemo"
        minSdk 24
        targetSdk 28
        versionCode 1
        versionName "1.0"

        testInstrumentationRunner "androidx.test.runner.AndroidJUnitRunner"

        ndk{
        	//注意使用的产品包是32位还是64位
            abiFilters 'armeabi-v7a'
        }
    }

    buildTypes {
        release {
            minifyEnabled true
            proguardFiles getDefaultProguardFile('proguard-android-optimize.txt'), 'proguard-rules.pro'
        }
    }
    compileOptions {
        sourceCompatibility JavaVersion.VERSION_1_8
        targetCompatibility JavaVersion.VERSION_1_8
    }
    sourceSets {
        main {
            jniLibs.srcDirs = ['libs']
        }
    }
}

dependencies {
    implementation 'androidx.appcompat:appcompat:1.3.0'
    implementation 'com.google.android.material:material:1.4.0'
    implementation 'androidx.constraintlayout:constraintlayout:2.0.4'

    //SuperMap Data模块
    implementation files('libs/com.supermap.data_v1100.jar')
    //SuperMap AR模块
    implementation files('libs/com.supermap.ar_v1100.jar')

    //渲染框架
    implementation files('libs/sceneform-sm-11.0.1.aar')
    //第三方工具类
    implementation files('libs/eqtool-1.3.0.jar')
}
运行示例
-
许可设置
此示例程序使用的是离线使用许可。
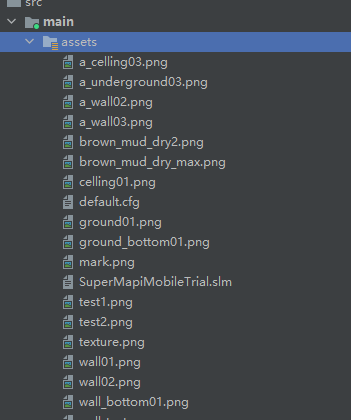
在src/main/assets/目录下,默认存放一个试用许可"SuperMapiMobileTrial.slm"。在程序初次启动时,会拷贝至手机对应文件夹(…/PipeData/license)下。
若许可过期或不可用,请先申请许可,然后拷贝至手机对应文件夹(…/PipeData/license)下,或在assets目录进行替换。
注意:
许可过期或不可用,会出现如下报错信息:

若许可可用,仍出现上述异常信息,请从以下方面进行自查。
- 使用的so与jar不是同一个产品包的产物
- 申请的许可与对应产品包的版本不一致
- 手机未开启存储读写权限
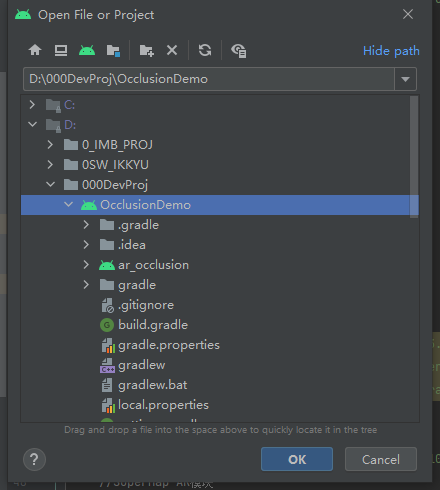
- 导入工程
方式一
打开工程
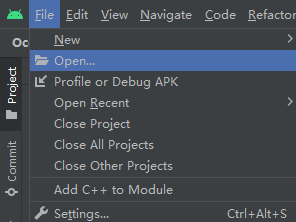
指定对应文件夹
方式二
在现有工程的settings.gradle中添加配置,实现模块导入
include ':ar_occlusion'
project(':ar_occlusion').projectDir=new File('D:\\OcclusionDemo')
- 导入模型数据
将模型数据拷贝至手机目录/SuperMap/PipeData。
具体路径配置,参考PathConfig.java
public static final String SD_CARD = android.os.Environment.getExternalStorageDirectory().getAbsolutePath();

/**
* 数据文件夹根路径
* MI 9 Transparent Edition\内部存储设备\SuperMap\PipeData
*/
public static final String PIPE_DATA_PATH = SD_CARD + "/SuperMap/PipeData";

/**
* 屋顶通风管道模型组文件夹路径
*/
public static String TOP_PIPE_DATA = PIPE_DATA_PATH + "/Model/top_pipe";

/**
* 地下管线模型组
*/
public static String UNDERGROUND_PIPE_DATA = PIPE_DATA_PATH + "/Model/underground_pipe";

/**
* 垂直墙面内的管线数据
*/
public static String VERTICAL_PIPE_DATA = PIPE_DATA_PATH + "/Model/pipe_v";
- 运行示例
运行示例程序

程序运行成功后,会在手机SuperMap/PipeData生成以下内容
- ImgData
- license
- Log
- app.cfg
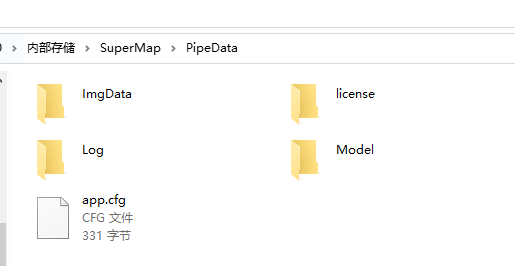
app.cfg(default.cfg)、ImgData(包含一张名为“mark.png”的图片)可在工程的assets目录下找到
- 示例程序使用流程
-
打印“mark.png”,将其布置在场景中
-
启动程序,进入主界面
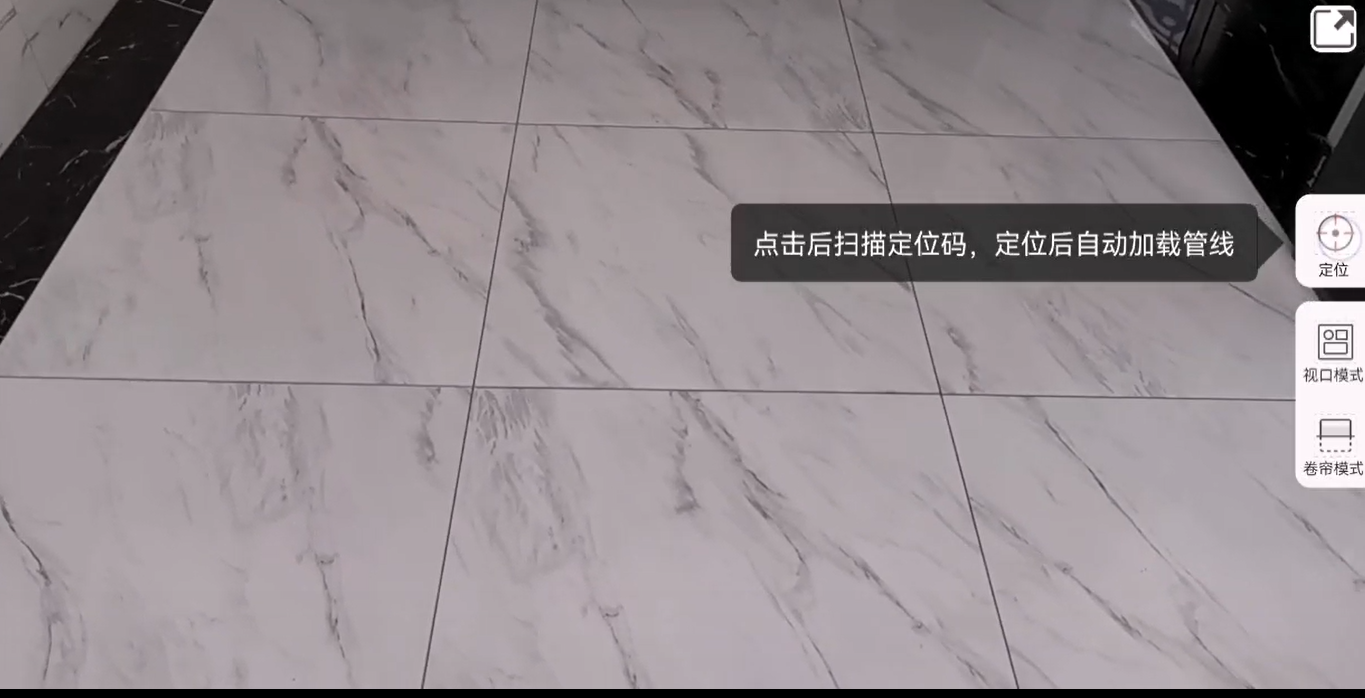
- 点击 “定位”,扫描“mark.png”,加载场景

代码定位
场景加载
实现通过扫码的方式加载场景。
见MarkerConfig,涉及Marker的初始位置、图片资源路径的相关信息。
见ScanLayout,涉及布局设置和图片识别相关的接口(ImageScanner)调用。
/**
* 开启图片扫描功能
* @param arEffectView AR视图
* @param callback 扫描结果回调
*/
public void startImageScan(AREffectView arEffectView,ScanCallback callback){
    //...
}

/**
* 结束图片扫描
* @param arEffectView AR视图
*/
private void stopScan(AREffectView arEffectView) {
        //...
}
见DataManager,涉及数据的加载.
/**
* 添加管线场景
* @param parent 父节点
* @param dataPath 数据路径
* @param enabled 启用点击交互
* @param type 数据类型
*/
public void addPipeScene(AREffectElement parent,String dataPath,boolean enabled,Type type){
	//...
}

/**
* 添加管线场景
* @param parent 父节点
* @param dataPath 数据路径
* @param enabled 启用点击交互
*/
public void addPipeScene(AREffectElement parent,String dataPath,boolean enabled) {
	//...
}
视口模式
实现在视口模式下,对墙内管线模型进行开挖显示。
见ViewportFuncLayout,涉及布局设置。
见ExcavatorManager,涉及开挖参数的计算、坑洞对象渲染和屏幕显示范围构成的点集的更新。
private EffectView.OnUpdateListener onUpdateListener = new OnUpdateListener() {
    @Override
    public void onUpdate() {
        //开挖参数计算->坑洞对象渲染->更新屏幕显示范围构成的点集
    }
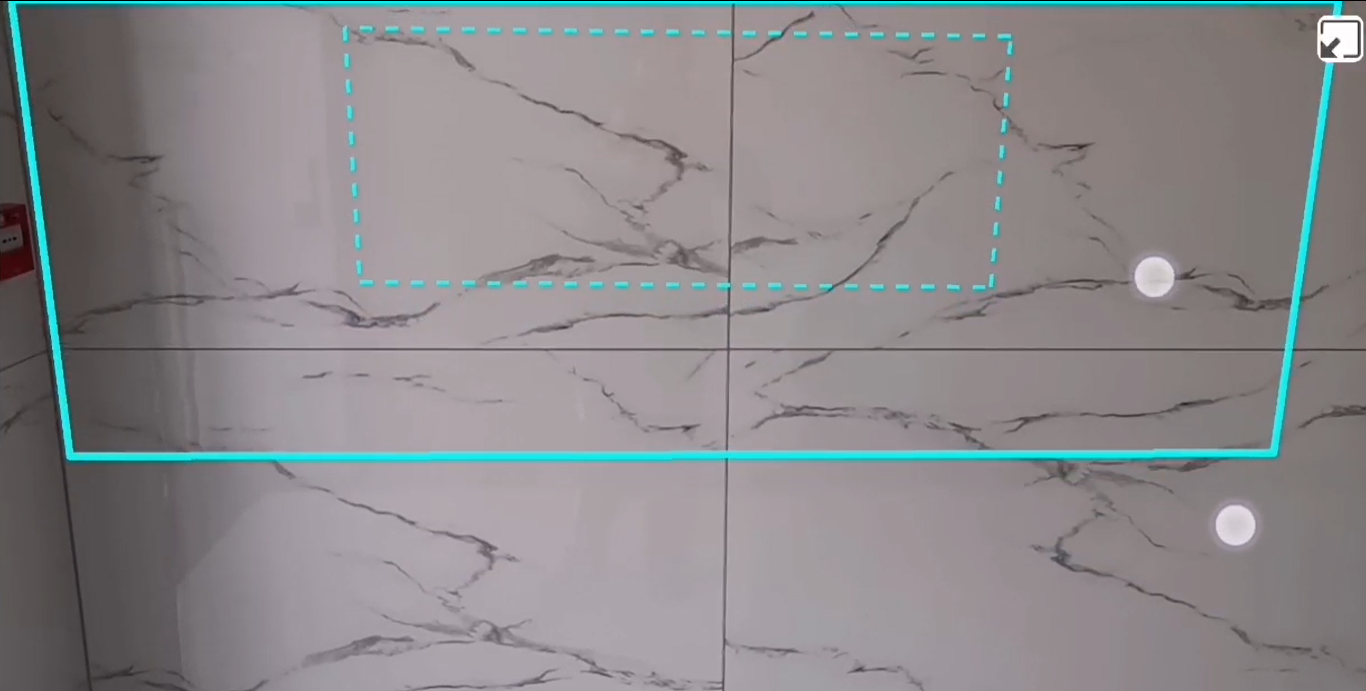
卷帘模式
实现类似卷帘的效果。
实现原理上,比视口模式更简单。直接根据分割线计算出屏幕显示范围构成的点集即可。
见RollingFuncLayout,涉及布局设置。
屏幕范围裁剪
见ScreenPointManager,统一管理屏幕显示范围构成的点集,当点集更新时,触发update回调。在回调事件里执行屏幕范围裁剪。
//在PipeActivity中
ScreenPointManager.getInstance().setOnUpdatePointListener(new ScreenPointManager.OnUpdatePointListener() {
    @Override
    public void update(List<ArrayList<int[]>> screenPoint,List<ArrayList<int[]>> bottomScreenPoint) {
    	//...裁剪屏幕显示范围
    }
});
开挖参数调节
在视口模式中,涉及通过手势去修改开挖参数。
在最初的版本中,是通过SeekBar的方式去修改开挖参数。
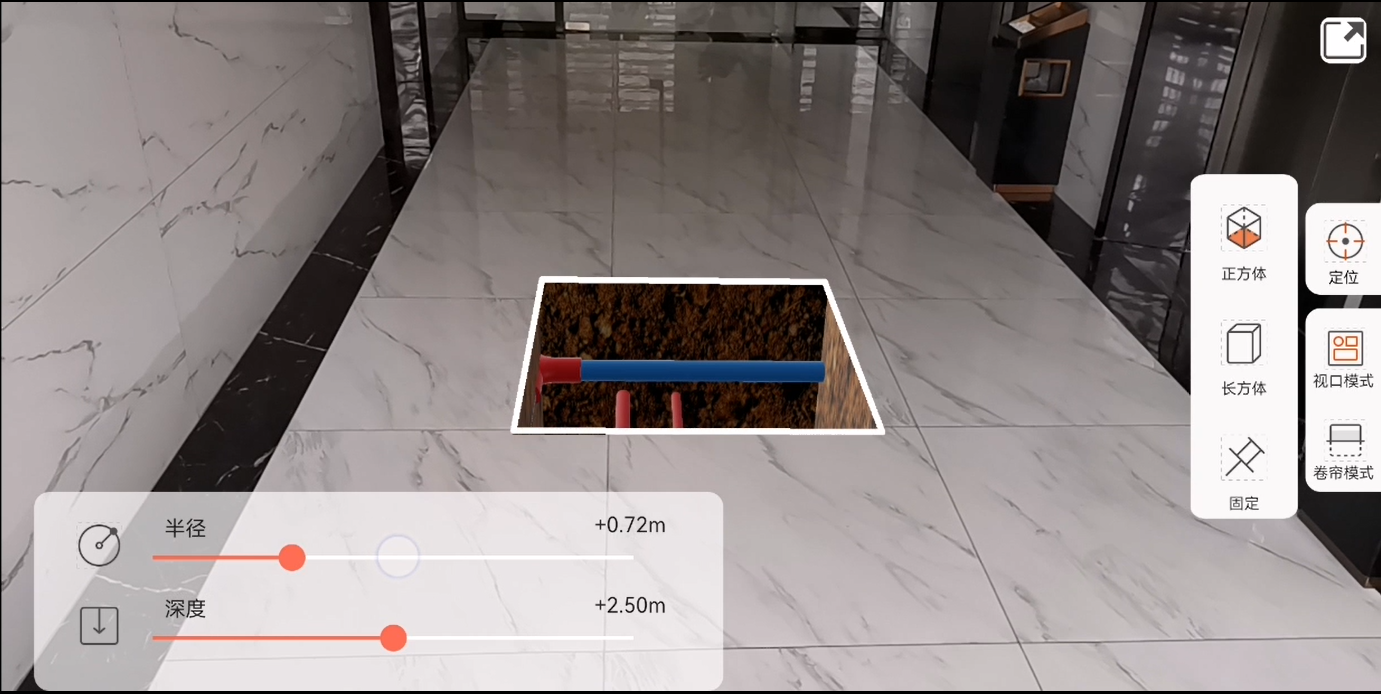
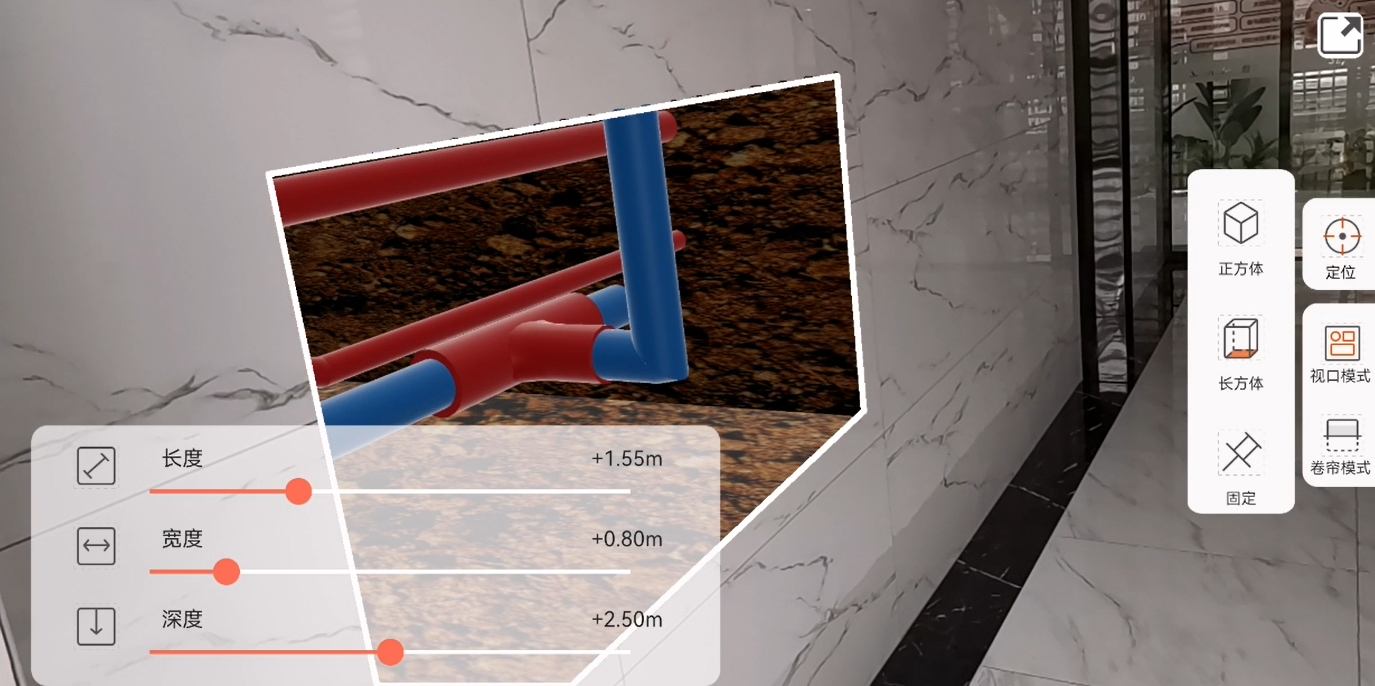
当前版本修改为通过手势去修改开挖参数。
见CustomGesture,涉及单指、双指手势的定义。
见DigGestureManager,涉及开挖参数修改的手势管理。
见DynamicView,在布局上位于最顶部,用于接收MotionEvent,分发onTouch事件。
@Override
public boolean onTouch(View v, MotionEvent event) {
	//...
}
程序演示
注: 以下内容非最终成果,仅是迭代过程中的录屏。且对应模型数据需要结合对应场景,才可正确地显示。
v1.0
示例程序的录屏
补充说明
实现方式
对每一帧显示的AR内容进行裁剪的方式来实现只显示坑洞范围内的AR内容。
在EffectView#OnUpdateListener的onUpdate事件中,重复执行以下步骤。
- 构建开挖参数ExcavationParameter
- Excavator#generateHitPoint 生成碰撞点
- Excavator#calculate 根据开挖参数进行计算
- PitObject#updateMesh 更新坑洞对象的网格
- OcclusionHelper#setUniquePointList 设置屏幕裁剪的范围
- OcclusionHelper#refresh 刷新
简单示例
//遮挡设置
occlusionHelper = arView.getOcclusionHelper();
occlusionHelper.init(0.36f)
    .setRenderMode(OcclusionHelper.RenderMode.NORMAL);

List  roomBounds = Arrays.asList(
    new Point3D(-1, -1, -2),
    new Point3D(-1, 6, -2),
    new Point3D(6, 6, -2),
    new Point3D(6, -1, -2),
    new Point3D(-1, -1, -2)
);

//采用ARGeoPrism,构建“检测墙”
ARGeoPrism geoVerticalRegion = new ARGeoPrism();
geoVerticalRegion.setParentNode(arView);
//仅用作射线检测,渲染状态设置为false
geoVerticalRegion.setRenderable(false);
geoVerticalRegion.addPart(roomBounds,6.0f);

//创建开挖工具,在这之前,需确认AREffectView开启了遮挡设置
//Excavator所有子类使用方法一致
excavatorWall = new WallExcavator(geoVerticalRegion);
//坑洞纹理
Bitmap bitmap=null;
Bitmap bitmap2=null;
try {
    InputStream is = getApplicationContext().getAssets()
        .open("brown_mud_dry2.png");
    bitmap= BitmapFactory.decodeStream(is);
    InputStream is2 = getApplicationContext().getAssets()
        .open("wall_texture.png");
    bitmap2= BitmapFactory.decodeStream(is2);
    is.close();
    is2.close();
} catch (IOException e) {
}

//创建坑洞渲染对象
pitWall = new PitObject(excavatorWall)
    .setTexture(bitmap,bitmap2);


//在每一帧刷新时调用(通常使用EffectView.addOnUpdateListener(EffectView.OnUpdateListener)添加帧监听事件)
arView.addOnUpdateListener(()->{
    //开挖计算墙面碰撞点 arView为AREffectView、screenPointX/Y为对应的屏幕坐标
    //以屏幕中心计算碰撞点
    Point3D hitPoint = excavatorWall
                .generateHitPoint(arView, screenPointX, screenPointY);
    if (hitPoint!=null){
        //desc-执行开挖的顶点计算(开挖参数)
        excavatorWall.calculate(ExcavationParameter.builder()
                                .setRadius(radius)
                                .setOffset(offset)
                                .setInnerMargin(0)
                                .setCenterPoint(hitPoint)
                                .build());
    }
    //渲染坑洞结果
    pitWall.updateMesh();

    if (occlusionHelper.isEnabled()){
        //desc-执行画面裁剪
        ArrayList  screenPoint = null;
        if (excavatorWall !=null){
            //计算屏幕坐标
            screenPoint = excavatorWall.getScreenPoint(null);
            if (screenPoint!=null){
                //根据屏幕坐标刷新裁剪范围
                occlusionHelper.setUniquePointList(screenPoint).refresh();
            }
        }
    }
})
AR开发专栏
原生开发?就用这做AR


