React18+Typescript+craco配置最小化批量引入Svg并应用的组件
- 前言
- 创建React + Typescript项目
- 通过require.context实现批量引入Svg
- 安装[@types/webpack-env](https://github.com/DefinitelyTyped/DefinitelyTyped/blob/master/README.zh-Hans.md)解决类型报错
- 安装[craco](https://craco.js.org/docs/getting-started/#start-configuring),覆盖React原有的webpack配置文件
- 修改package.json脚本快捷方式为craco启动项目
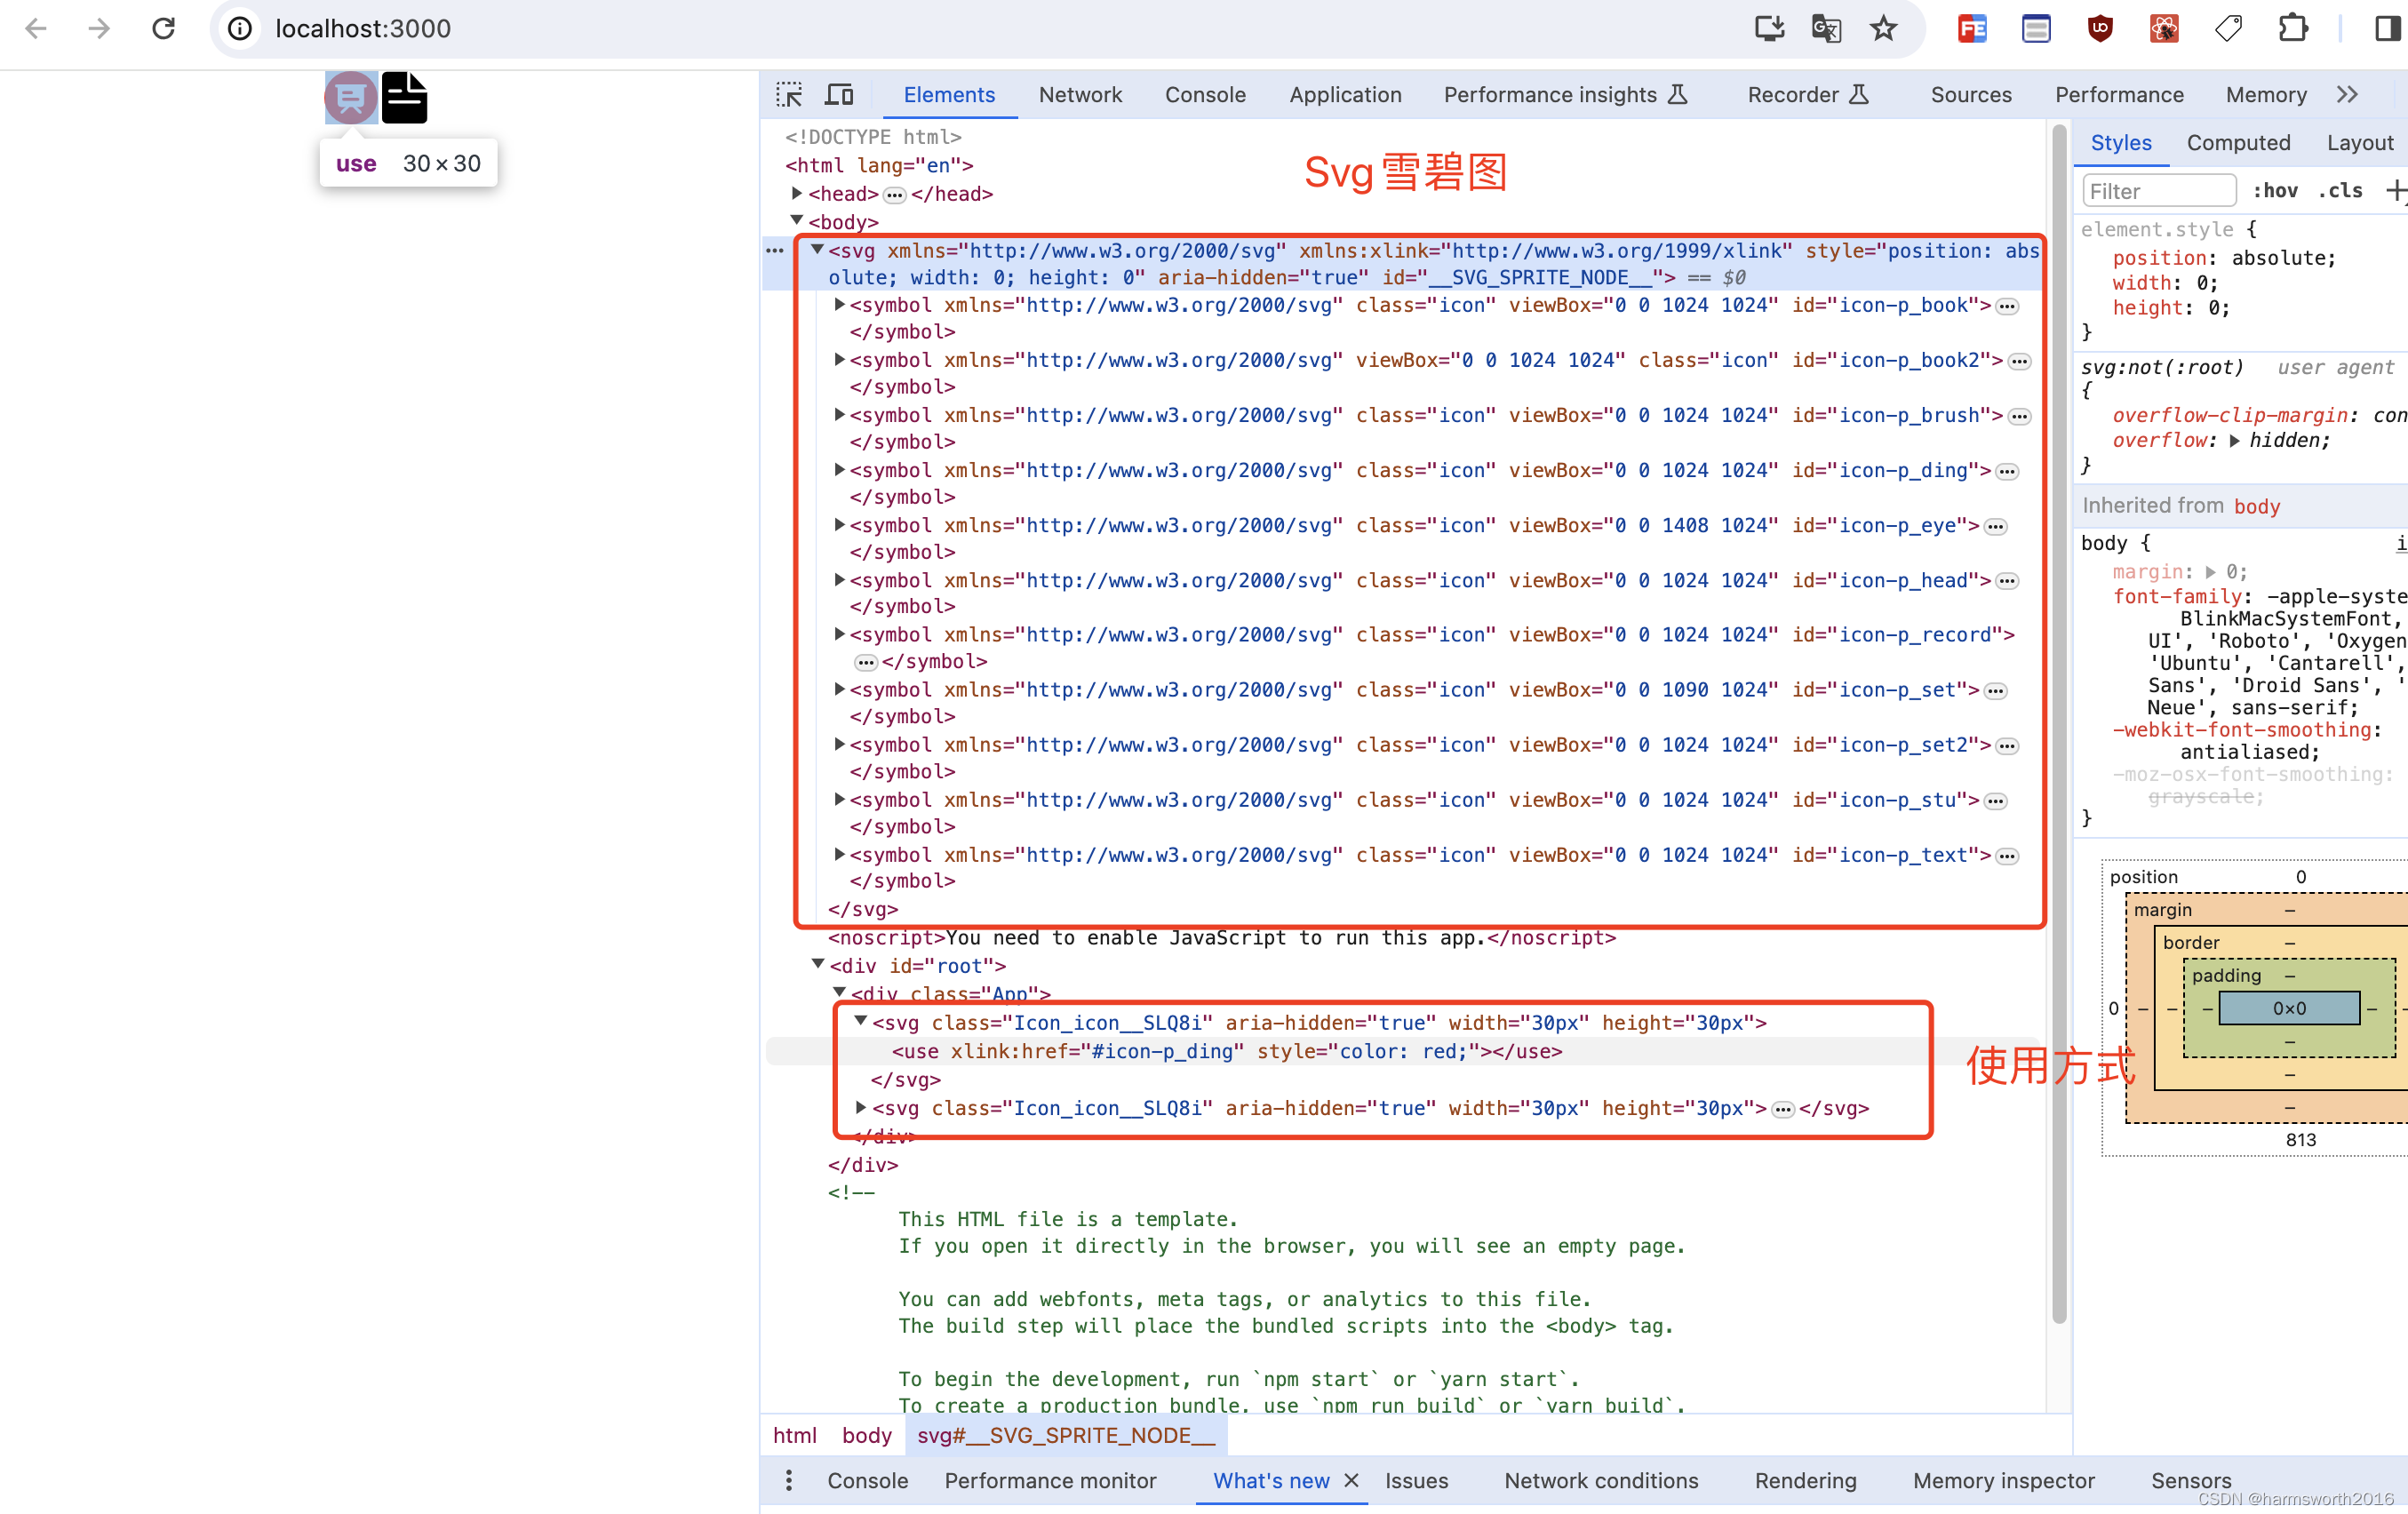
- 安装[svg-sprite-loader](https://github.com/JetBrains/svg-sprite-loader)生成Svg雪碧图
- 安装[svgo-loader](https://github.com/svg/svgo-loader)去除Svg的fill和stroke属性
- 新增craco.config.js配置文件
- 封装Icon组件应用Svg图标
- 在index.tsx入口文件中引入批量引入Svg的函数
- 在App.tsx中引入Icon组件并应用
- 修改tsconfig.json新增别名@解决报错
- 启动项目,目录结构如下
- 参考
- 总结
前言
无论是哪种 Web UI 框架都不可避免的要与 Svg 打交道,那么批量引入才更方便管理 Svg。
创建React + Typescript项目
npx create-react-app my-ts-app --template typescript
通过require.context实现批量引入Svg
// src/assets/icons/index.ts
const requireAll = (requireContext: __WebpackModuleApi.RequireContext) => requireContext.keys().map(requireContext)
const icons = require.context('./', false, /\.svg$/)
requireAll(icons)

export {}
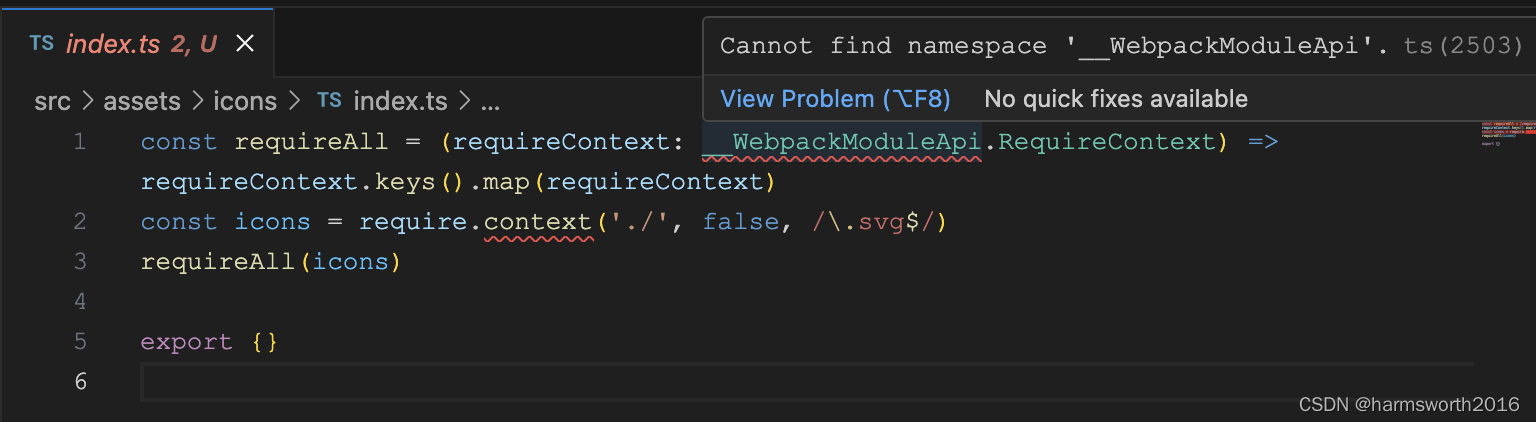
安装@types/webpack-env解决类型报错
npm install --save @types/webpack-env
安装craco,覆盖React原有的webpack配置文件
npm i -D @craco/craco @craco/types
修改package.json脚本快捷方式为craco启动项目
"scripts": {
-  "start": "react-scripts start"
+  "start": "craco start"
-  "build": "react-scripts build"
+  "build": "craco build"
-  "test": "react-scripts test"
+  "test": "craco test"
}
安装svg-sprite-loader生成Svg雪碧图
npm install svg-sprite-loader -D
安装svgo-loader去除Svg的fill和stroke属性
npm install svgo-loader --save-dev
新增craco.config.js配置文件
const path = require('path');

module.exports = {
    webpack: {
        alias: {
            '@': path.resolve(__dirname, 'src'),
        },
        configure: (webpackConfig) => {
            const oneOfRule = webpackConfig.module.rules.find((rule) => rule.oneOf)
            if (oneOfRule) {
                oneOfRule.oneOf.splice(0, 0, {
                    test: /\.svg$/,
                    include: path.resolve(__dirname, "src/assets/icons"),
                    use: [
                        {
                            loader: 'svg-sprite-loader',
                            options: {
                                symbolId: "icon-[name]"
                            }
                        },
                        {
                            loader: 'svgo-loader', options: {
                                plugins: [
                                    {
                                        name: 'removeAttrs',
                                        params: {
                                            attrs: '(fill|stroke)'
                                        }
                                    }
                                ]
                            }
                        }
                    ]
                })
            }
            return webpackConfig
        },
    }
}
封装Icon组件应用Svg图标
// src/components/Icon/index.tsx
import React from "react";
import classes from './index.module.css'

interface IconProps {
    name: string
    width: string
    height?: string
    fill?: string
}

const Icon = ({ name, width, height, fill }: IconProps) => {
    return (
        <svg className={classes.icon} aria-hidden="true" width={width} height={height}>
            <use xlinkHref={'#icon-' + name} style={{color: fill}}></use>
        </svg>
    )
}

export default Icon
/* src/components/Icon/index.module.css */
.icon {
    vertical-align: -0.15em;
    fill: currentColor;
    overflow: hidden;
    font-size: 0;
}
在index.tsx入口文件中引入批量引入Svg的函数
// src/index.tsx
import '@/assets/icons/index';
在App.tsx中引入Icon组件并应用
// src/App.tsx
import React from 'react';
import Icon from '@/components/Icon/index'
import './App.css';

function App() {
    return (
        <div className="App">
            <Icon name='p_ding' width="30px" height='30px' fill="red" />
            <Icon name='p_book' width="30px" height='30px' />
        </div>
    );
}

export default App;
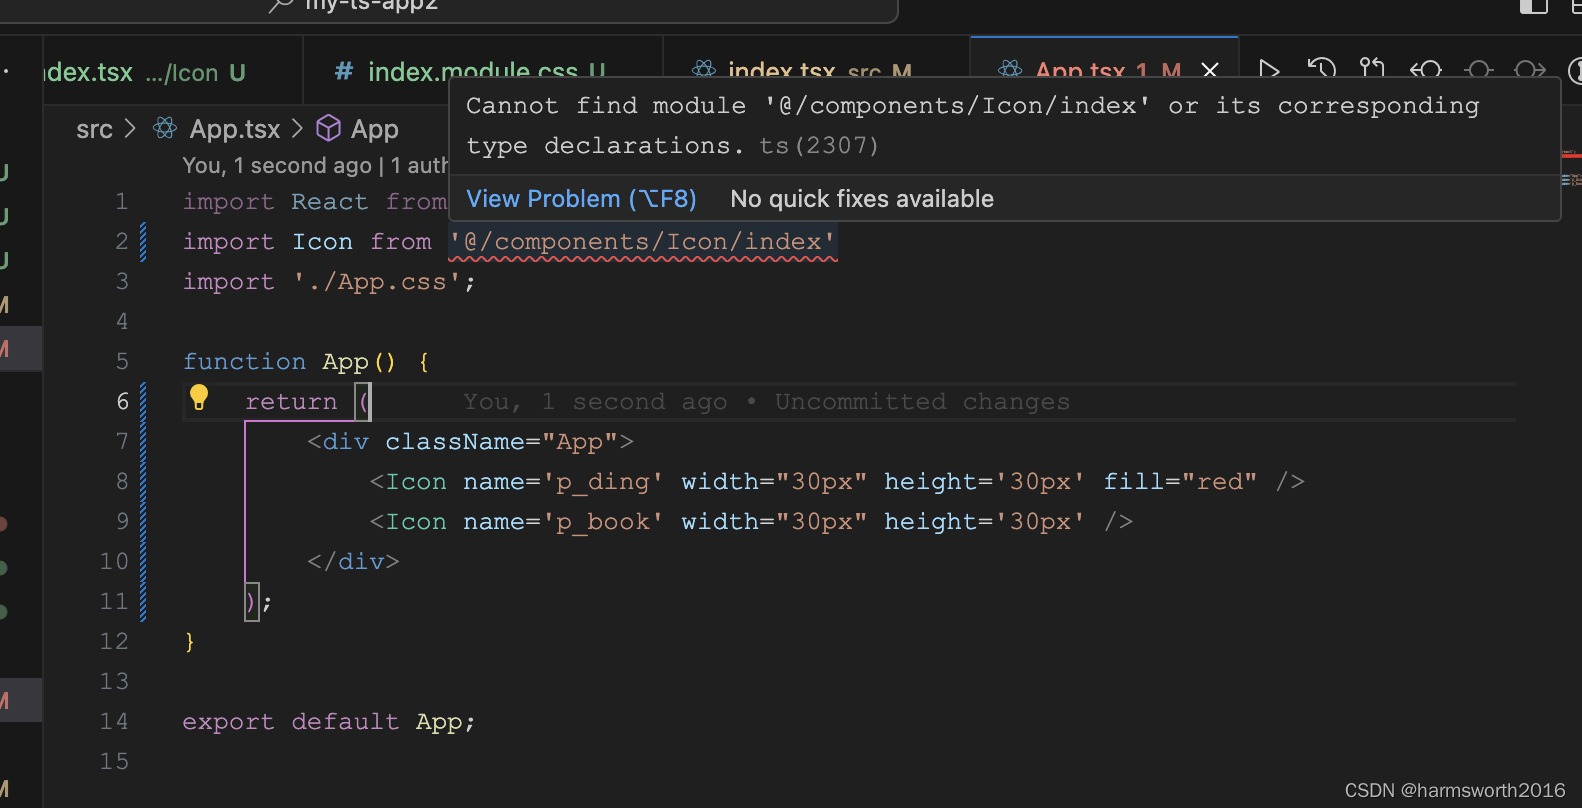
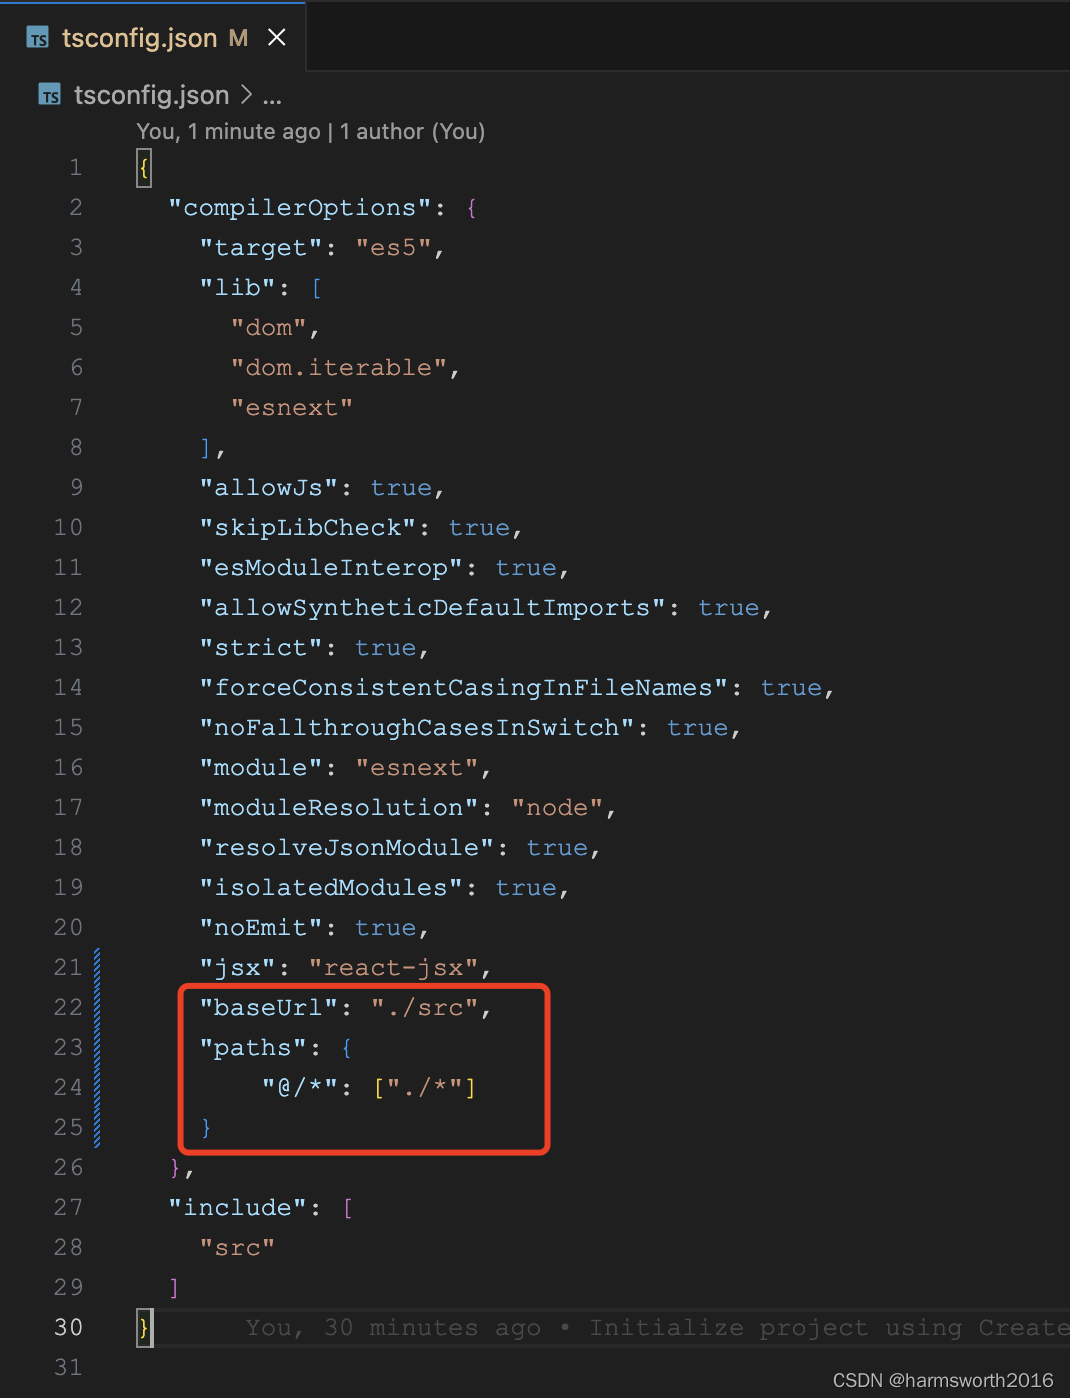
修改tsconfig.json新增别名@解决报错
{
  "compilerOptions": {
    "target": "es5",
    "lib": [
      "dom",
      "dom.iterable",
      "esnext"
    ],
    "allowJs": true,
    "skipLibCheck": true,
    "esModuleInterop": true,
    "allowSyntheticDefaultImports": true,
    "strict": true,
    "forceConsistentCasingInFileNames": true,
    "noFallthroughCasesInSwitch": true,
    "module": "esnext",
    "moduleResolution": "node",
    "resolveJsonModule": true,
    "isolatedModules": true,
    "noEmit": true,
    "jsx": "react-jsx",
    "baseUrl": "./src",
    "paths": {
        "@/*": ["./*"]
    }
  },
  "include": [
    "src"
  ]
}
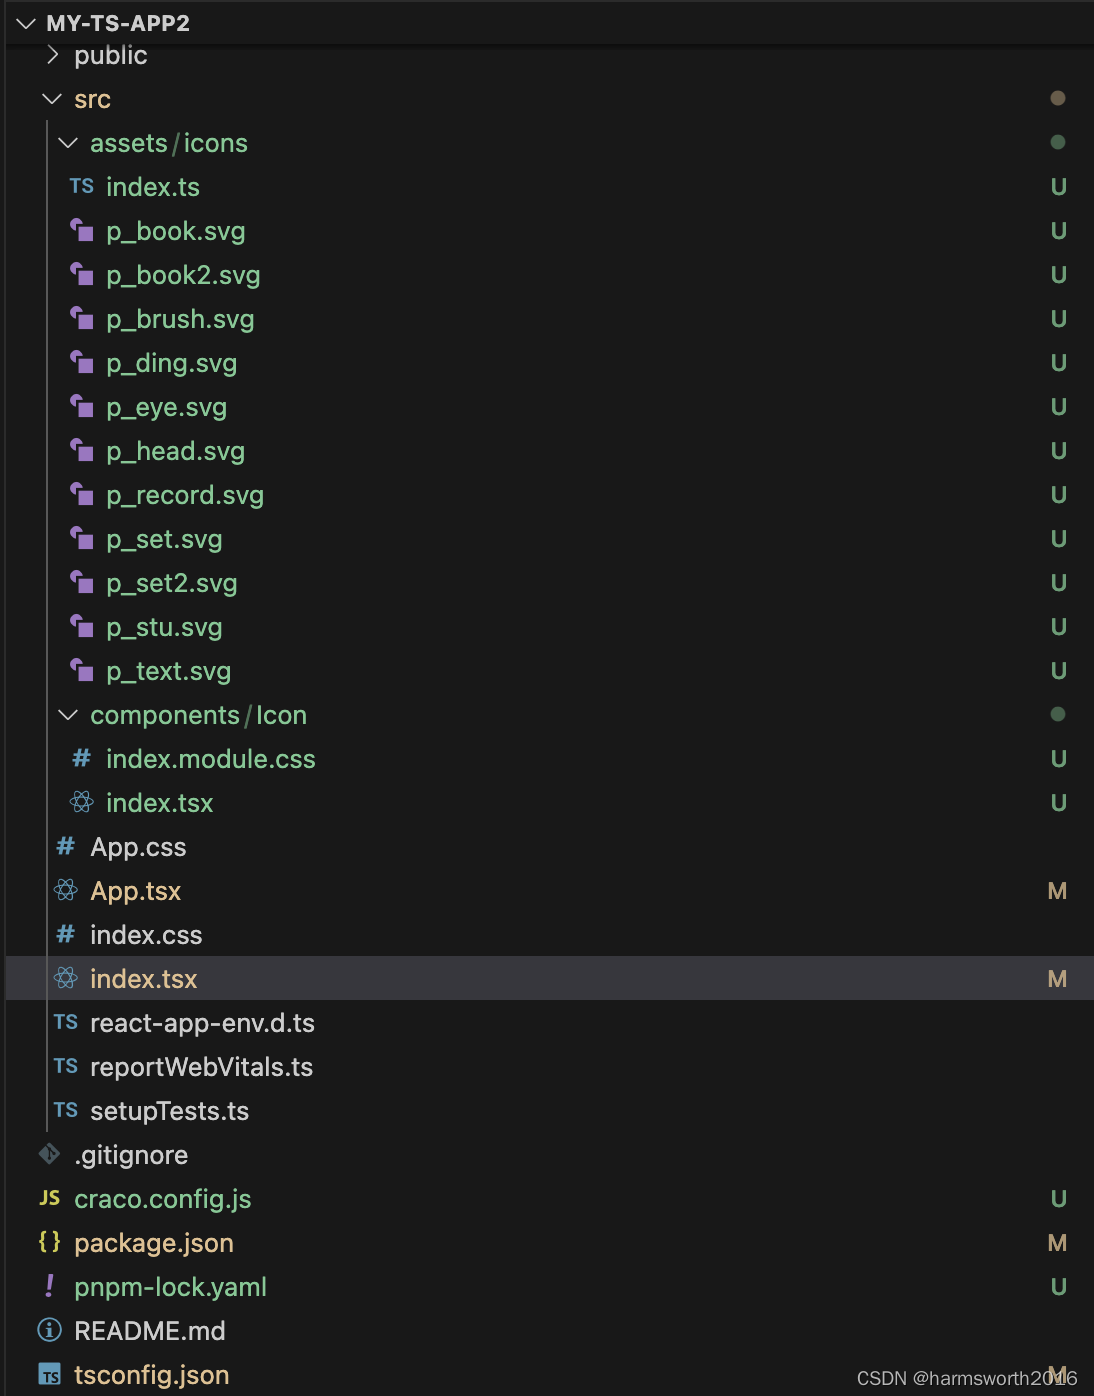
启动项目,目录结构如下

参考
- https://ryanhutzley.medium.com/dynamic-svg-imports-in-create-react-app-d6d411f6d6c6
- https://github.com/airbnb/babel-plugin-inline-react-svg/issues/51
- https://blog.shianqi.com/2017/12/13/Webpack/SVG-sprite/
- https://pganalyze.com/blog/building-svg-components-in-react
- https://juejin.cn/post/6844904194747400199
- https://blog.csdn.net/qq_44883318/article/details/132202175
- https://juejin.cn/post/7035808121272893477
- https://github.com/dilanx/craco/issues/395
- https://segmentfault.com/a/1190000023807589
- https://blog.csdn.net/qq_39953537/article/details/93760188
- https://juejin.cn/post/7207336474150273061
- https://juejin.cn/post/6918723151732391950#heading-0
- https://juejin.cn/post/6981836039463632932
- https://segmentfault.com/a/1190000039850941
总结
- 配置别名需要tsconfig.json和craco.config.js一起配合
- 批量引入组件或者资源通过require.context函数实现
- module css实现组件的私有样式,相当于Vue中 scoped 作用域


