一、228环境ES使用安装
1、检验ES服务是否安装成功的方法
(1)查看Elasticsearch进程是否成功
ps -ef|grep elasticsearch
(2)linux elasticsearch下访问(curl带认证访问)
curl --user elastic:Zhes.13DSWJWE3dfdd9098 -XGET 'localhost:9200'
2、elasticsearch-7.8 跟查询elasticsearch-head插件版本的对应的关系
3、elasticsearch-head插件中访问:http://192.168.2.228:9200/
关闭elasticsearch.yml 配置文件中 设置为false: xpack.security.enabled: false
wget https://nodejs.org/dist/v10.16.3/node-v10.16.3-linux-x64.tar.xz
4、elasticsearch-head插件后台运行:nohup npm run start &
5、elasticsearch-head 工具的使用
(1)elasticsearch-head添加mapping (这个里面的结构是对查询条件类型的设置),需要熟悉es的相关语法,才可以写出

(2)给索引添加mapping
{"settings":{"index":{"index.number_of_shards":3,"number_of_replicas":0}},"mappings":{"properties":{"baseId":{"type":"keyword"},"title":{"type":"text","fields":{"keyword":{"type":"keyword","ignore_above":256},"suggest":{"type":"completion","analyzer":"standard","preserve_separators":true,"preserve_position_increments":true,"max_input_length":50}},"analyzer":"standard"},"type":{"type":"keyword"},"newType":{"type":"keyword"},"creator":{"type":"keyword"},"creatorName":{"type":"text","fields":{"keyword":{"type":"keyword","ignore_above":256}},"analyzer":"standard"},"place":{"type":"keyword"},"province":{"type":"keyword"},"city":{"type":"keyword"},"district":{"type":"keyword"},"dept":{"type":"nested","properties":{"baseId":{"type":"keyword"}}},"policyType":{"type":"nested","properties":{"baseId":{"type":"keyword"}}},"supportmode":{"type":"nested","properties":{"baseId":{"type":"keyword"}}},"tag":{"type":"nested","properties":{"baseId":{"type":"keyword"}}},"viewCount":{"type":"integer"},"auditState":{"type":"integer"},"longAuditTime":{"type":"long"},"longBaseCreateTime":{"type":"long"},"baseCreateTime":{"type":"date"},"isTop":{"type":"boolean"},"topSort":{"type":"long"},"content":{"type":"text","fields":{"keyword":{"type":"keyword","ignore_above":256}},"analyzer":"standard"}}}}
(3)elasticsearch-head工具创建带有mapping结构的索引
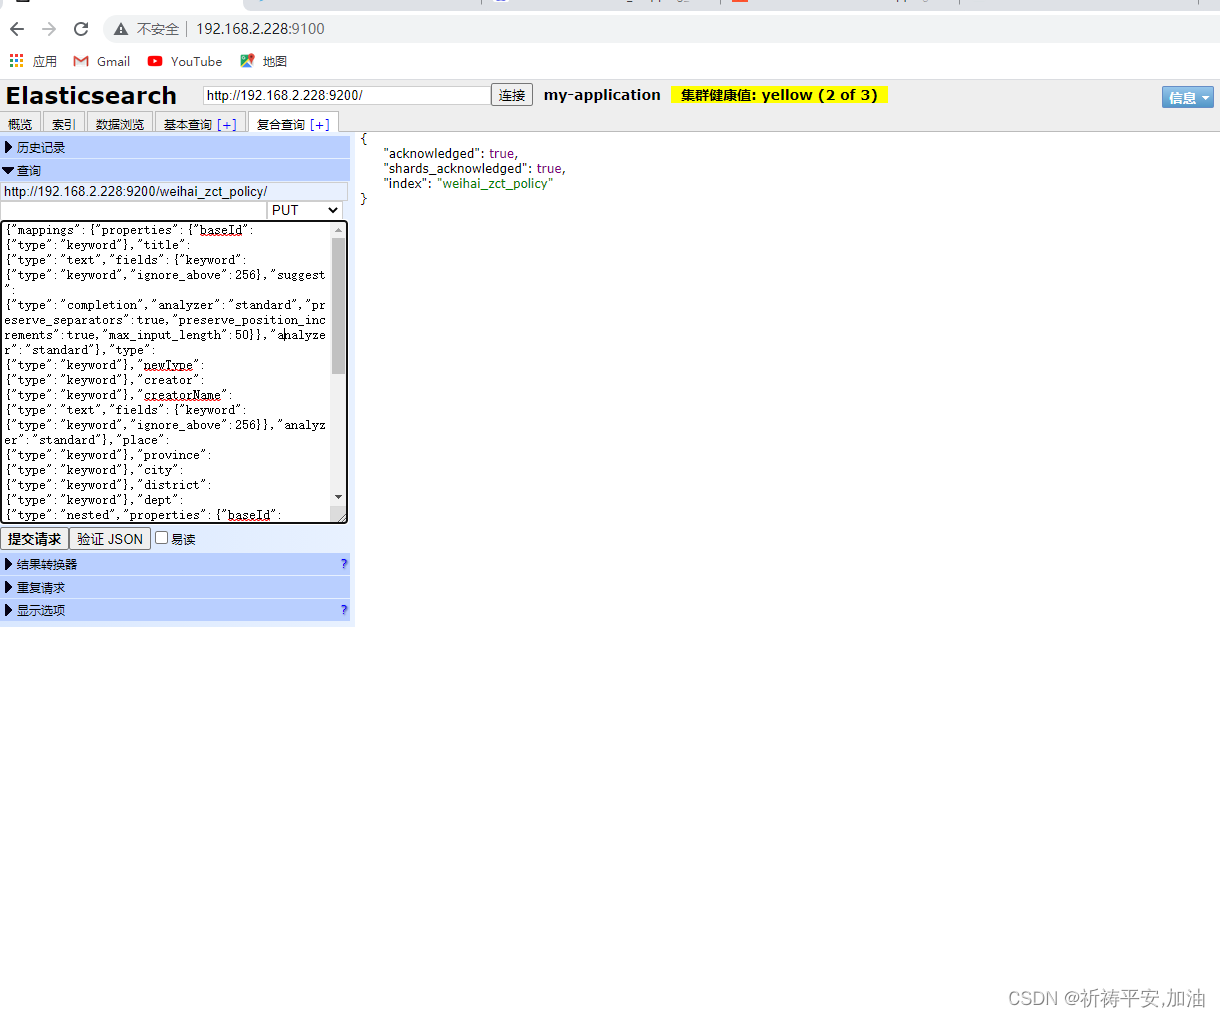
{"mappings":{"properties":{"baseId":{"type":"keyword"},"title":{"type":"text","fields":{"keyword":{"type":"keyword","ignore_above":256},"suggest":{"type":"completion","analyzer":"standard","preserve_separators":true,"preserve_position_increments":true,"max_input_length":50}},"analyzer":"standard"},"type":{"type":"keyword"},"newType":{"type":"keyword"},"creator":{"type":"keyword"},"creatorName":{"type":"text","fields":{"keyword":{"type":"keyword","ignore_above":256}},"analyzer":"standard"},"place":{"type":"keyword"},"province":{"type":"keyword"},"city":{"type":"keyword"},"district":{"type":"keyword"},"dept":{"type":"nested","properties":{"baseId":{"type":"keyword"}}},"policyType":{"type":"nested","properties":{"baseId":{"type":"keyword"}}},"supportmode":{"type":"nested","properties":{"baseId":{"type":"keyword"}}},"tag":{"type":"nested","properties":{"baseId":{"type":"keyword"}}},"viewCount":{"type":"integer"},"auditState":{"type":"integer"},"longAuditTime":{"type":"long"},"longBaseCreateTime":{"type":"long"},"baseCreateTime":{"type":"date"},"isTop":{"type":"boolean"},"topSort":{"type":"long"},"content":{"type":"text","fields":{"keyword":{"type":"keyword","ignore_above":256}},"analyzer":"standard"}}}}
二 192.168.2.53 演示环境ES使用安装
1、Linux系统下ES账户操作和访问
(1) linux系统下的 es账户操作
[root@localhost elastic]# groupadd eszhgroup2
[root@localhost elastic]# useradd -g eszhgroup2 eszh
[root@localhost ~]# passwd eszh
Changing password for user eszh.
New password:
BAD PASSWORD: it is too short
BAD PASSWORD: is too simple
Retype new password:
passwd: all authentication tokens updated successfully.
(2) http://192.168.2.53:9100/?auth_user=elastic&auth_password=abc123
用户密码认证后的信息:用户名elastic 密码abc123
2、相关命令
(1)解压zip的命令:unzip + 某某.zip
(2)解压tar包的命令:tar -zvxf +tar包
(3)tar -xJf node-v10.16.3-linux-x64.tar.xz
3、elasticsearch-head插件的安装
服务器Elasticsearch-head插件的安装与配置
1.安装node.js
1.1、通过官网下载二进制安装包
Node.js — Download Node.js®
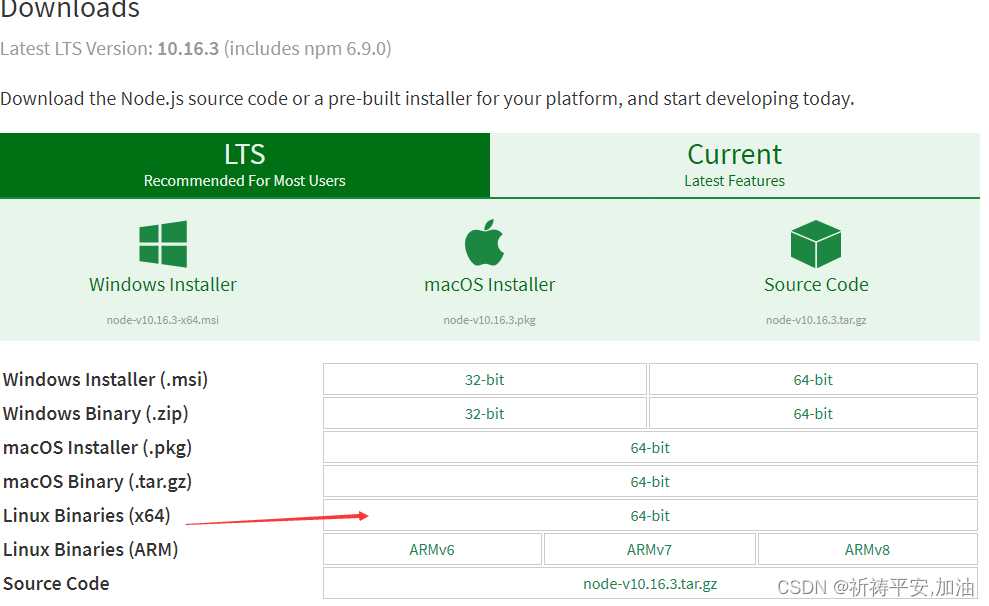
选择对应的版本,右键复制下载链接,进入linux目录,切换到要安装目录的磁盘。这里我们软件安装在/usr/local目录下,执行如下命令下载安装包
cd /usr/local/ wget https://nodejs.org/dist/v10.16.3/node-v10.16.3-linux-x64.tar.xz
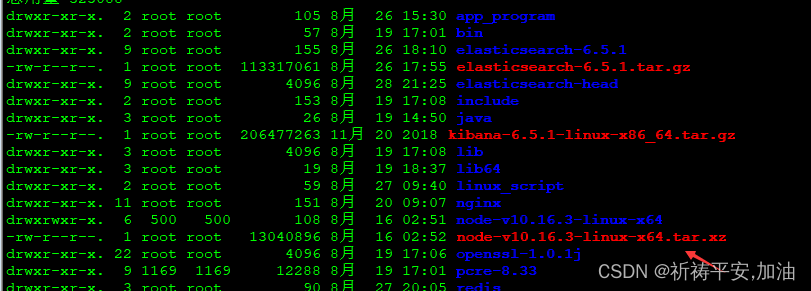
下载完之后可以在磁盘目录看到已经下载完成的压缩包
1.2、解压安装包
tar -xJf node-v10.16.3-linux-x64.tar.xz
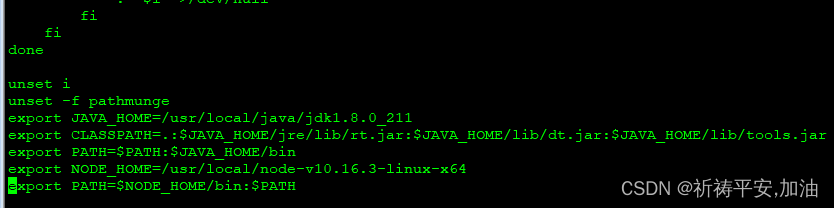
1.3、配置环境变量
vi /etc/profile
在文件最后面追加node.js环境变量
export NODE_HOME=/usr/local/node-v10.16.3-linux-x64 export PATH=$NODE_HOME/bin:$PATH
1.4、重新加载配置文件并验证是否安装成功
source /etc/profile
node -v npm -v
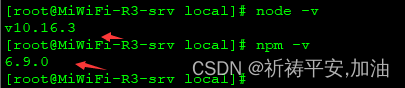
看到上图所示说明node.js配置安装成功!
2.head插件的安装与配置
安装head插件需要下载安装包,但是通过git下载,所以我们首先需要在系统安装git插件,然后才能进行下载安装
2.1、安装git插件
yum install -y git
2.2、验证git插件是否安装成功
git --version
看到如下图所述说明git插件安装成功

2.3、下载并安装head插件
git clone git://github.com/mobz/elasticsearch-head.git cd elasticsearch-head/ npm install
2.4、配置elasticsearch,允许head插件远程访问
cd elasticsearch-6.5.1/config/ vi elasticsearch.yml
在配置文件末尾添加如下内容,重新启动elasticsearch服务
http.cors.enabled: true http.cors.allow-origin: "*"
2.5、启动elasticsearch-head服务
cd elasticsearch-head/ npm run start
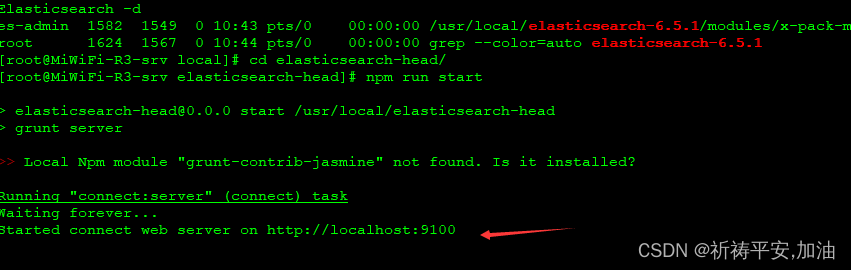
可以看到head插件默认占用9100端口,浏览器输入:http://192.168.31.170:9100/即可显示head插件界面
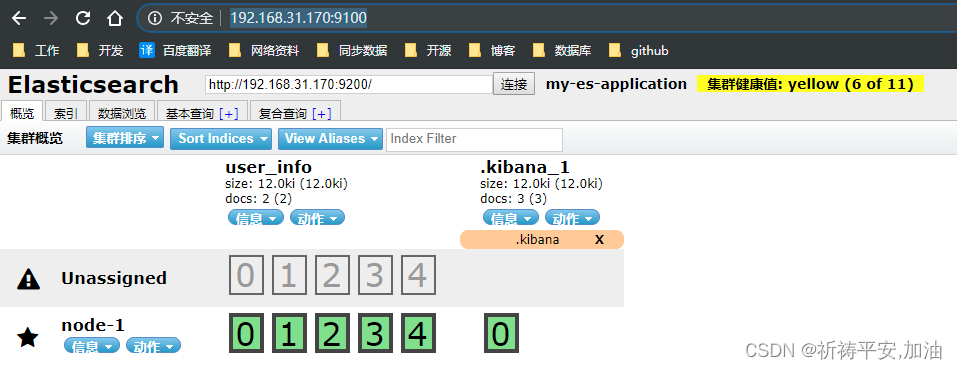
2.6、通过head插件连接elasticsearch服务
输入elasticsearch服务地址,点击连接右边显示黄色信息说明连接成功,至此elasticsearch-head插件安装成功


