PugiXML是什么?
PugiXML 是一个用于解析和操作 XML 文档的 C++ 库。它提供了简单易用的接口,能够高效地加载、解析和修改 XML 数据。PugiXML 的主要特点包括:
-
轻量级和高效性: PugiXML 被设计成一个轻量级的库,具有高效的性能。它采用了一种基于指针的数据结构,能够快速地解析和操作 XML 文档。
-
简单易用的接口: PugiXML 提供了简单易用的 API,使得 XML 文档的操作变得容易和直观。它采用了类似于 DOM(文档对象模型)的数据结构,允许用户通过节点、属性和文本内容来访问和修改 XML 文档的各个部分。
-
跨平台性: PugiXML 被设计成一个跨平台的库,可以在各种操作系统上运行,包括 Windows、Linux 和 macOS 等。
-
开源和免费: PugiXML 是一个开源项目,采用 MIT 许可证发布,可以免费用于商业和非商业项目。
总的来说,PugiXML 是一个简单、高效且易于使用的 C++ XML 解析库,适用于各种类型的应用程序,包括游戏开发、图形界面程序、数据处理等领域。
下载与编译
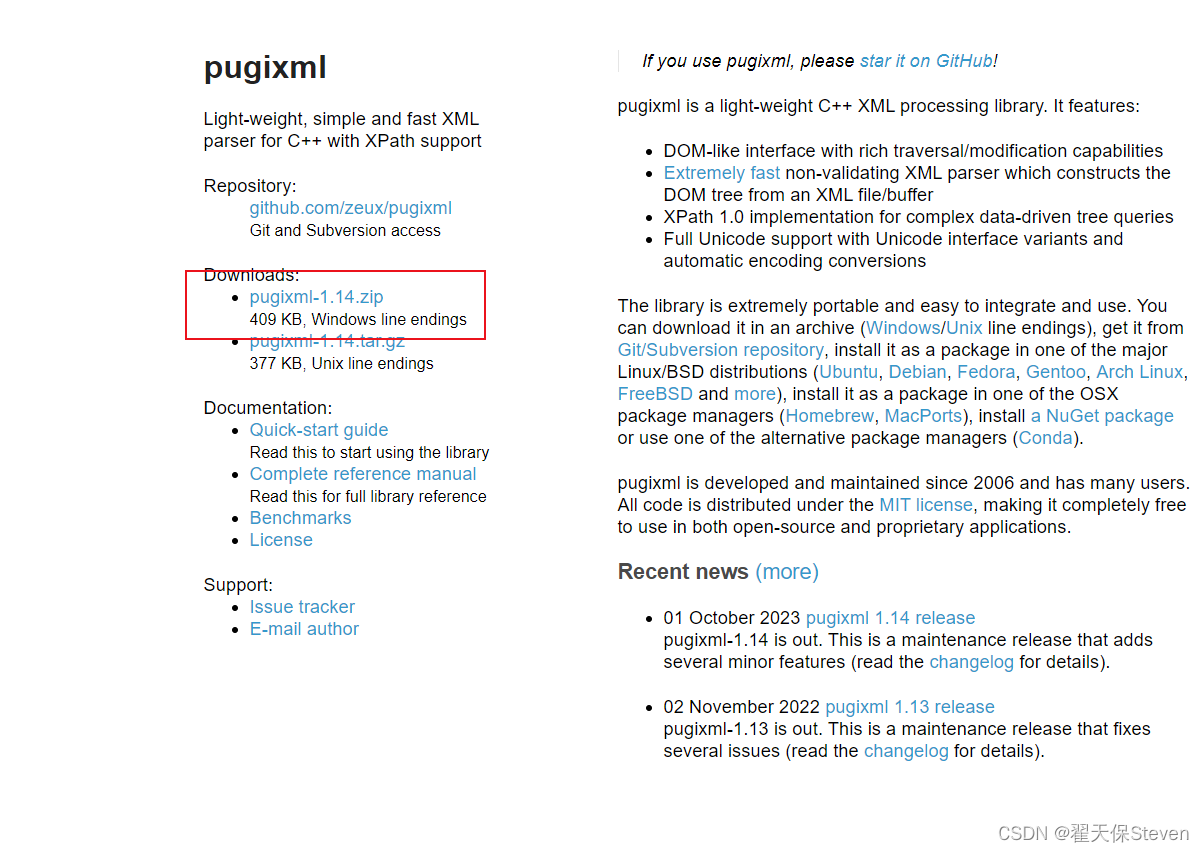
1)网站:https://pugixml.org/,下载PugiXML压缩包。
2)解压后如下图所示,还需要用CMake进行编译。
CMake安装和配置参考:Windows下配置CMake(入门级教程,适合新人收藏学习)_window cmake-CSDN博客

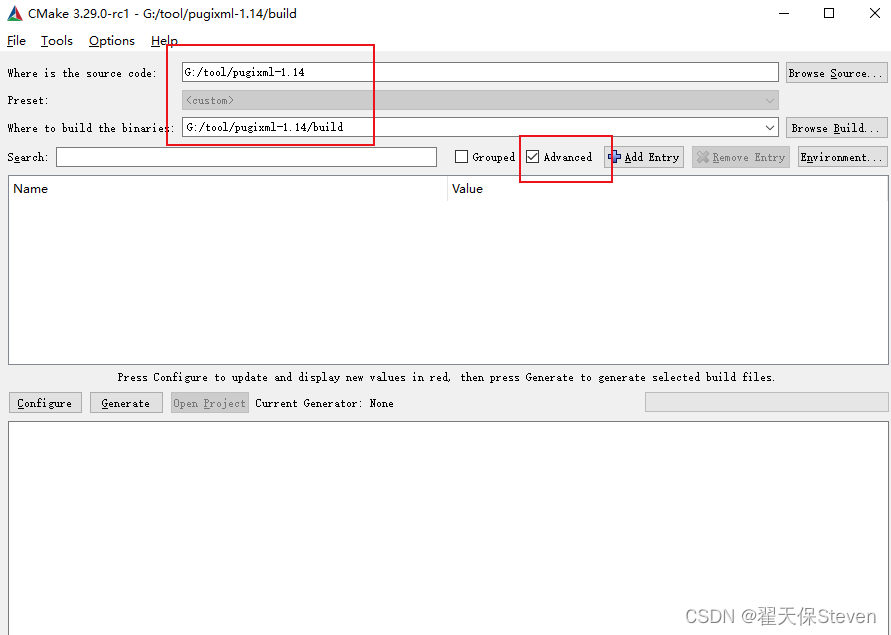
3)安装好CMake后,按Win+R打开运行,输入cmd打开命令运行窗,输入cmake-gui,中间无空格,会出现cmake界面。source输入PugiXML的文件路径,build可以在其路径下创建个build文件夹,如下图所示。勾选advanced。
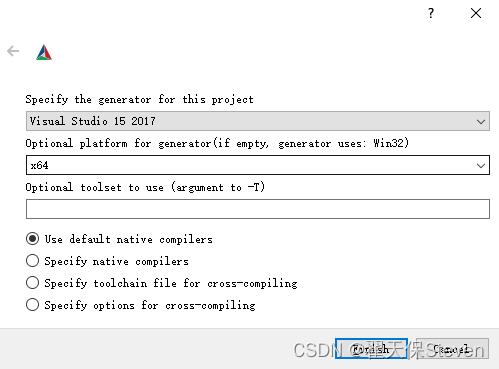
4)点击configure配置,我是vs2017 x64,点确定就开始运行了。
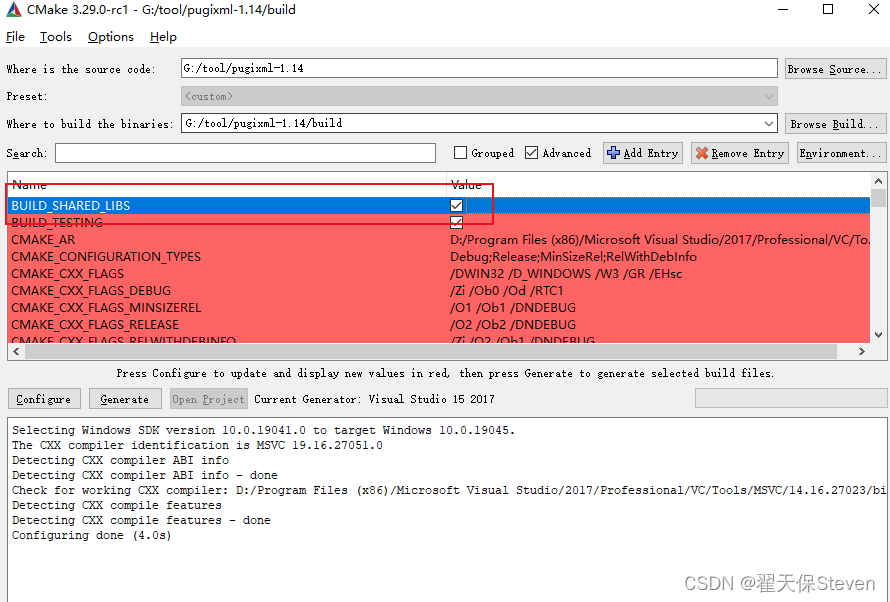
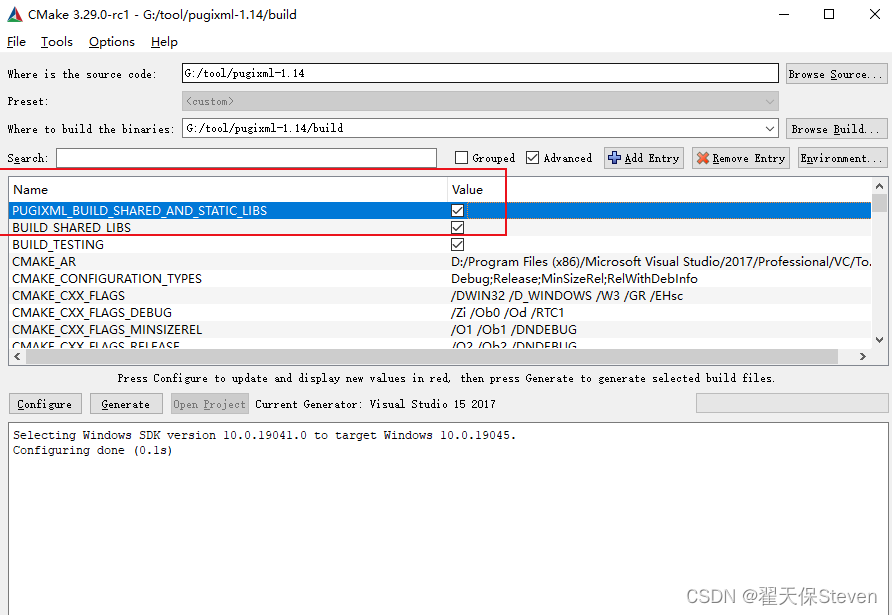
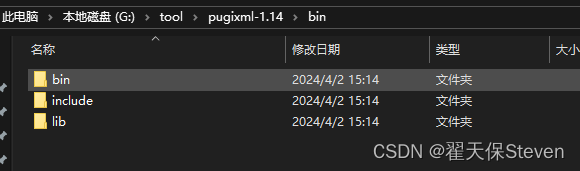
5)configure第一次后应该要进行一次配置。BUILD_SHARED_ILBS打钩,为了后面生成库;CMAKE_INSTALL_PREFIX设置生成库的路径,建议是在其目录下创建个bin文件。

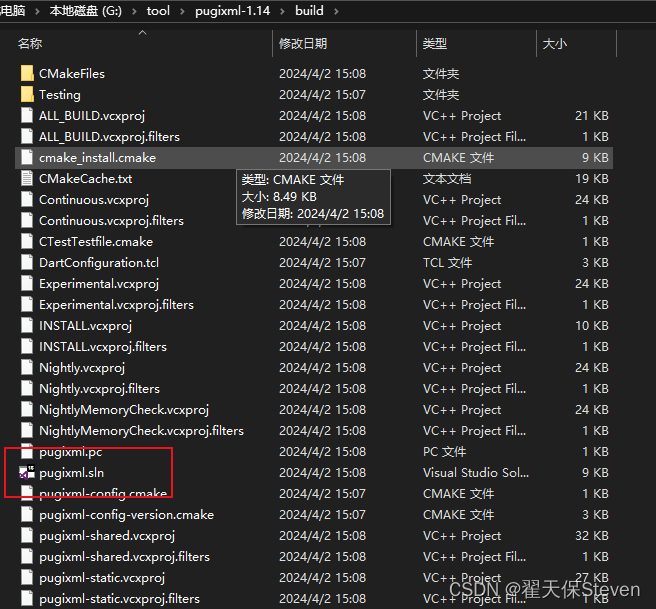
6)然后再次点击configure,只要有红色就再点,等没有红色后点击generate,生成完毕后build文件如下所示。点击sln进入项目。
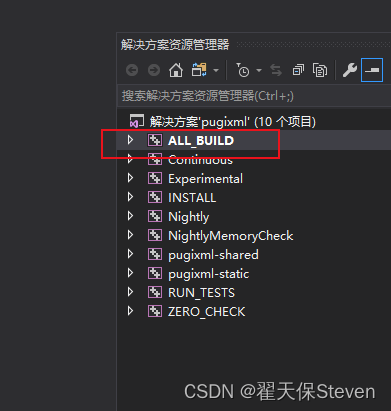
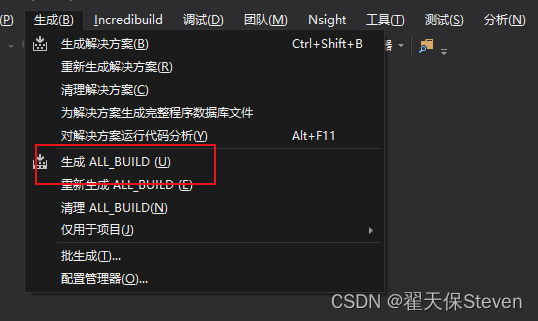
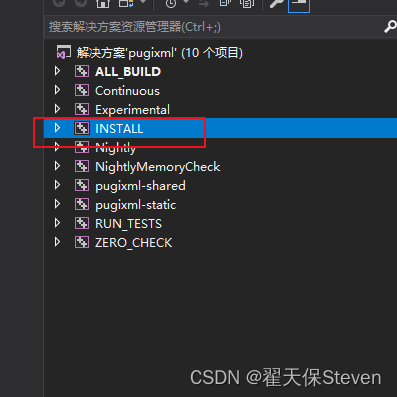
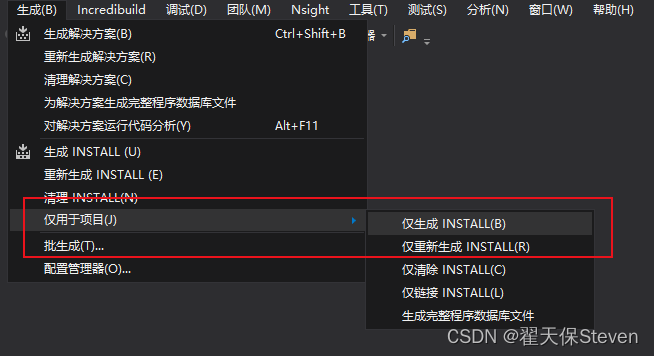
7)进入build文件夹,点击sln项目工程文件;选中ALL_BUILD,选择release/debug,再点击生成ALL_BUILD,此时会进行一段时间的编译操作;再选中INSTALL,点击仅生成,等待结束去看之前设置的bin文件夹,分别是DLL、头文件和LIB。
8)至此,PugiXML库的编译已经结束。
配置与测试
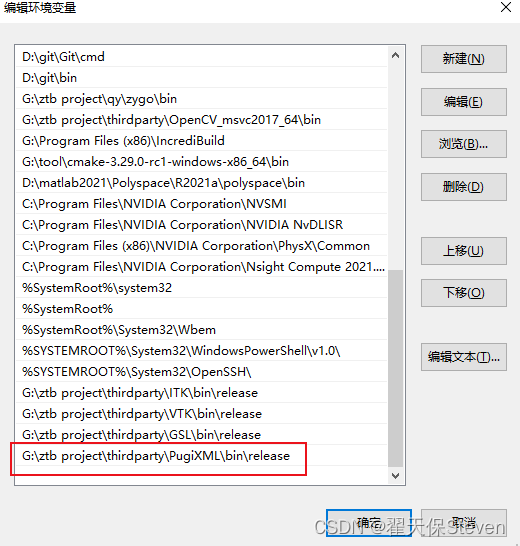
1)编辑环境变量,输入bin文件路径。
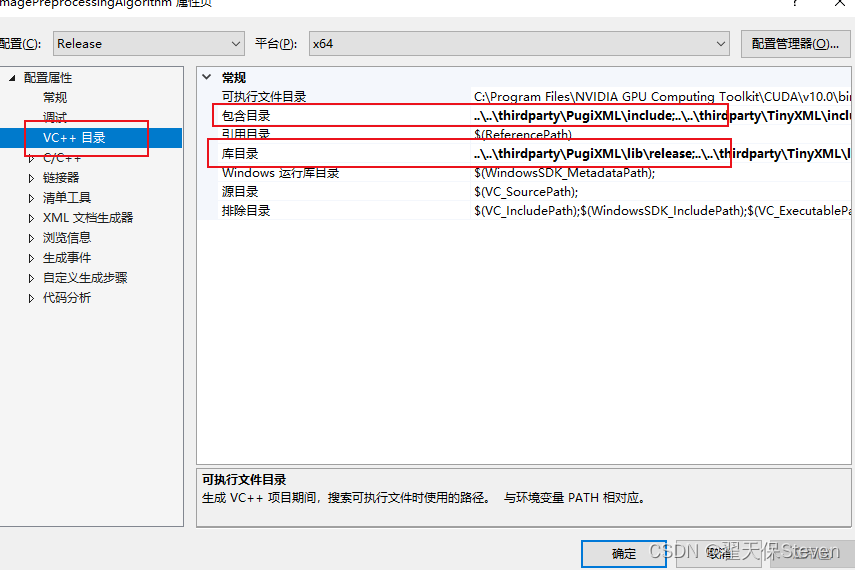
2)创建一个VS项目,可以单项目配置也可以全局配置,我喜欢每个项目独立开,各配置各的,就这样演示了。在项目设置中,包含目录中放include路径,库目录放lib路径。
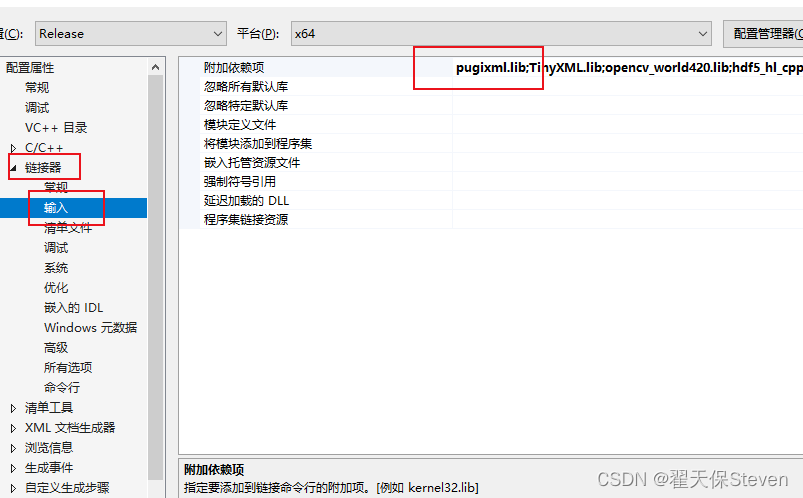
3)链接器-输入-附加依赖项-lib名字。
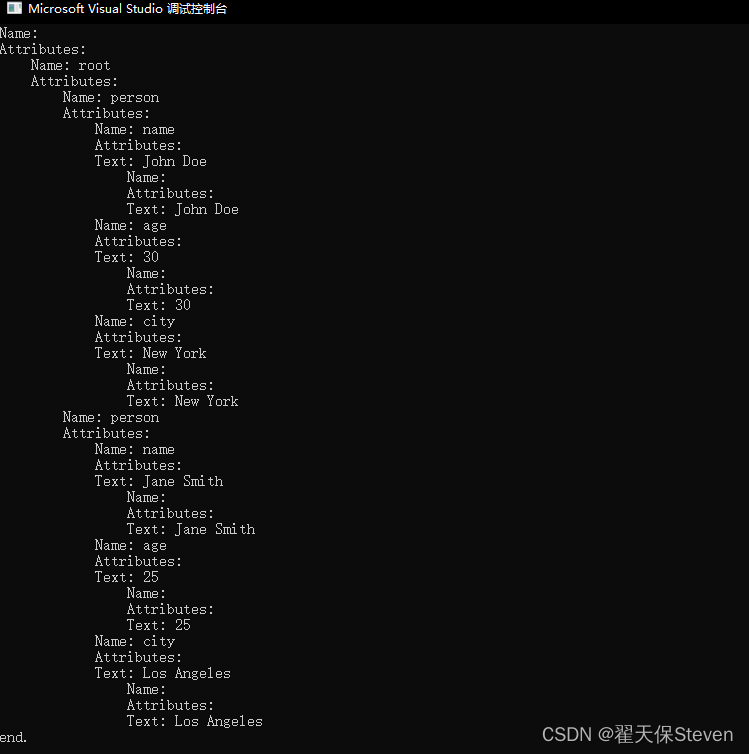
4)接下来,开始测试,输入下方代码,看看VS有没有异常提示,如果没有就直接运行,就ok啦。
#include <algorithm>
#include <chrono>
#include <ctime>
#include <direct.h>
#include <functional>
#include <fstream>
#include <iostream>
#include <io.h>
#include <map>
#include <numeric>
#include <omp.h>
#include <random>
#include <regex>
#include <stdio.h>
#include <sstream>
#include <string>
#include <set>
#include <time.h>
#include <thread>
#include <unordered_map>
#include <unordered_set>
#include <utility>
#include <vector>
#include <Windows.h>
#include <pugixml.hpp>

using namespace std;

// Structure to hold node data
struct NodeData {
	std::string name;
	std::unordered_map<std::string, std::string> attributes;
	std::vector<NodeData> children;
	std::string text;

	// 根据节点名获取子节点
	NodeData* getChildNode(const std::string& nodeName)
	{
		for (auto& child : children)
		{
			if (child.name == nodeName)
			{
				return &child;
			}
		}
		return nullptr; // 未找到匹配的子节点
	}

};

// 递归函数,将XML节点转换为NodeData结构体
NodeData parseNode(const pugi::xml_node& xmlNode)
{
	NodeData nodeData;

	// 提取节点名称
	nodeData.name = xmlNode.name();

	// 提取节点属性
	for (const auto& attr : xmlNode.attributes())
	{
		nodeData.attributes[attr.name()] = attr.value();
	}

	// 提取节点文本
	nodeData.text = xmlNode.text().get();

	// 递归处理子节点
	for (const auto& child : xmlNode.children())
	{
		nodeData.children.push_back(parseNode(child));
	}

	return nodeData;
}


// 显示
void displayNodeData(const NodeData& node, int depth = 0)
{
	// Display current node
	cout << string(depth * 4, ' ') << "Name: " << node.name << endl;
	cout << string(depth * 4, ' ') << "Attributes:" << endl;
	for (const auto& attr : node.attributes)
	{
		cout << string(depth * 4, ' ') << "  " << attr.first << " : " << attr.second << endl;
	}
	if (!node.text.empty())
	{
		cout << string(depth * 4, ' ') << "Text: " << node.text << endl;
	}

	// Display child nodes recursively
	for (const auto& child : node.children)
	{
		displayNodeData(child, depth + 1);
	}
}

int main()
{
	pugi::xml_document doc;
	pugi::xml_parse_result result = doc.load_file("test.xml");
	if (!result)
	{
		std::cerr << "Error: " << result.description() << std::endl;
		return 1;
	}
	// 将根节点转换为结构体
	NodeData rootNode = parseNode(doc.root());

	// 显示
	displayNodeData(rootNode);

	cout << "end." << endl;
	return 0;
}
<?xml version="1.0" encoding="UTF-8"?>
<root>
<person>
<name>John Doe</name>
<age>30</age>
<city>New York</city>
</person>
<person>
<name>Jane Smith</name>
<age>25</age>
<city>Los Angeles</city>
</person>
</root>
已编译好的库
百度云地址:
链接:https://pan.baidu.com/s/14i8kCZqig7ki77d8PHLUjg
提取码:cz0q
PugiXML是我用着比较舒服的库,特此推荐给大家,TinyXML也不错,可惜不支持utf-16。
TinyXML教程:
Windows下编译TinyXML(XML文件解析)-CSDN博客
以上就是“Windows下用CMake编译PugiXML及配置测试”的过程。
如果文章帮助到你了,可以点个赞让我知道,我会很快乐~加油!


