最近在一个uni-app项目中遇到一个需求,在登录页面成功登录以后需要判断身份,不同的身份的进入不同的tabBar页面,但是在uni-app项目中pages.json中的tabBar的list数组只有一个,且不能写成动态的,那如何实现这个需求呢?答案是需要我们自定义tabBar。
目录
1、我们确定在 pages.json文件中的pages数组中的第一个页面就是进入程序时展示的第一个页面,那这个页面肯定就是我们的登录页面了。
2、将pages.json中的tabBar的list设置为空数组,即不再使用默认系统自带的tabBar组件。
4、在main.js文件中将自定义的tabBar定义为全局组件。
5、在每一个原本将要设置为tabBar的子页面添加我们自定义的tabBar组件。
1、我们确定在 pages.json文件中的pages数组中的第一个页面就是进入程序时展示的第一个页面,那这个页面肯定就是我们的登录页面了。
2、将pages.json中的tabBar的list设置为空数组,即不再使用默认系统自带的tabBar组件。
3、创建tabBar.vue组件,组件内的代码内容如下。
<template>
	<view class="tab-bar">
		<view v-for="(item, index) in list" :key="index" class="tab-bar-item" @click="switchTab(item, index)">
			<image class="tab_img" :src="currentIndex == index ? item.selectedIconPath : item.iconPath"></image>
			<view class="tab_text" :style="{ color: currentIndex == index ? selectedColor : color }">{{ item.text }}</view>
		</view>
	</view>
</template>

<script>
	export default {
		props: {
			selectedIndex: {
				// 当前选中的tab index
				default: 0,
			},
		},
		data() {
			return {
				color: '#666666',
				selectedColor: '#00BAB2',
				list: [],
				currentIndex: 0,
			};
		},
		created() {
			this.currentIndex = this.selectedIndex;

			var _this = this;

			if (uni.getStorageSync('system') == 'diagnosis') {
				//故障诊断系统
				_this.list = [
					{
						pagePath: '/pages/terbineList/index',
						iconPath: '/static/images/tabbar/terbine.png',
						selectedIconPath: '/static/images/tabbar/terbine_select.png',
						// "text": "风机列表"
					},
					{
						pagePath: '/pages/warningList/index',
						iconPath: '/static/images/tabbar/warning.png',
						selectedIconPath: '/static/images/tabbar/warning_select.png',
						// "text": "预警列表"
					},
					{
						pagePath: '/pages/mine/index',
						iconPath: '/static/images/tabbar/mine.png',
						selectedIconPath: '/static/images/tabbar/mine_select.png',
						// "text": "我的"
					},
				];
			} else {
				//能源利用与分布系统
				_this.list = [
					{},
					{},
					{},
					{
						pagePath: '/pages/mine/index',
						iconPath: '/static/images/tabbar/mine.png',
						selectedIconPath: '/static/images/tabbar/mine_select.png',
						// "text": "我的"
					},
				];
			}
		},
		methods: {
			switchTab(item, index) {
				this.currentIndex = index;
				let url = item.pagePath;
				uni.redirectTo({ url: url });
			},
		},
	};
</script>

<style lang="scss">
	.tab-bar {
		position: fixed;
		bottom: 0;
		left: 0;
		right: 0;
		height: 100rpx;
		background: #05112f;
		display: flex;
		justify-content: center;
		align-items: center;
		padding-bottom: env(safe-area-inset-bottom); // 适配iphoneX的底部

		.tab-bar-item {
			flex: 1;
			text-align: center;
			display: flex;
			justify-content: center;
			align-items: center;
			flex-direction: column;
			.tab_img {
				width: 37rpx;
				height: 41rpx;
			}
			.tab_text {
				font-size: 20rpx;
				margin-top: 9rpx;
			}
		}
	}
</style>
这里需要注意:里面的图片路径要写成绝对路径,不然打包的时候如果是在该项目下的页面会出现层级问题,显示不出来图片
4、在main.js文件中将自定义的tabBar定义为全局组件。
import tabBar from "components/tabBar/tabBar.vue"
Vue.component('tabBar',tabBar)5、在每一个原本将要设置为tabBar的子页面添加我们自定义的tabBar组件。
//就在不同的tabbar页面中添加这一行    index 根据在tabbar中List集合中进行设置
//第一个页面
<tabBar selectedIndex = 0></tabBar>

//第二个页面
<tabBar selectedIndex = 1></tabBar>
6、创建一个新的页面来进行对不同系统进行操作
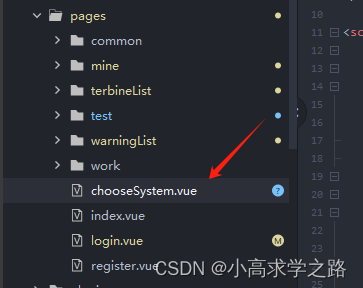
通过uni.setStorageSync('system', 'diagnosis'); 来判断进入的系统
<template>
	<view>
		<uni-section title="请选择您要进入的系统" titleColor="#ffffff" type="line" class="titleStyle" />
		<view class="button-group">
			<button type="primary" plain="true" @click="handleButtonClick(1)">{{ energySystem }}</button>
			<button type="primary" plain="true" @click="handleButtonClick(2)">{{ diagnosisSystem }}</button>
		</view>
	</view>
</template>

<script>
	export default {
		data() {
			return {
				energySystem: '故障诊断系统',
				diagnosisSystem: '能源利用与分布系统',
			};
		},
		methods: {
			handleButtonClick(systemId) {
				if (systemId === 1) {
					// 进入故障诊断系统
					uni.setStorageSync('system', 'diagnosis');
					uni.navigateTo({
						url: '/pages/terbineList/index',
					});
				} else if (systemId === 2) {
					// 进入能源利用与分布系统
					uni.setStorageSync('system', 'energy');
					uni.navigateTo({
						url: '/pages/mine/index',
					});
				}
			},
		},
	};
</script>

<style>
	.titleStyle {
		font-size: 20rpx;
	}
	.button-group {
		flex-direction: column;
		align-items: center;
		width: 60%;
		height: auto;
		margin-left: 150rpx;
	}
	button {
		margin: 200rpx auto;
	}
</style>
7.设置完后需要在每个tabbar页面中配置css
一定要用这样的格式
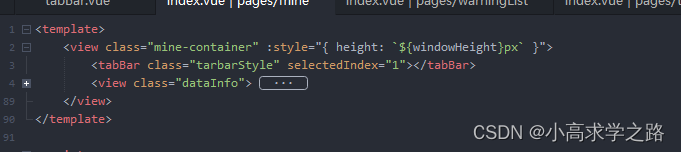
.tarbarStyle {  //tarbarStyle
		position: fixed;
		bottom: 0;
		left: 0;
		right: 0;
		z-index: 99;
	}
	.dataInfo { //tabbar上面的信息展示
		margin-bottom: 50px; /* 根据 tabBar 的高度进行调整 */
	}


