reference :https://github.com/yyuu/pyenv-installer
1.首先安装pyenv
这里推荐bash安装方式,使用brew总会提示各种权限,link。
url -L https://raw.githubusercontent.com/yyuu/pyenv-installer/master/bin/pyenv-installer | bash
<!--?xml version="1.0" encoding="UTF-8" standalone="no"?-->
配置mac环境变
# Load pyenv automatically by adding

       # the following to ~/.bash_profile:


   export PATH="/Users/admin/.pyenv/bin:$PATH"

        eval "$(pyenv init -)
更新升级pyenv
pyenv update
pycharm指定python 版本
pyenv virtualenv 3.5.2 app
- 创建之后的目录结构为
☁  .pyenv  pwd
/Users/jerry/.pyenv
☁  .pyenv  tree -d -L 4
.
├── cache
├── plugins
│   └── pyenv-virtualenv
│       ├── bin
│       ├── etc
│       │   └── pyenv.d
│       ├── shims
│       └── test
│           ├── stubs
│           └── tmp
├── shims
└── versions
    ├── 3.5.1
    │   ├── bin
    │   ├── envs
    │   │   ├── my-virtualenv-3.5.1
    │   │   └── new-env-3.5.1
    │   ├── include
    │   │   └── python3.5m
    │   ├── lib
    │   │   ├── pkgconfig
    │   │   └── python3.5
    │   └── share
    │       └── man
    ├── my-virtualenv-3.5.1 -> /Users/jerry/.pyenv/versions/3.5.1/envs/my-virtualenv-3.5.1
    └── new-env-3.5.1 -> /Users/jerry/.pyenv/versions/3.5.1/envs/new-env-3.5.1

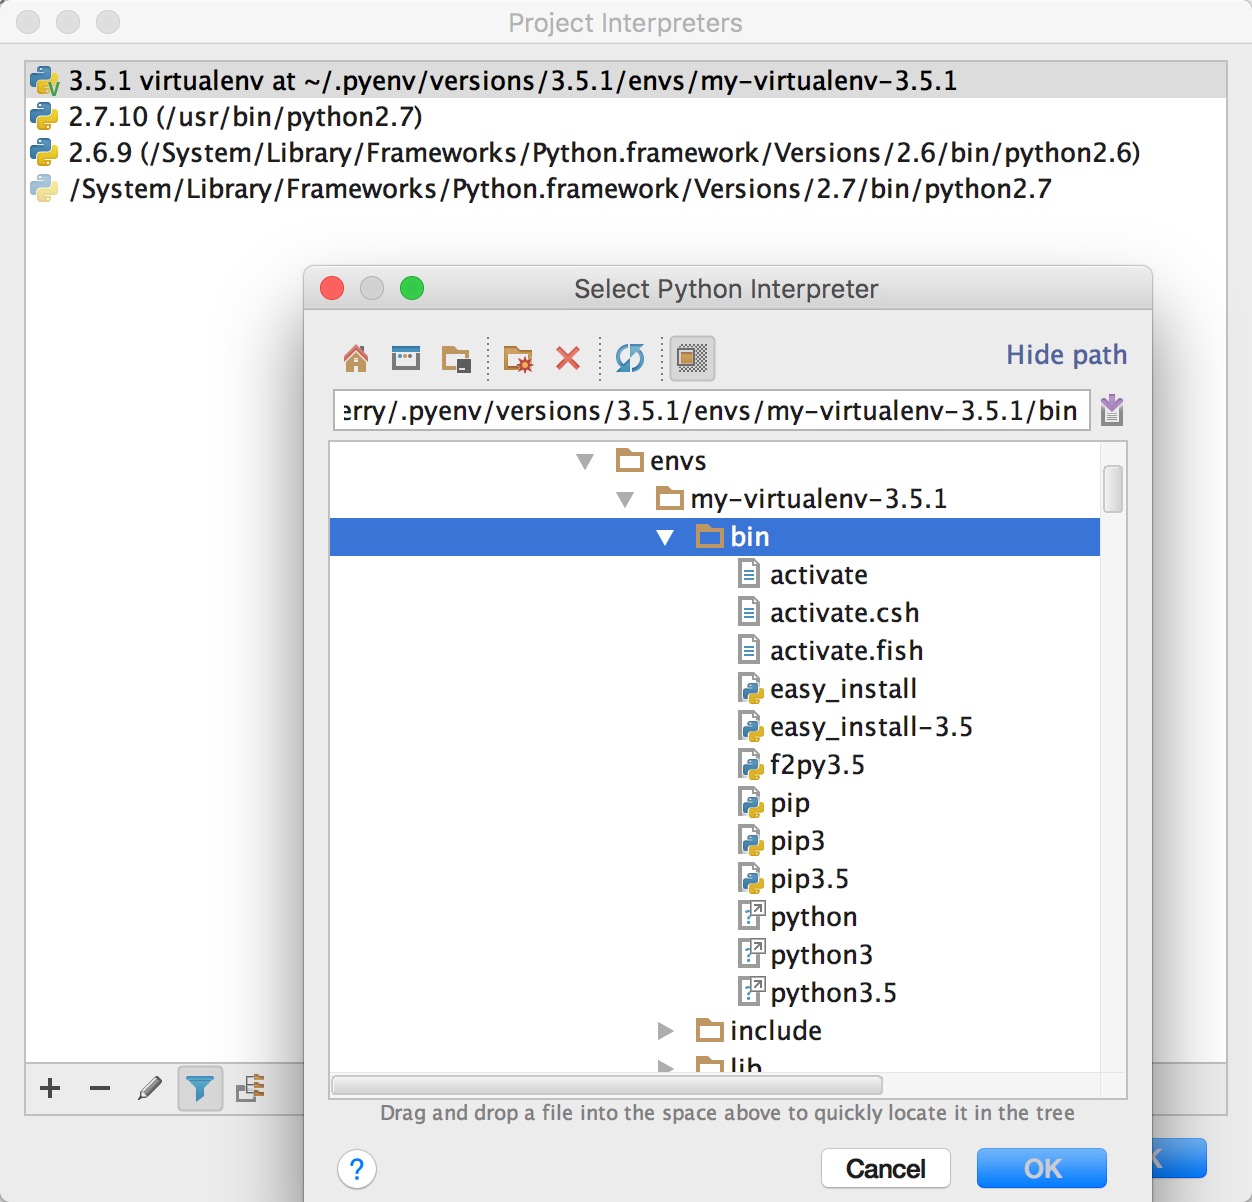
26 directories- 在PyCharm中为工程选择Project Interpreter
PyCharm->Perferences->Project->Project Interperter
在弹出窗口中,点左下角的+号,add local,然后输入路径 /Users/jerry/.pyenv/versions/3.5.1/envs/new-env-3.5.1/bin/python -> 点击OK即为工程设置好相应环境的python解释器了。


