> # **源码获取:我的博客资源页面可以下载!!!!**
# 项目名称
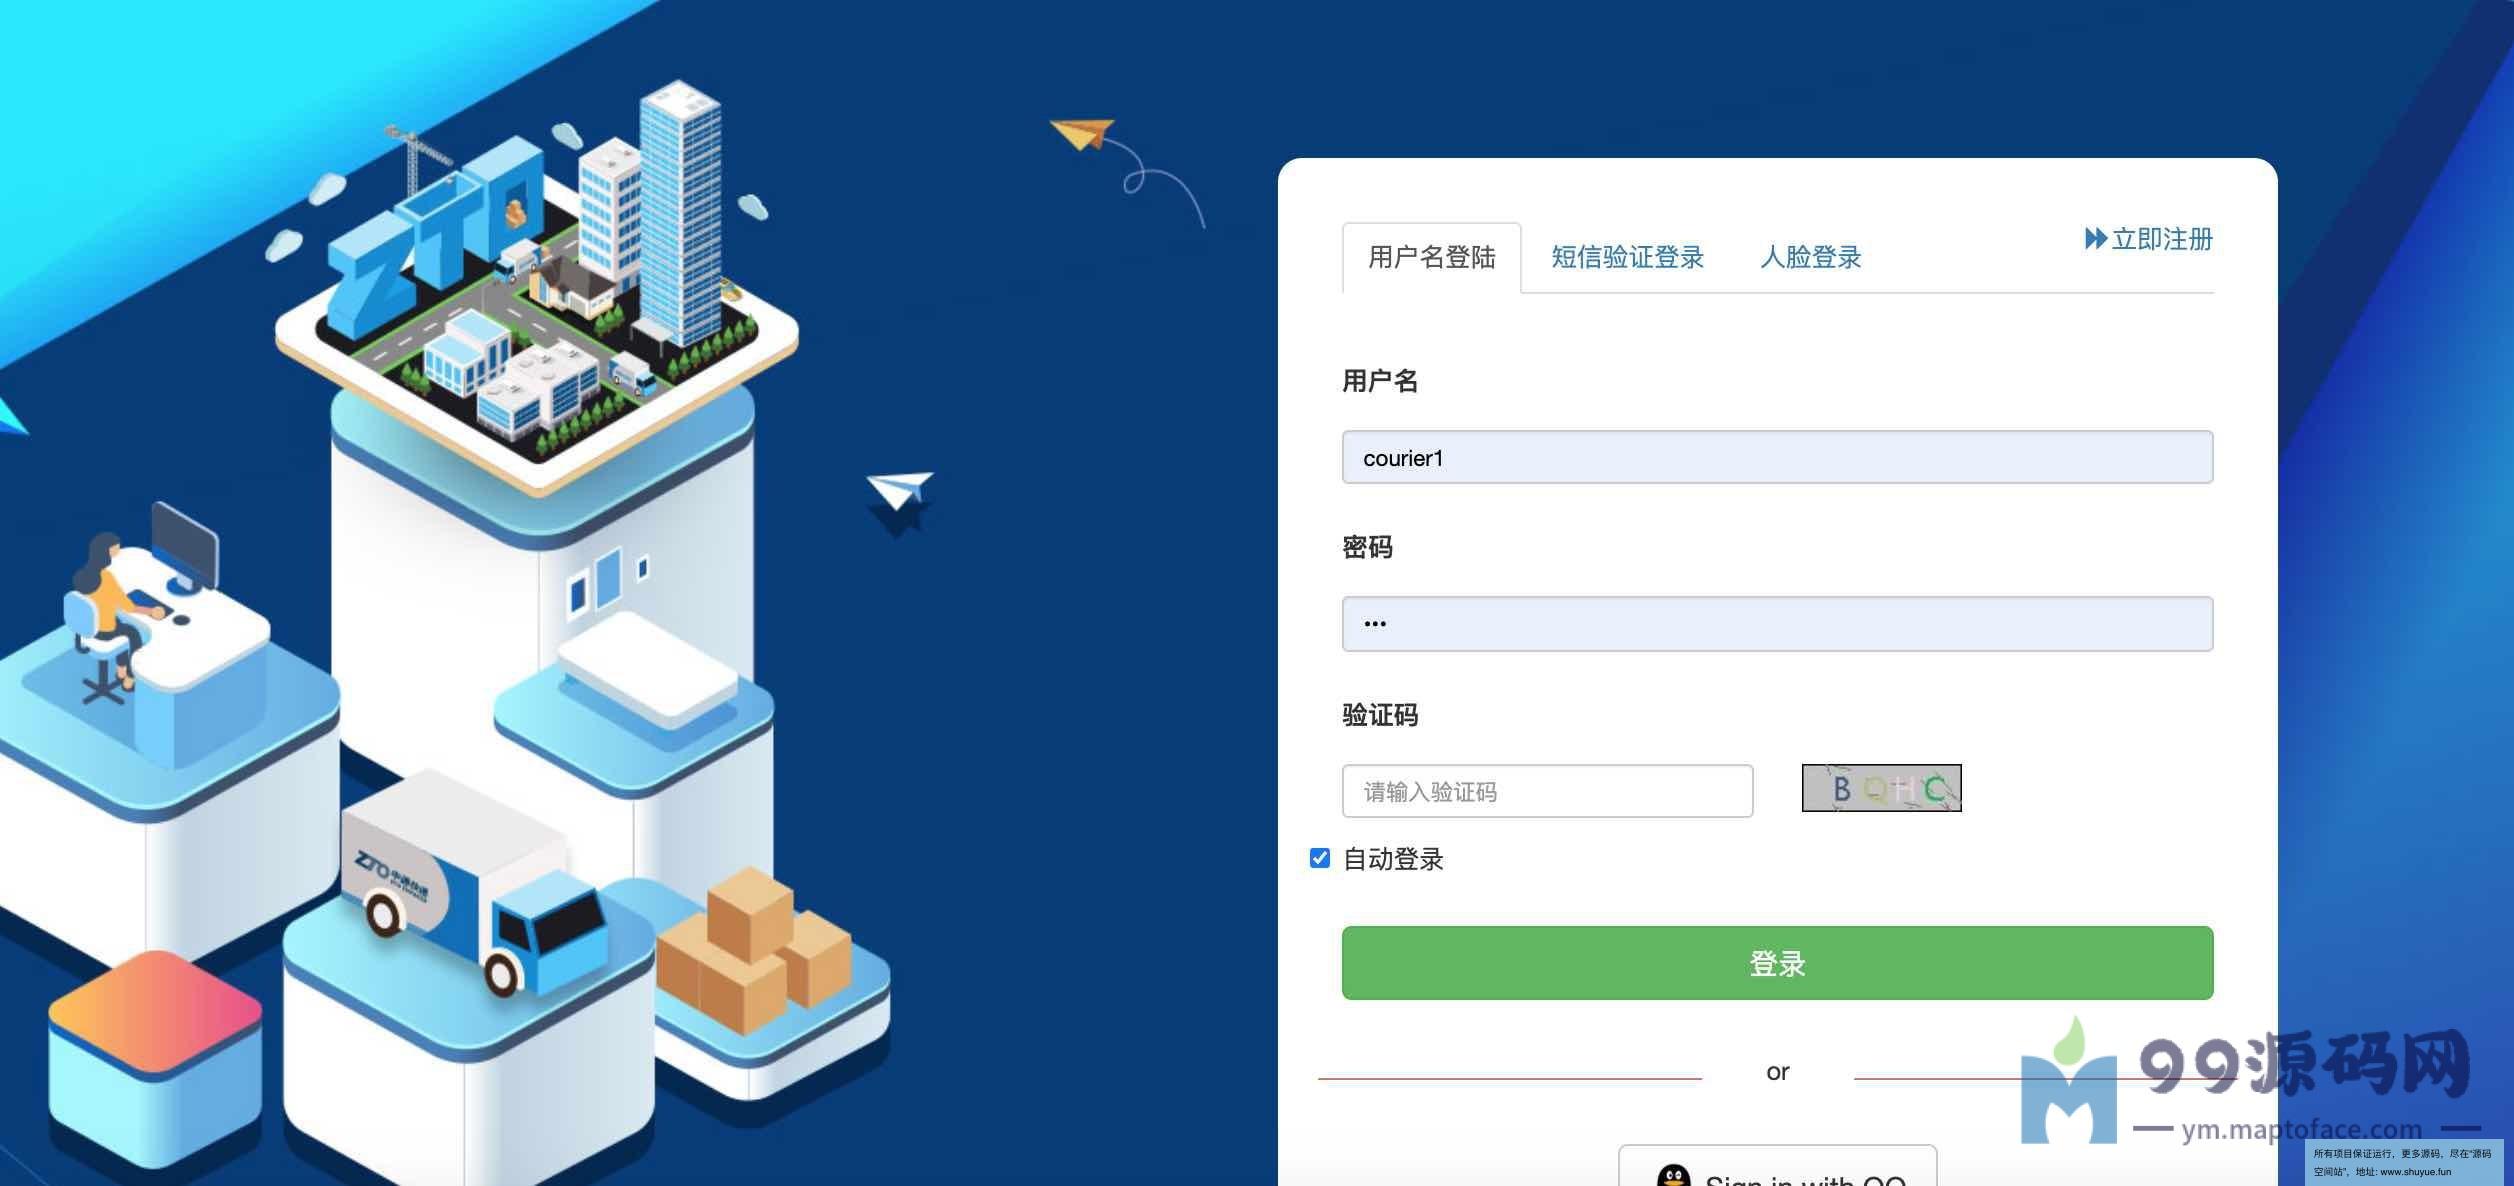
springBoot redis开发的Java快递代拿系统(含人脸识别,验证码登录)
# 系统介绍
快递代拿系统
> 该项目使用当前最为流行的 SpringBoot 框架,相关技术栈全面更新!是您深入学习 SpringBoot 开发的最佳实践!
相关技术栈
1. **前端:** Thymeleaf、Bootstrap、Ajax、JQuery
2. **开发环境:** IDEA 、SpringBoot 2.1、Maven
3. **数据库与缓存**:MySQL 5.7、Redis、Guava Cache
4. **三方服务**:腾讯云短信服务、支付宝支付(沙箱)、百度人脸识别
5. **安全框架**:Spring Security
6. **其他技术**:API 接口限速、二级缓存
主要功能
1. **登陆与注册:** 用户名密码、短信验证码、人脸识别登录、QQ登录
2. **权限:** 普通用户、配送员、后台管理员
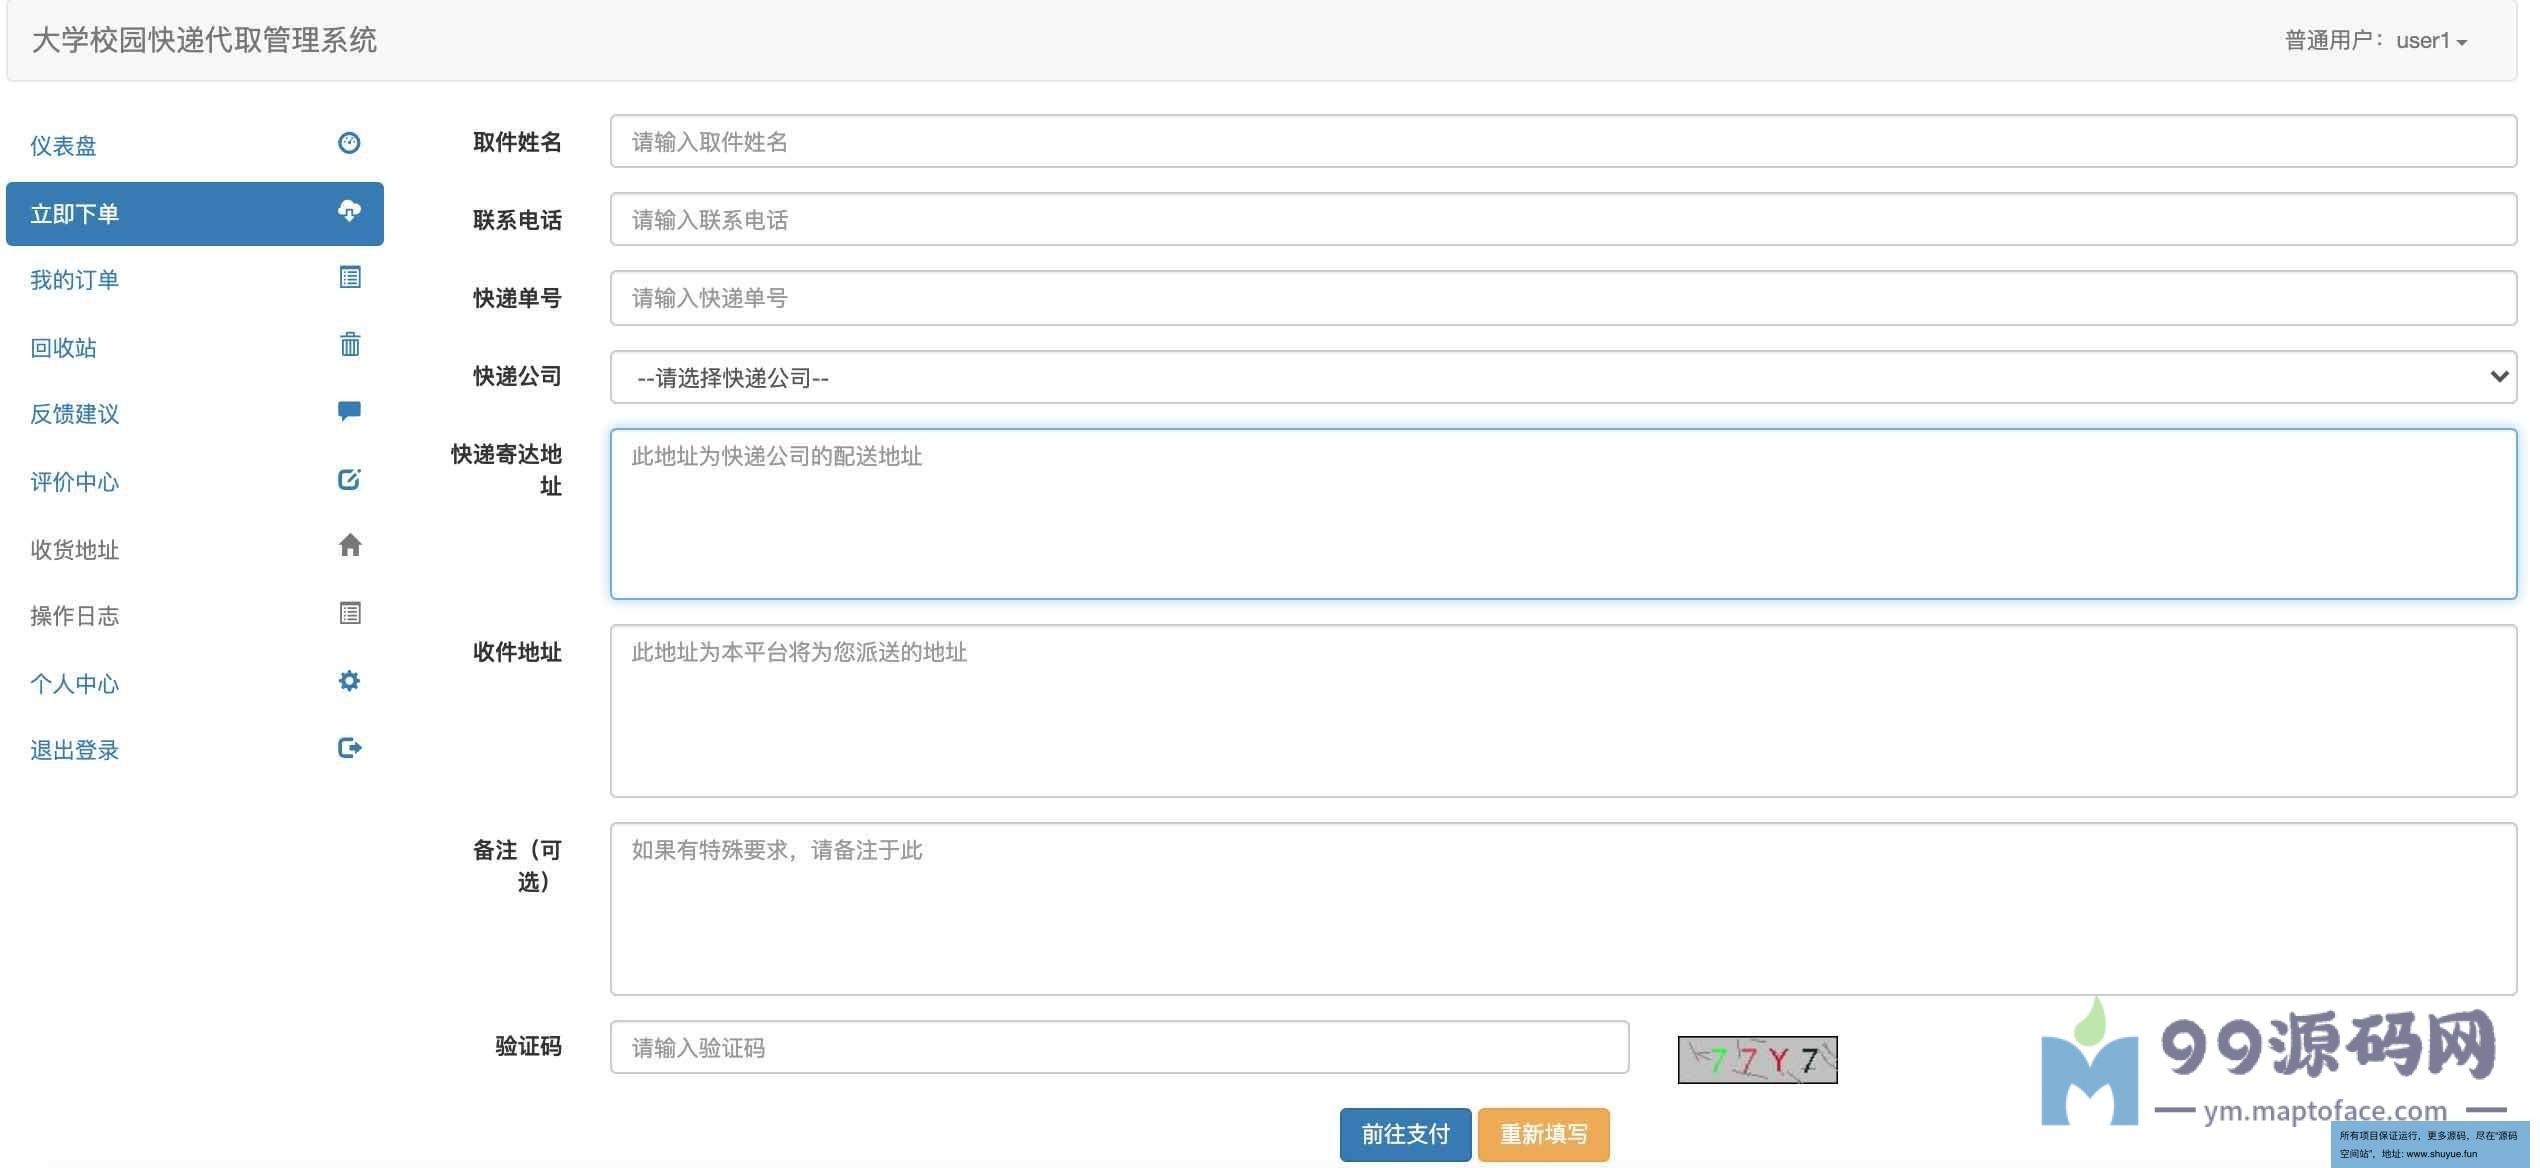
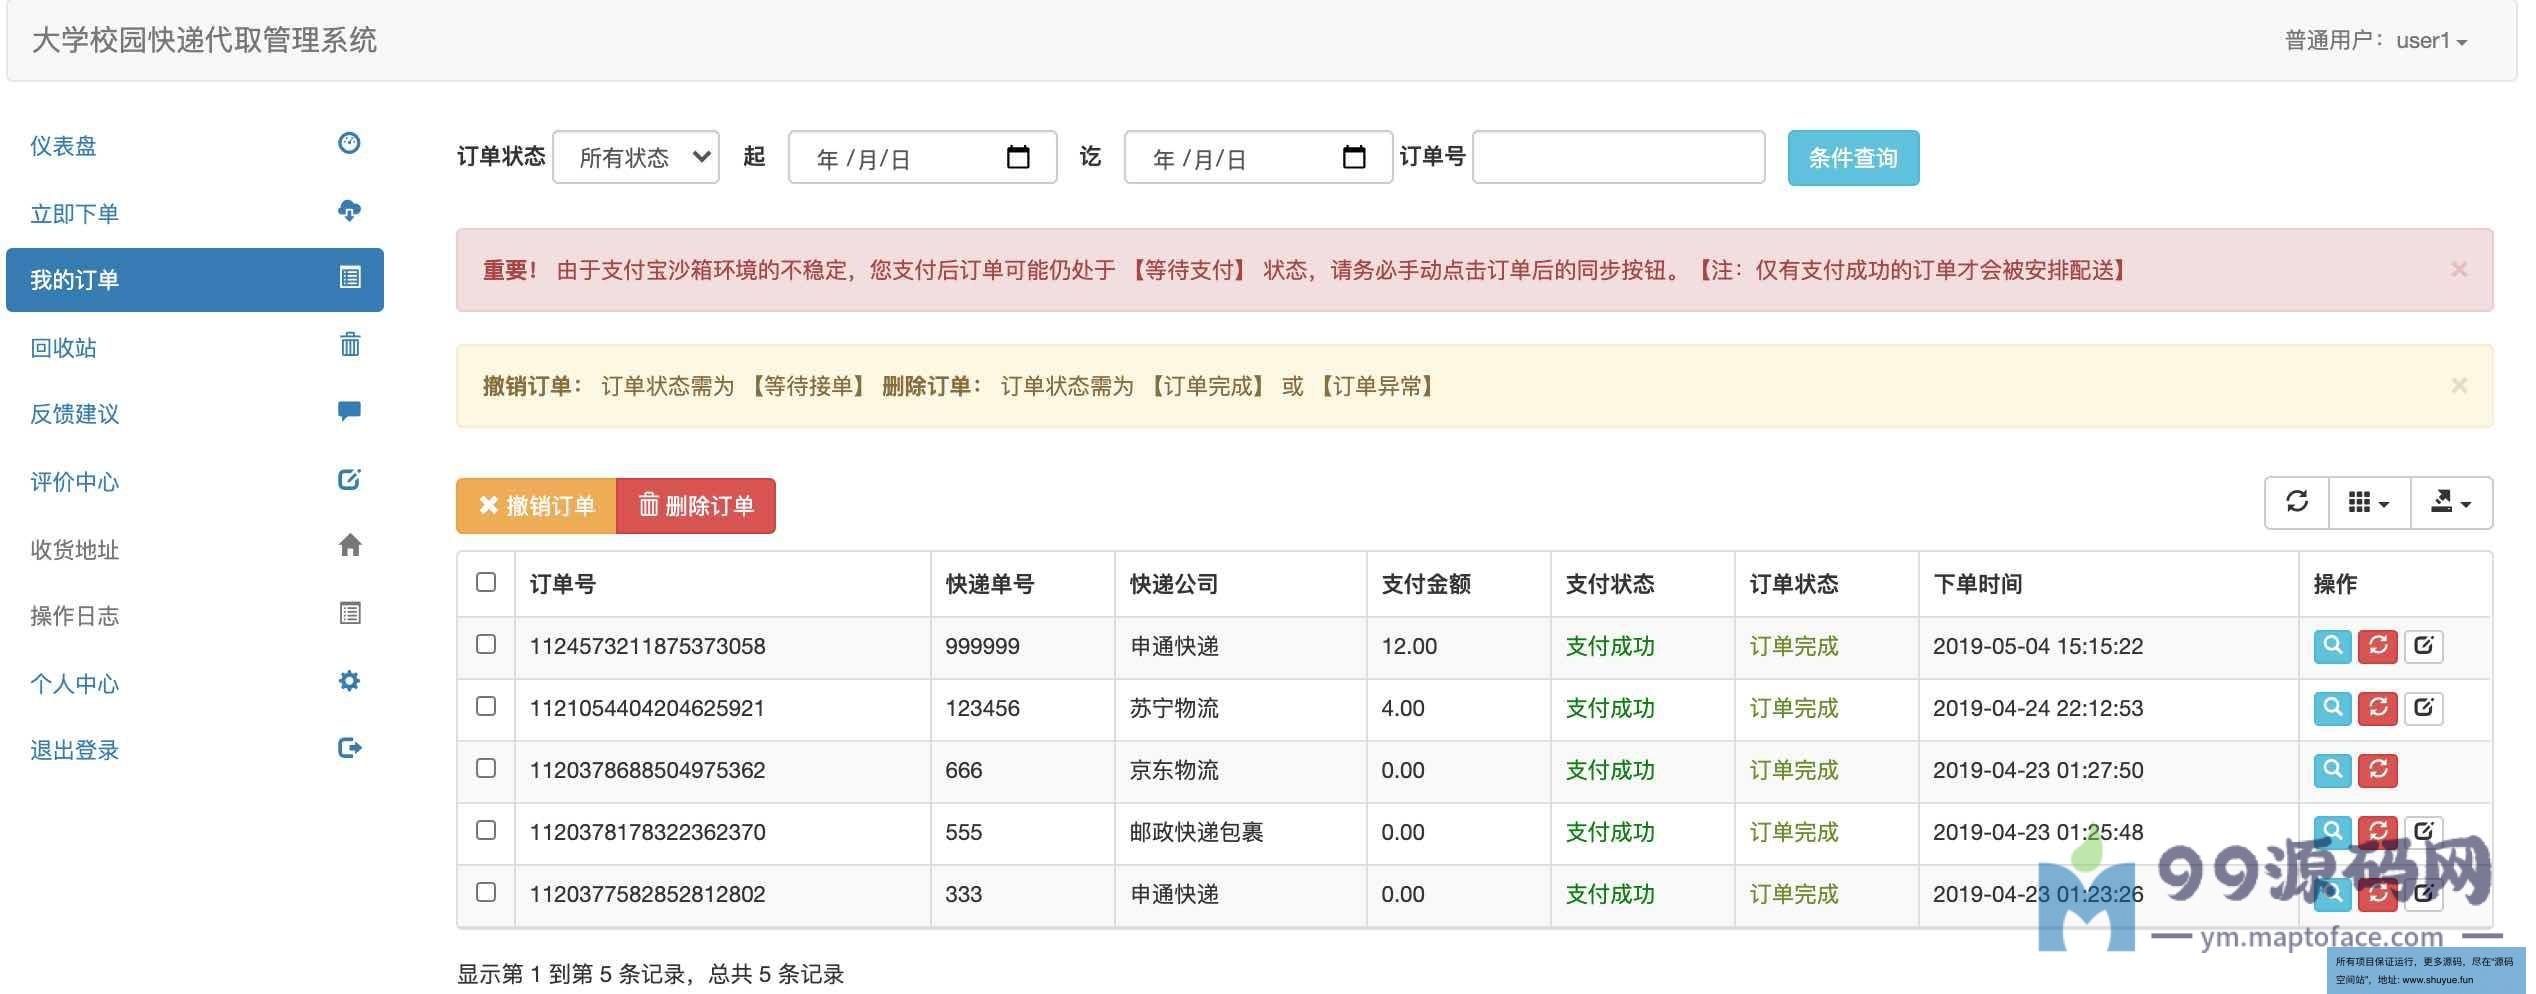
3. **普通用户**:下单支付、订单查询、意见反馈、订单评价
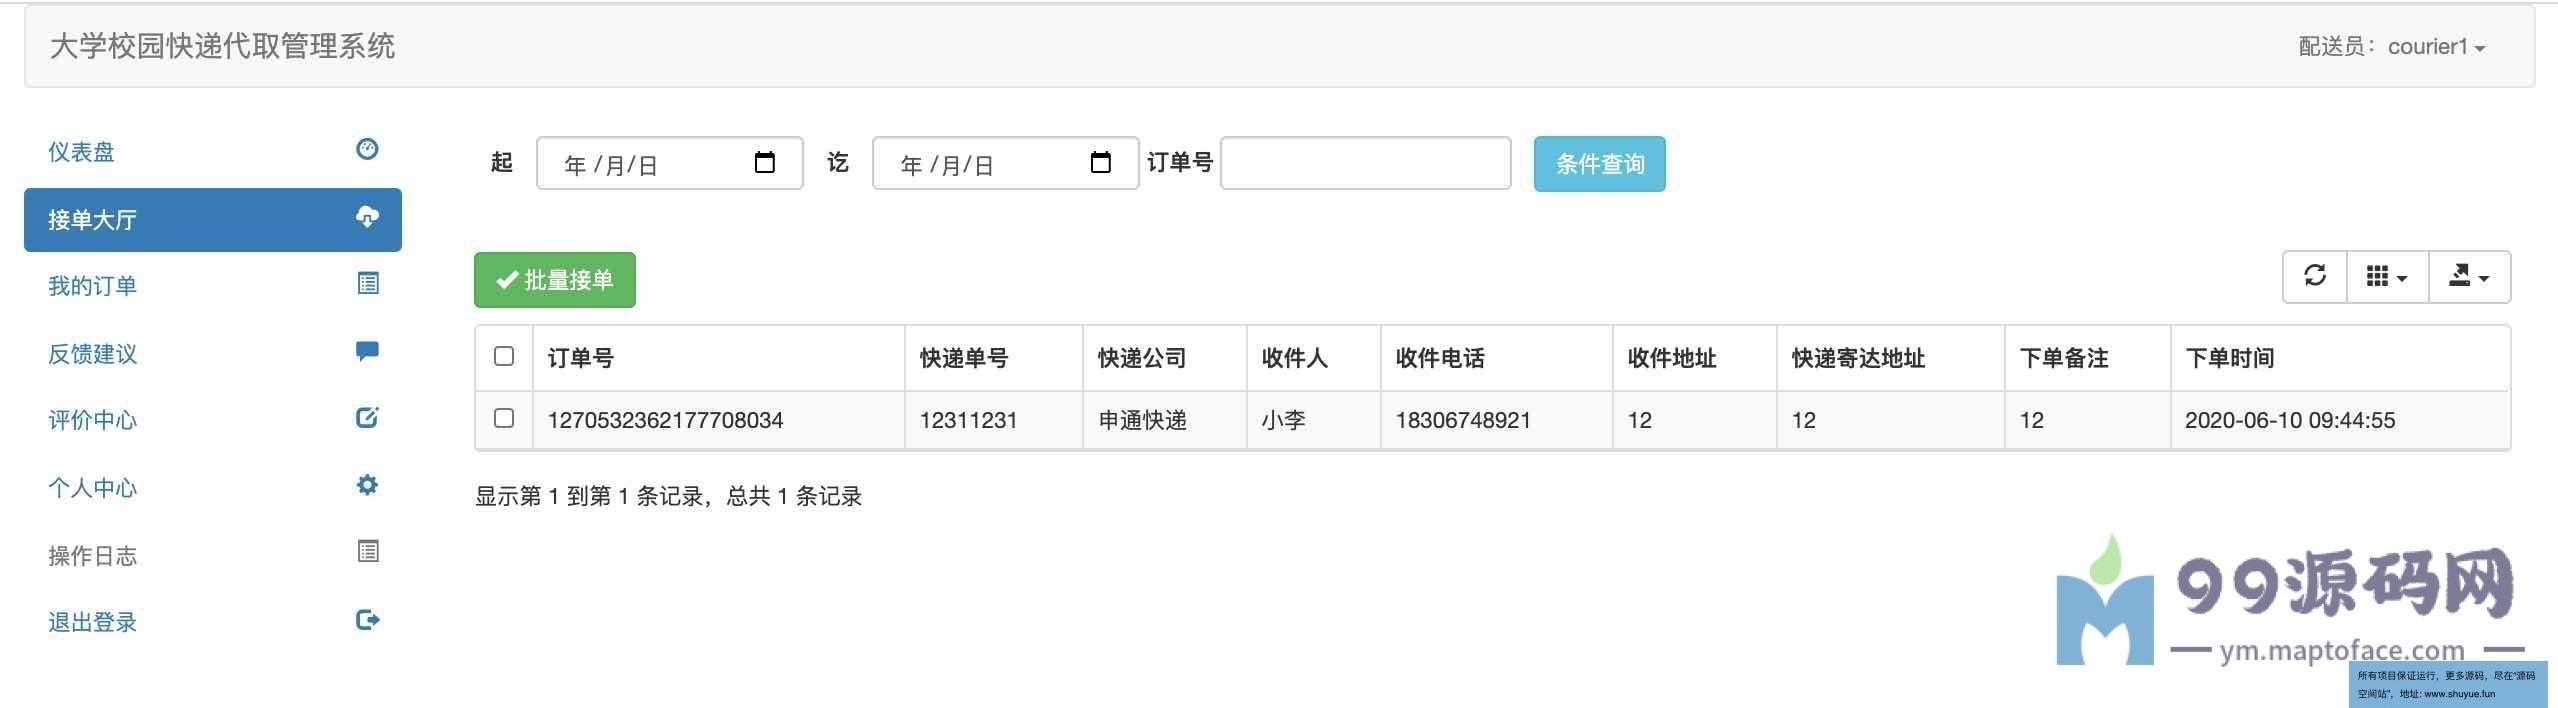
4. **配送员**:接单、订单管理、意见反馈、订单评价
5. **系统管理员**:用户管理、订单管理、反馈管理
管理员账号:admin1 密码:123
普通用户: user1 密码:123
配送员: courier1 密码:123
项目运行
#### 必读
为最大限度降低大家学习门槛,公开提供了**支付宝支付**和**QQ登录**的配置信息,也就说以下配置流程中你可以略去支付宝配置和QQ登录配置,使用默认配置即可。
百度人脸登录和短信登录由于涉及隐私和费用问题,不予公开,需要大家自己按照流程去申请。
数据库配置【必须】
1. 本地安装 MySQL 环境,所需版本为 `5.7+`
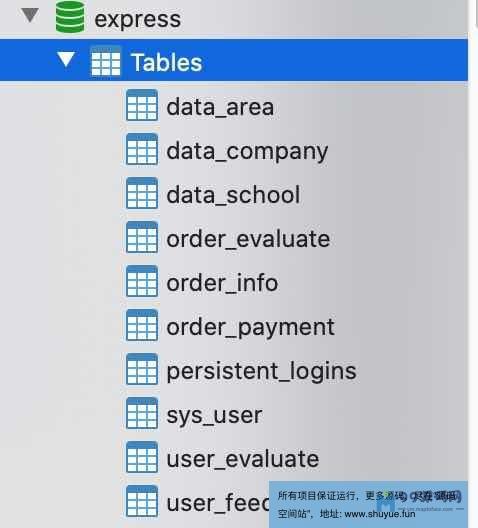
2. 创建数据库名为 `express`,数据库编码采用 `utf8mb4`,排序规则为 utf8mb4_general_ci
```
CREATE DATABASE IF NOT EXISTS express default charset utf8mb4 COLLATE utf8mb4_general_ci;
```
3. 导入项目中 `/src/main/resources/db/express.sql` 到 `express`库
4. 编辑项目中 `application.yml` 文件,修改数据库连接信息
```yaml
datasource:
driver-class-name: com.mysql.cj.jdbc.Driver # MySQL驱动,无需修改
# 数据库连接URL,以下为连接本地的express库的url
url: jdbc:mysql://localhost:3306/express?useUnicode=true&characterEncoding=utf-8&useSSL=true&serverTimezone=GMT%2B8
username: # 数据库连接名
password: # 数据库连接密码
```
#### Redis配置【必须】
1. 本地安装 Redis 环境,如果你使用的是 Windows 平台,请[点击这里]()下载 Windows 版本。
2. 修改 `application.yml`文件,修改Redis连接信息
```yaml
redis:
host: 127.0.0.1 # Redis地址,本地为127.0.0.1
port: 6379 # Redis端口号,默认为6379
password: # Redis密码,没有请保持为空
...
```
### 修改logback-spring.xml文件中日志的路径【必须】
#### 支付宝支付【默认已配置,可跳过】
支付宝支付为快递下单的支付方式,因此必须配置,这里采用支付宝的沙箱模式,配置完毕后,修改 `application.yml`文件:
```yaml
alipay:
uid: # 商户UID
app-id: # APPID
sign-type: RSA2
gateway-url: https://openapi.alipaydev.com/gateway.do # 支付宝网关
merchant-private-key: # 商户私钥,使用密钥生成工具得到
alipay-public-key: # 支付宝公钥
notify-url: ${server.addr}/order/alipay/notify # 支付异步通知URL,需公网能够访问
return-url: ${server.addr}/order/alipay/return # 同步通知URL,无需公网访问
```
其中 `notify-url` 和 `return-url`为支付宝的支付同步回调和异步回调,请根据自己需求修改 Url 前缀即可,即 `${server.addr}` 部分。
例如,当你处于本地启动,端口号为 8080 时,`notify-url` 和 `return-url` 保持不变,可以接受到同步回调,但是无法接收异步回调。
> 详细流程请参考文章:[Java Web中接入支付宝支付]()
#### QQ 登录【默认已配置,可跳过】
如需配置QQ登录功能,请按以下步骤操作:
(1)登录[QQ互联管理中心](),创建 **网站应用**。
(2)网站地址为程序配置文件中配置的 `server.add` 属性,例如本地启动,且端口号为 8080 时,则填写为:
```
http://127.0.0.1:8080
```
(3)网站回调域为`${server.addr}/auth/third-login/qqCallback`,当本地启动,且端口号为8080时,填写为:
```
http://127.0.0.1:8080/auth/third-login/qqCallback
```
(4)点击**创建应用**按钮即可。即使提示正在审核,或者审核失败也可以正常使用,仅限申请者的QQ号登录。
(5)修改 `application.yml`文件,将 `app-id` 和 `app-key` 替换为创建应用时得到的即可:
```yaml
third-login:
qq:
app-id: # APP_ID
app-key: # APP_KEY
```
> 详细流程请参考文章:[Web三方登录实现(基于OAuth2.0,包含Github和QQ登录,附源码)]()
#### 短信登录【可选】
(1)登录[腾讯云短信服务]()
(2)根据[官方指南](),成功**创建应用**、**短信签名**和**短信正文**后,编辑 `application.yml`文件:
```yaml
sms:
app-id: # 应用 SDK AppID
app-key: # 应用 App Key
template-id: # 短信正文ID
sign: # 短信签名
```
(3)`application.yml` 中,还有两项是控制短信的发送间隔,以及短信的有效时间,请合理配置
```yaml
sms:
# 短信发送分钟间隔
interval-min: 1
# 短信有效分钟
valid-min: 5
```
**注意事项**
1. `sms.sign`必须为经过审核的短信签名,否则可能会导致发送失败
2. 短信正文设置建议参考以下,这是因为**程序中限定了发送短信时参数一为短信验证码,参数二为过期时间**。如果你想改变参数的个数或顺序,请修改`com.example.express.service.impl.SmsServiceImpl#send`方法。
```
{1}为您的登录验证码,请于{2}分钟内填写。如非本人操作,请忽略本短信。
```
#### 人脸登录【可选】
1. 登录[百度人脸识别]()
2. 创建应用后,修改`application.yml`文件,复制应用的 `AppID`、`API Key`、`Secret Key`到相对应项。
3. `conn-timeout` 和 `socket-timeout` 为连接超时时间,如无特殊需求,保持默认值即可。
4. `accept-score` 为最低被接受的置信分数,该分数用于人脸登录,只有置信分到达阈值时才能登录成功。如无特殊需求,保持在90以上即可。
```yaml
baidu:
aip:
app-id: # 应用 APPID
app-key: # 应用API KEY
secret-key: # 应用 Secret Key
conn-timeout: 2000 # 连接超时ms,默认 2000
socket-timeout: 60000 # socket超时ms,默认60000
# 最低被接受的人脸置信分数[1,100],分数越高,要求越严格,也越准确。
accept-score: 90
```
### 疑问解答
1. 请您仔细阅读 **项目运行** 章节,**确认已经仔细阅读情况下**,仍存在疑问的请联系售后客服。
# **高清视频:**
https://www.bilibili.com/video/BV1ba411j7uY/
# 环境需要
1.运行环境:最好是java jdk 1.8,我们在这个平台上运行的。其他版本理论上也可以。\
2.IDE环境:IDEA,Eclipse,Myeclipse都可以。推荐IDEA;\
3.tomcat环境:Tomcat 7.x,8.x,9.x版本均可\
4.硬件环境:windows 7/8/10 1G内存以上;或者 Mac OS; \
5.数据库:MySql 5.7版本;\
6.是否Maven项目:否;
# 技术栈
1. 后端:Spring+SpringMVC+Mybatis\
2. 前端:JSP+CSS+JavaScript+jQuery
# 使用说明
1. 使用Navicat或者其它工具,在mysql中创建对应名称的数据库,并导入项目的sql文件;\
2. 使用IDEA/Eclipse/MyEclipse导入项目,Eclipse/MyEclipse导入时,若为maven项目请选择maven;\
若为maven项目,导入成功后请执行maven clean;maven install命令,然后运行;\
3. 将项目中springmvc-servlet.xml配置文件中的数据库配置改为自己的配置;\
4. 运行项目,在浏览器中输入http://localhost:8080/ 登录
# 运行截图


#
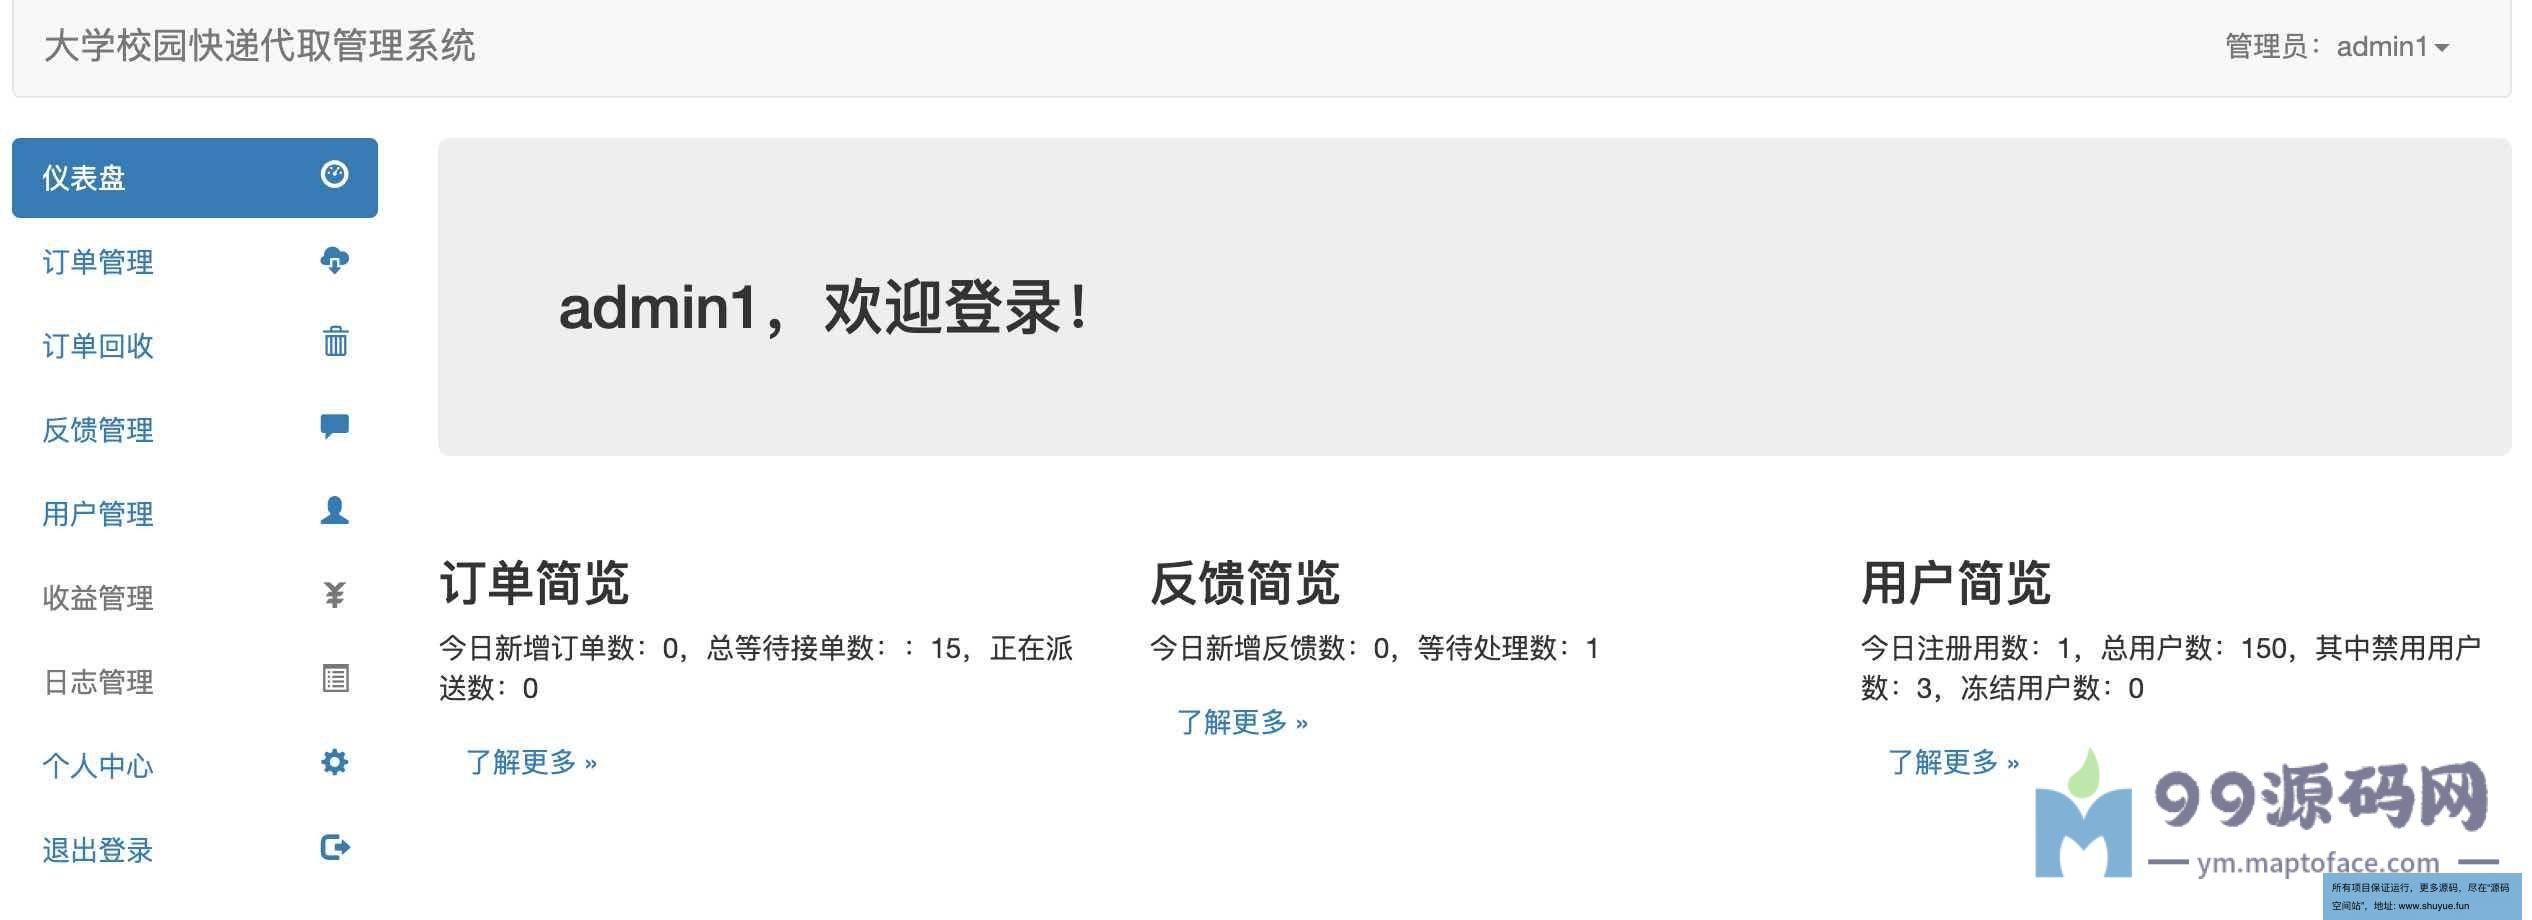 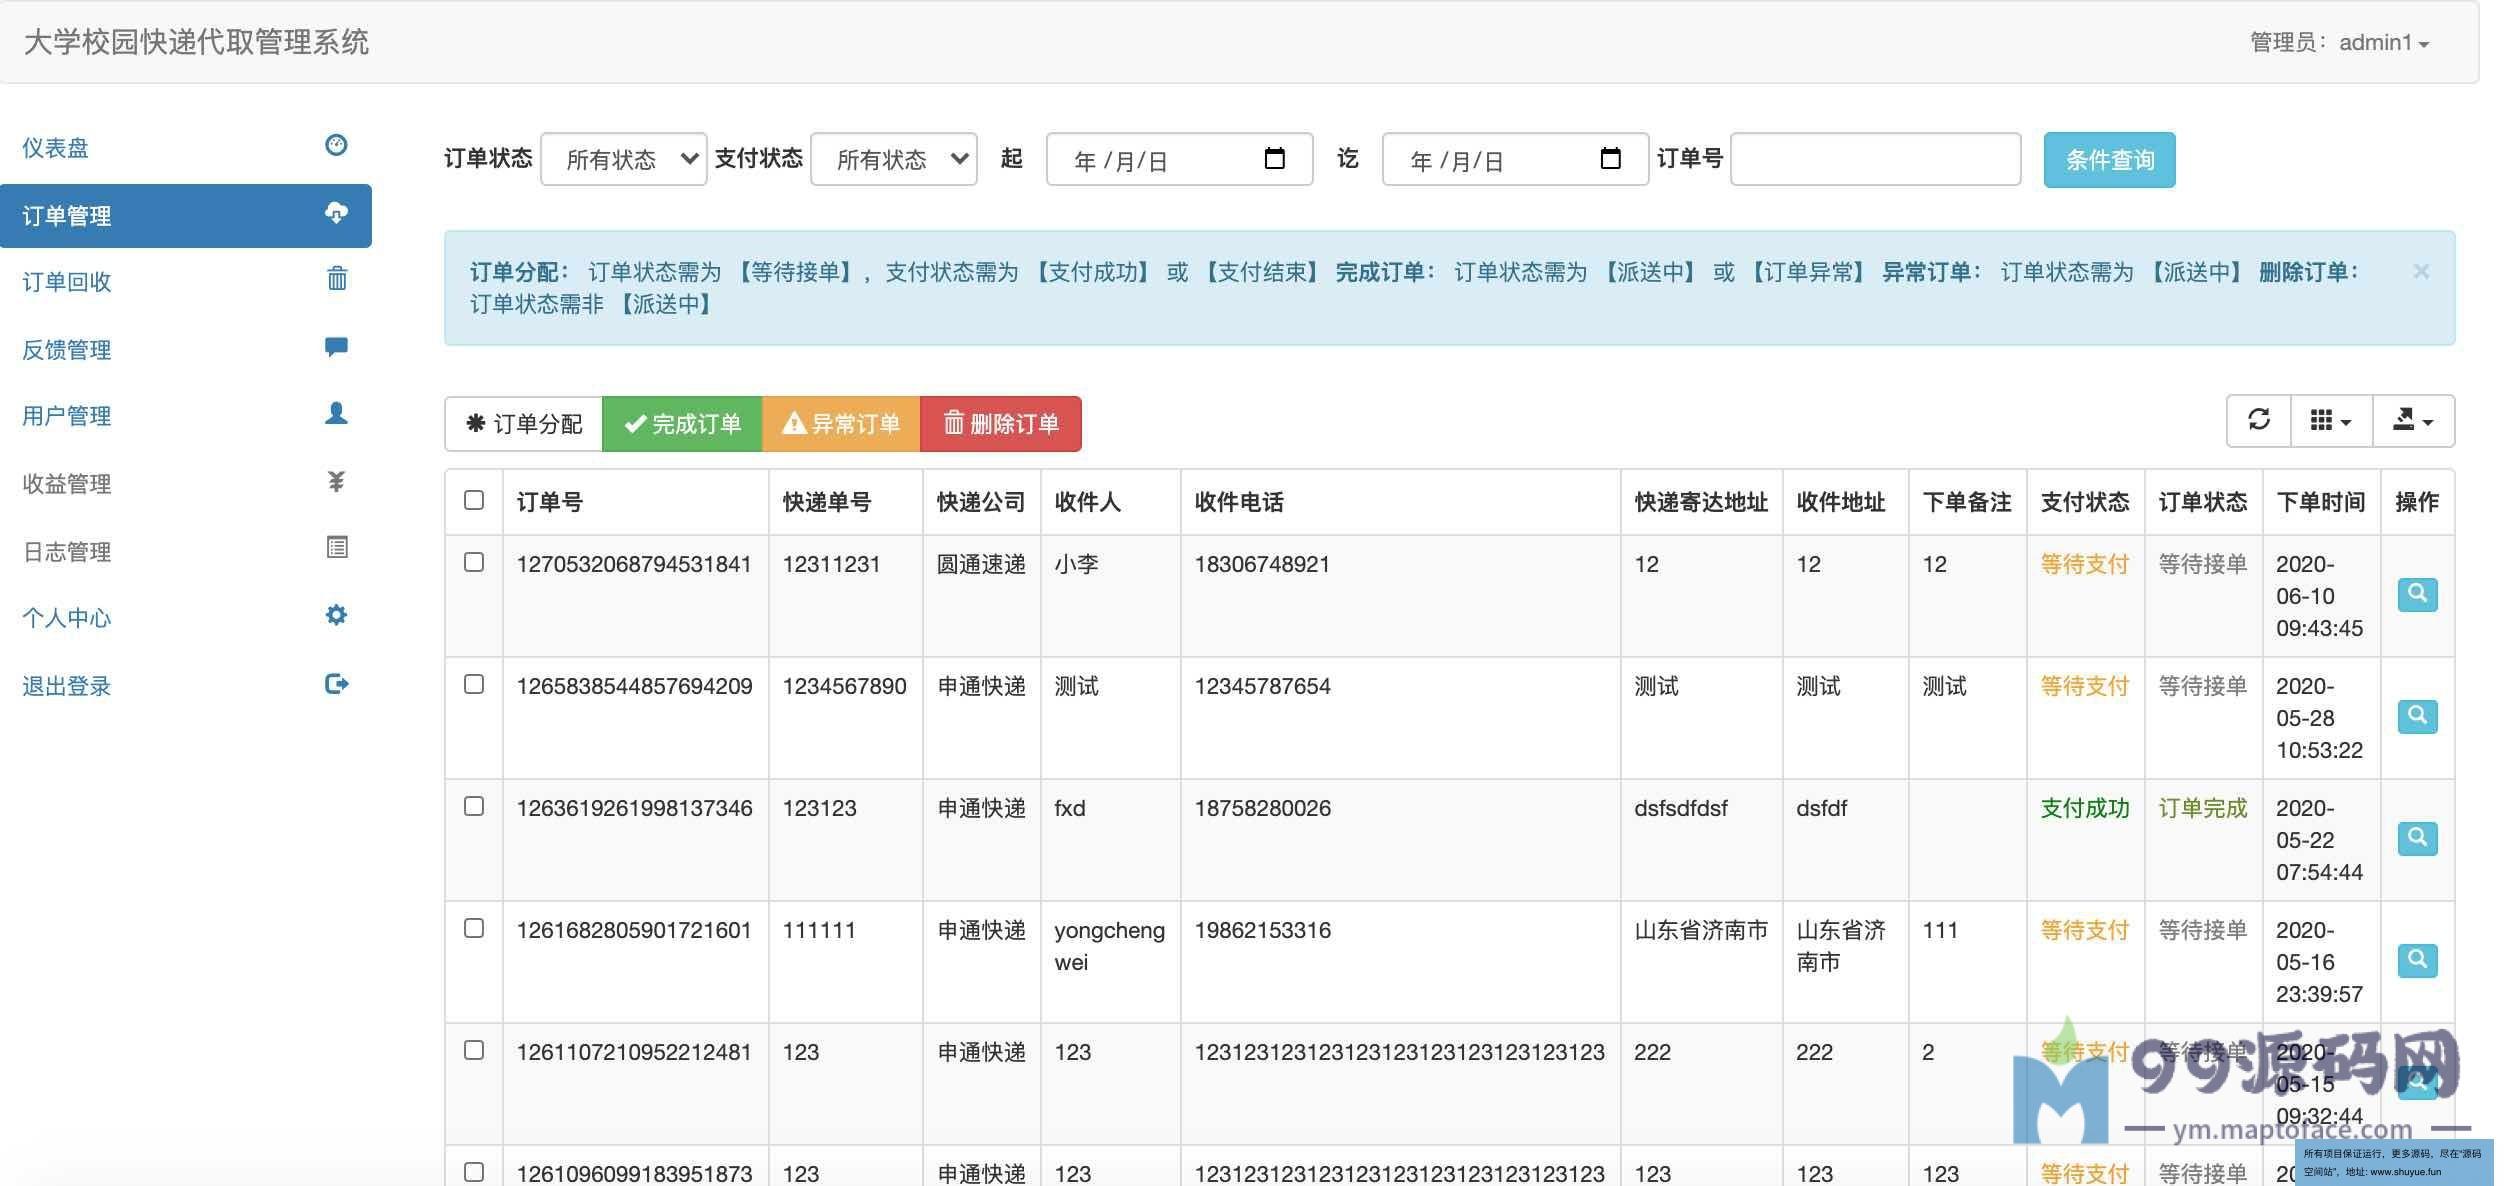 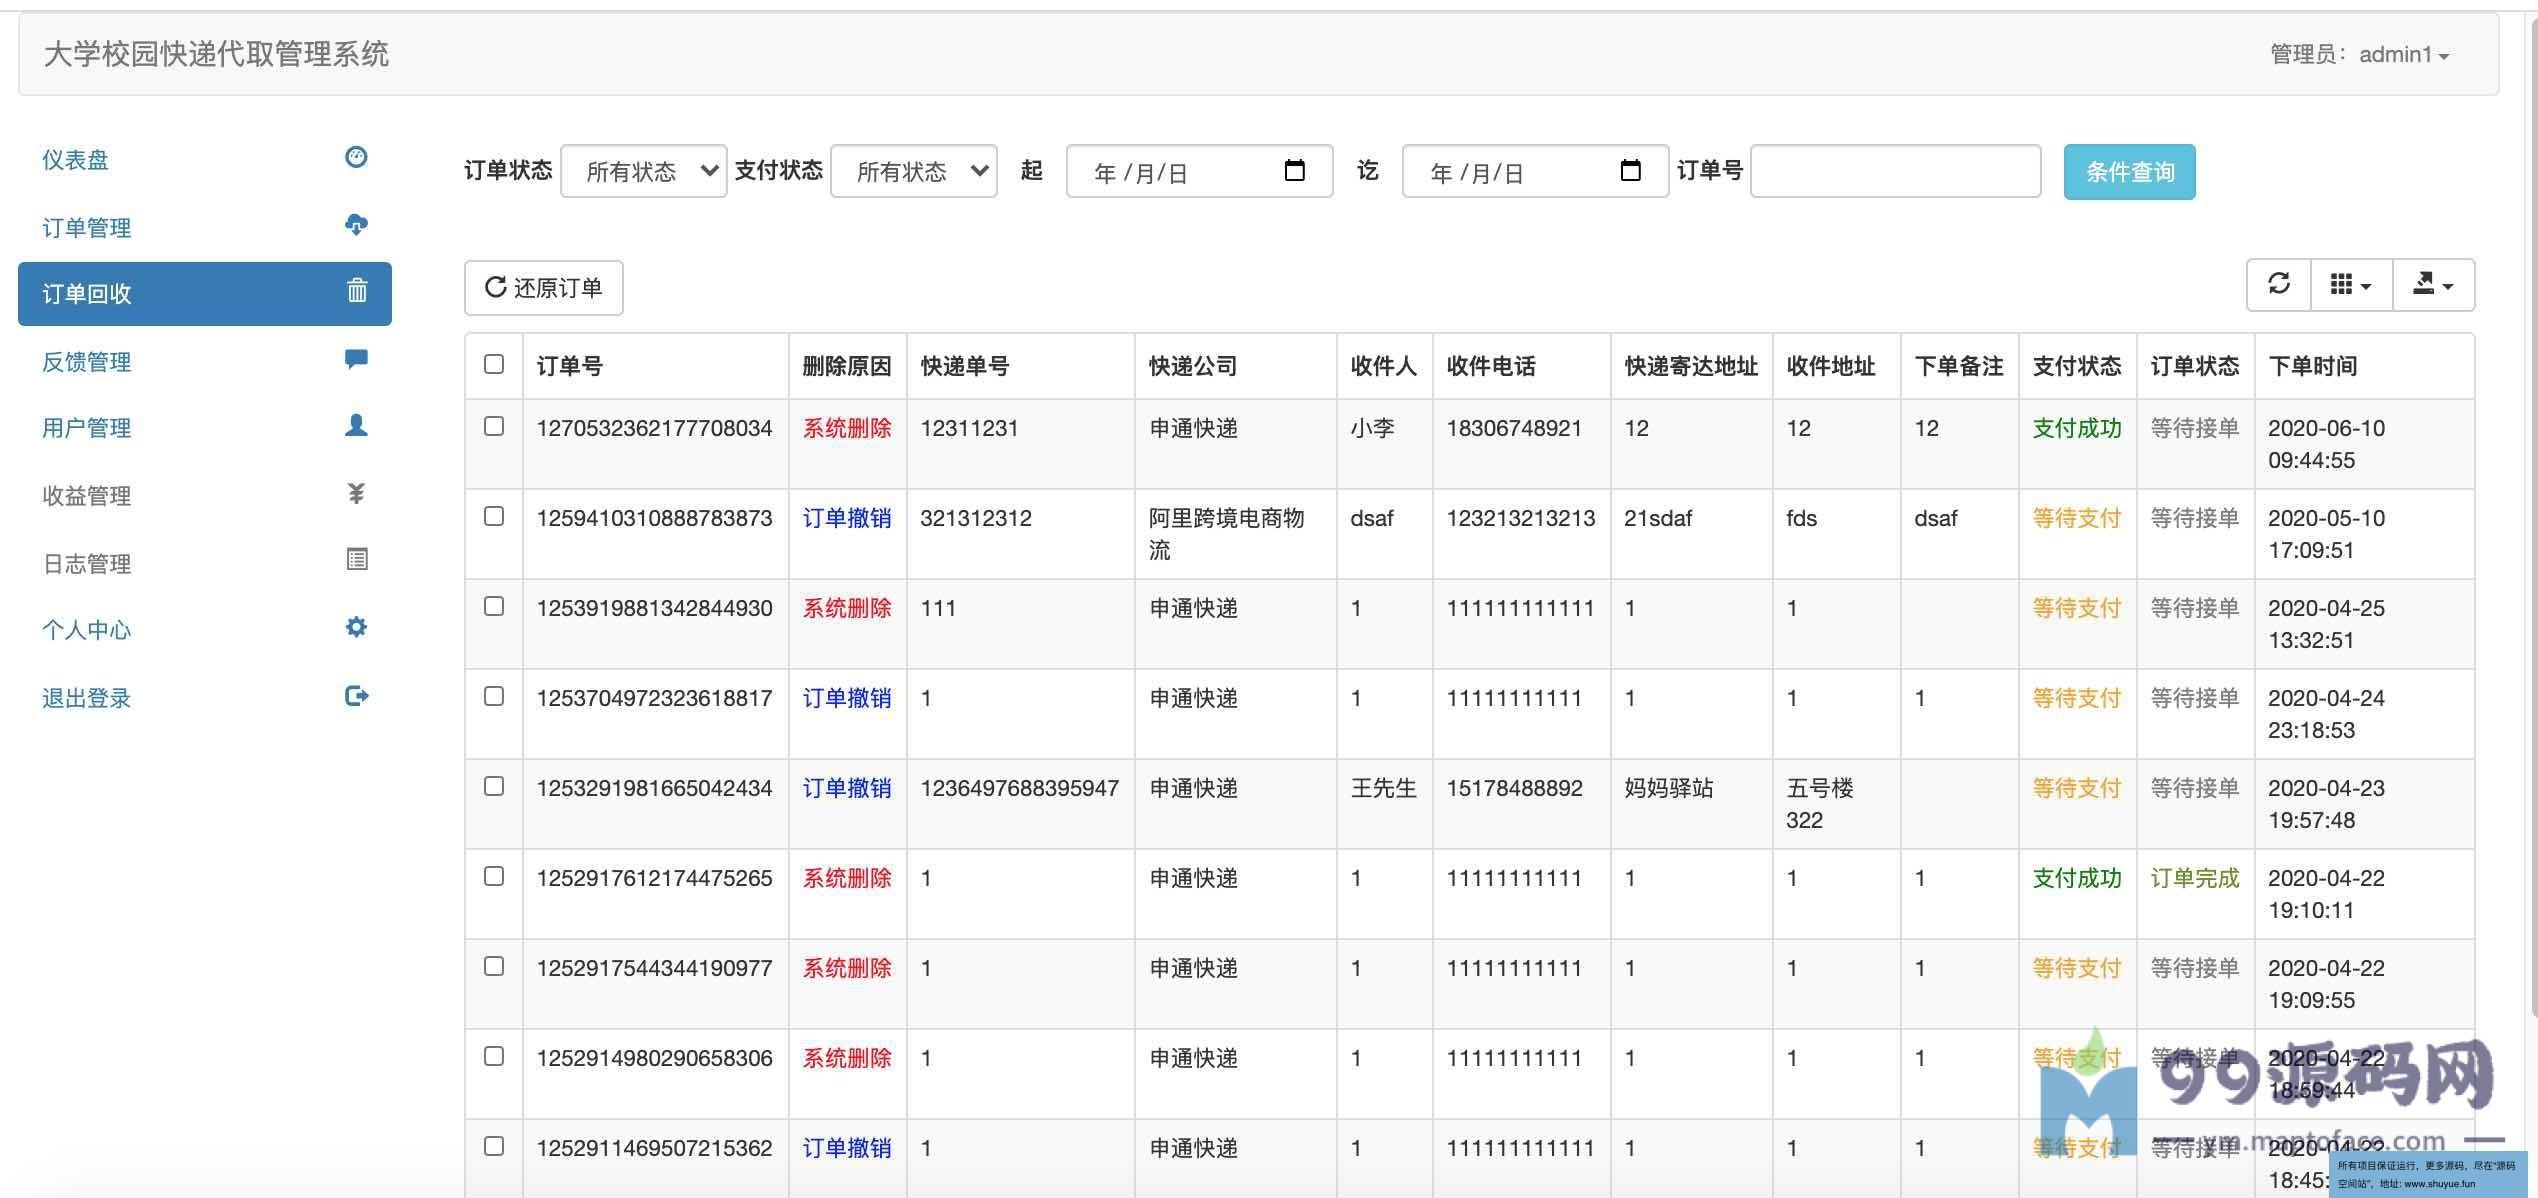 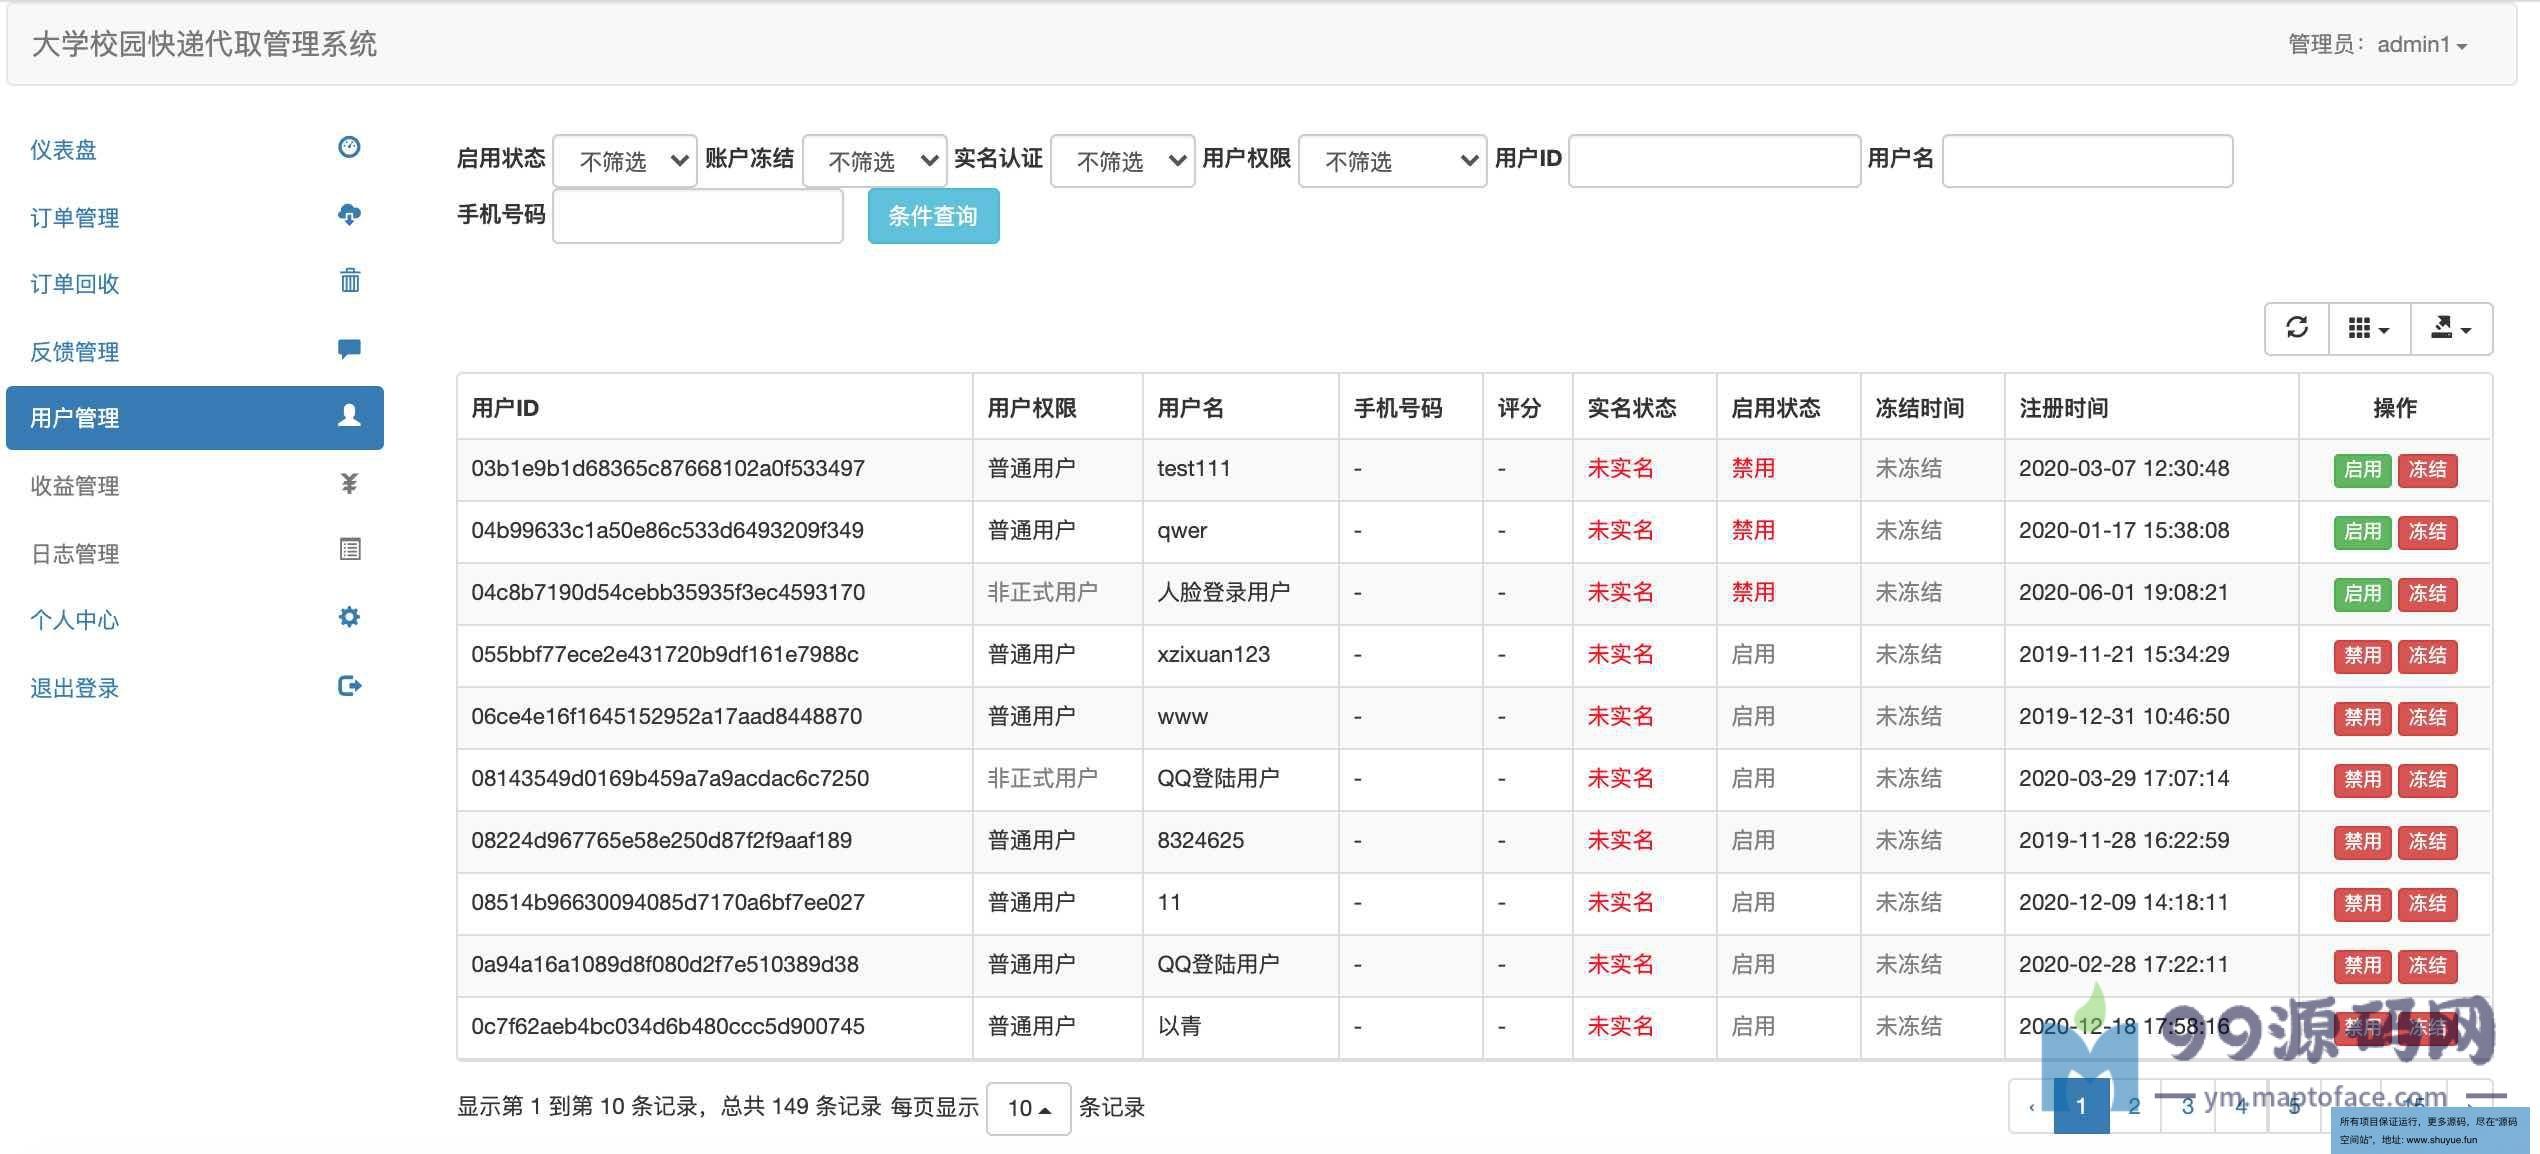      
##
# 用户管理控制层:
```
package com.houserss.controller;
import javax.servlet.http.HttpSession;
import org.apache.commons.lang3.StringUtils;
import org.springframework.beans.factory.annotation.Autowired;
import org.springframework.stereotype.Controller;
import org.springframework.web.bind.annotation.RequestMapping;
import org.springframework.web.bind.annotation.RequestMethod;
import org.springframework.web.bind.annotation.RequestParam;
import org.springframework.web.bind.annotation.ResponseBody;
import com.houserss.common.Const;
import com.houserss.common.Const.Role;
import com.houserss.common.ServerResponse;
import com.houserss.pojo.User;
import com.houserss.service.IUserService;
import com.houserss.service.impl.UserServiceImpl;
import com.houserss.util.MD5Util;
import com.houserss.util.TimeUtils;
import com.houserss.vo.DeleteHouseVo;
import com.houserss.vo.PageInfoVo;
/**
* Created by admin
*/
@Controller
@RequestMapping("/user/")
public class UserController {
@Autowired
private IUserService iUserService;
/**
* 用户登录
* @param username
* @param password
* @param session
* @return
*/
@RequestMapping(value = "login.do",method = RequestMethod.POST)
@ResponseBody
public ServerResponse<User> login(User user,String uvcode, HttpSession session){
String code = (String)session.getAttribute("validationCode");
if(StringUtils.isNotBlank(code)) {
if(!code.equalsIgnoreCase(uvcode)) {
return ServerResponse.createByErrorMessage("验证码不正确");
}
}
ServerResponse<User> response = iUserService.login(user.getUsername(),user.getPassword());
if(response.isSuccess()){
session.setAttribute(Const.CURRENT_USER,response.getData());
}
return response;
}
}
```

# 管理员管理控制层:
```
package com.sxl.controller.admin;
import java.util.List;
import java.util.Map;
import javax.servlet.http.HttpServletRequest;
import org.springframework.http.ResponseEntity;
import org.springframework.stereotype.Controller;
import org.springframework.ui.Model;
import org.springframework.web.bind.annotation.RequestMapping;
import com.sxl.controller.MyController;
@Controller("adminController")
@RequestMapping(value = "/admin")
public class AdminController extends MyController {
@RequestMapping(value = "/index")
public String frame(Model model, HttpServletRequest request)throws Exception {
return "/admin/index";
}
@RequestMapping(value = "/main")
public String main(Model model, HttpServletRequest request)throws Exception {
return "/admin/main";
}
@RequestMapping(value = "/tj1")
public String tj1(Model model, HttpServletRequest request)throws Exception {
String sql="select DATE_FORMAT(insertDate,'%Y-%m-%d') dates,sum(allPrice) price from t_order order by DATE_FORMAT(insertDate,'%Y-%m-%d') desc";
List<Map> list = db.queryForList(sql);
model.addAttribute("list", list);
System.out.println(list);
return "/admin/tj/tj1";
}
@RequestMapping(value = "/password")
public String password(Model model, HttpServletRequest request)throws Exception {
return "/admin/password";
}
@RequestMapping(value = "/changePassword")
public ResponseEntity<String> loginSave(Model model,HttpServletRequest request,String oldPassword,String newPassword) throws Exception {
Map admin = getAdmin(request);
if(oldPassword.equals(admin.get("password").toString())){
String sql="update t_admin set password=? where id=?";
db.update(sql, new Object[]{newPassword,admin.get("id")});
return renderData(true,"1",null);
}else{
return renderData(false,"1",null);
}
}
}
```

# 修改密码业务逻辑:
```
package com.sxl.controller.admin;
import java.util.Map;
import javax.servlet.http.HttpServletRequest;
import org.springframework.http.ResponseEntity;
import org.springframework.stereotype.Controller;
import org.springframework.ui.Model;
import org.springframework.web.bind.annotation.RequestMapping;
import com.sxl.controller.MyController;
@Controller("userController")
@RequestMapping(value = "/user")
public class UserController extends MyController {
@RequestMapping(value = "/index")
public String frame(Model model, HttpServletRequest request)throws Exception {
return "/user/index";
}
@RequestMapping(value = "/main")
public String main(Model model, HttpServletRequest request)throws Exception {
return "/user/main";
}
@RequestMapping(value = "/password")
public String password(Model model, HttpServletRequest request)throws Exception {
return "/user/password";
}
@RequestMapping(value = "/changePassword")
public ResponseEntity<String> loginSave(Model model,HttpServletRequest request,String oldPassword,String newPassword) throws Exception {
Map user = getUser(request);
if(oldPassword.equals(user.get("password").toString())){
String sql="update t_user set password=? where id=?";
db.update(sql, new Object[]{newPassword,user.get("id")});
return renderData(true,"1",null);
}else{
return renderData(false,"1",null);
}
}
@RequestMapping(value = "/mine")
public String mine(Model model, HttpServletRequest request)throws Exception {
Map user =getUser(request);Map map = db.queryForMap("select * from t_user where id=?",new Object[]{user.get("id")});model.addAttribute("map", map); return "/user/mine";
}
@RequestMapping(value = "/mineSave")
public ResponseEntity<String> mineSave(Model model,HttpServletRequest request,Long id
,String username,String password,String name,String gh,String mobile) throws Exception{
int result = 0;
String sql="update t_user set name=?,gh=?,mobile=? where id=?";
result = db.update(sql, new Object[]{name,gh,mobile,id});
if(result==1){
return renderData(true,"操作成功",null);
}else{
return renderData(false,"操作失败",null);
}
}
}
```

# 通用管理模块:
```
package com.sxl.controller;
import java.nio.charset.Charset;
import java.util.Locale;
import java.util.ResourceBundle;
import javax.servlet.http.HttpServletRequest;
import org.apache.commons.lang.StringUtils;
import org.springframework.beans.factory.annotation.Autowired;
import org.springframework.http.HttpHeaders;
import org.springframework.http.HttpStatus;
import org.springframework.http.MediaType;
import org.springframework.http.ResponseEntity;
import com.sxl.util.JacksonJsonUtil;
import com.sxl.util.StringUtil;
import com.sxl.util.SystemProperties;
public class BaseController {
public static final Long EXPIRES_IN = 1000 * 3600 * 24 * 1L;// 1天
@Autowired
private SystemProperties systemProperties;
/**
* 获得配置文件内容
*/
public String getConfig(String key) {
return systemProperties.getProperties(key);
}
/**
* 返回服务器地址 like http://192.168.1.1:8441/UUBean/
*/
public String getHostUrl(HttpServletRequest request) {
String hostName = request.getServerName();
Integer hostPort = request.getServerPort();
String path = request.getContextPath();
if (hostPort == 80) {
return "http://" + hostName + path + "/";
} else {
return "http://" + hostName + ":" + hostPort + path + "/";
}
}
/***
* 获取当前的website路径 String
*/
public static String getWebSite(HttpServletRequest request) {
String returnUrl = request.getScheme() + "://"
+ request.getServerName();
if (request.getServerPort() != 80) {
returnUrl += ":" + request.getServerPort();
}
returnUrl += request.getContextPath();
return returnUrl;
}
/**
* 初始化HTTP头.
*
* @return HttpHeaders
*/
public HttpHeaders initHttpHeaders() {
HttpHeaders headers = new HttpHeaders();
MediaType mediaType = new MediaType("text", "html",
Charset.forName("utf-8"));
headers.setContentType(mediaType);
return headers;
}
/**
* 返回 信息数据
*
* @param status
* @param msg
* @return
*/
public ResponseEntity<String> renderMsg(Boolean status, String msg) {
if (StringUtils.isEmpty(msg)) {
msg = "";
}
String str = "{"status":"" + status + "","msg":"" + msg + ""}";
ResponseEntity<String> responseEntity = new ResponseEntity<String>(str,
initHttpHeaders(), HttpStatus.OK);
return responseEntity;
}
/**
* 返回obj数据
*
* @param status
* @param msg
* @param obj
* @return
*/
public ResponseEntity<String> renderData(Boolean status, String msg,
Object obj) {
if (StringUtils.isEmpty(msg)) {
msg = "";
}
StringBuffer sb = new StringBuffer();
sb.append("{");
sb.append(""status":"" + status + "","msg":"" + msg + "",");
sb.append(""data":" + JacksonJsonUtil.toJson(obj) + "");
sb.append("}");
ResponseEntity<String> responseEntity = new ResponseEntity<String>(
sb.toString(), initHttpHeaders(), HttpStatus.OK);
return responseEntity;
}
/***
* 获取IP(如果是多级代理,则得到的是一串IP值)
*/
public static String getIpAddr(HttpServletRequest request) {
String ip = request.getHeader("x-forwarded-for");
if (ip == null || ip.length() == 0 || "unknown".equalsIgnoreCase(ip)) {
ip = request.getHeader("Proxy-Client-IP");
}
if (ip == null || ip.length() == 0 || "unknown".equalsIgnoreCase(ip)) {
ip = request.getHeader("WL-Proxy-Client-IP");
}
if (ip == null || ip.length() == 0 || "unknown".equalsIgnoreCase(ip)) {
ip = request.getRemoteAddr();
}
if (ip != null && ip.length() > 0) {
String[] ips = ip.split(",");
for (int i = 0; i < ips.length; i++) {
if (!"unknown".equalsIgnoreCase(ips[i])) {
ip = ips[i];
break;
}
}
}
return ip;
}
/**
* 国际化获得语言内容
*
* @param key
* 语言key
* @param args
* @param argsSplit
* @param defaultMessage
* @param locale
* @return
*/
public static String getLanguage(String key, String args, String argsSplit,
String defaultMessage, String locale) {
String language = "zh";
String contry = "cn";
String returnValue = defaultMessage;
if (!StringUtil.isEmpty(locale)) {
try {
String[] localeArray = locale.split("_");
language = localeArray[0];
contry = localeArray[1];
} catch (Exception e) {
}
}
try {
ResourceBundle resource = ResourceBundle.getBundle("lang.resource",
new Locale(language, contry));
returnValue = resource.getString(key);
if (!StringUtil.isEmpty(args)) {
String[] argsArray = args.split(argsSplit);
for (int i = 0; i < argsArray.length; i++) {
returnValue = returnValue.replace("{" + i + "}",
argsArray[i]);
}
}
} catch (Exception e) {
}
return returnValue;
}
}
```

> # **源码获取:我的博客资源页面可以下载!!!!**


